If you got one (or more!) of the low cost plastic spring-loaded impact sprinklers that tend to come in 2-packs, you may have found that one (or both) of them have a tendency to stop rotating. Whether it’s made by Orbit, Yardworks, Nelson, or another brand, the plastic models tend to be cheaply made and a sprinkler that gets stuck and stops spinning is a common occurrence.
Fortunately, the cause tends to be the same in all the spring-loaded models, and there are a few “quick fixes” if you’d rather tinker for a few minutes rather than returning them to the store. Before going further though, let’s make sure your sprinkler looks like this:
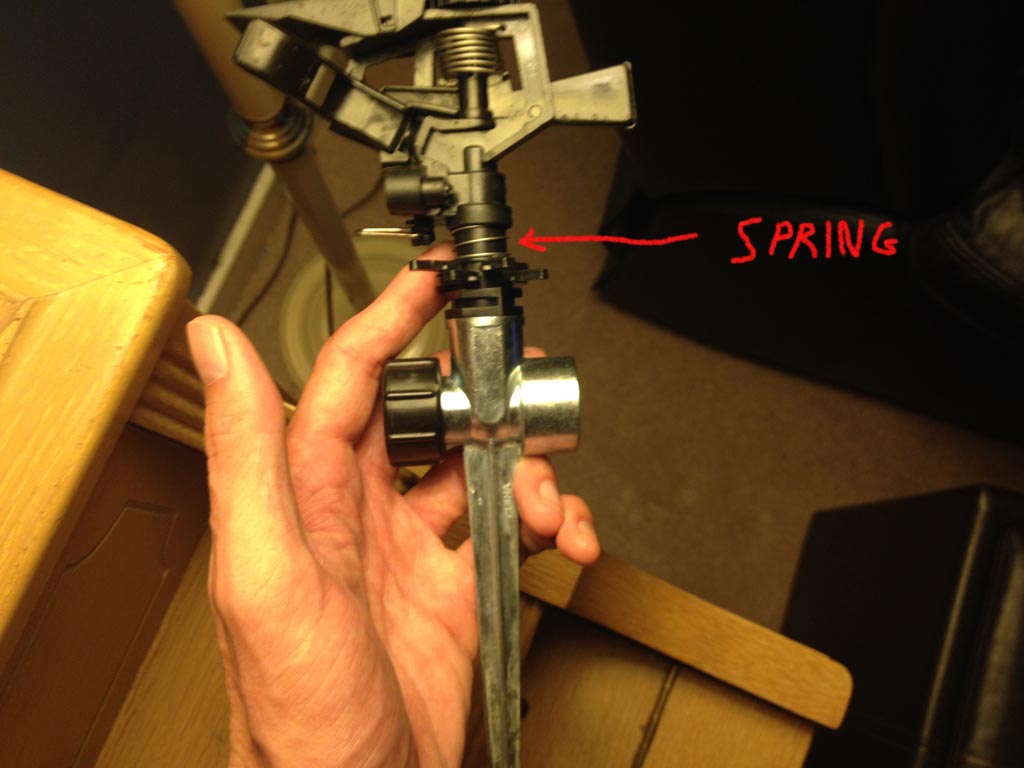
The spring-loaded plastic impact sprinkler.
Look similar? Great!
The Cause of the Sticking Sprinkler
The highlighted spring is designed to create some tension/resistance so that the sprinkler rotates somewhat slowly instead of whipping around insanely fast. The problem is that the end of the spring often has sharp edges, which can catch on the “ridges” of the moulded plastic shaft it spins around.
If you have the sprinkler in-hand, you can test this by lightly (and slowly) tapping the sprinkler head in one direction, and then in the other direction. You’ll notice that counter-clockwise (when viewing the sprinkler from above) is generally easy and smooth. On the other hand, clockwise will often result in the spring sticking.
You can just barely make out one of the “ridges” (in the black plastic) that the spring will be inclined to stick on in the image below:
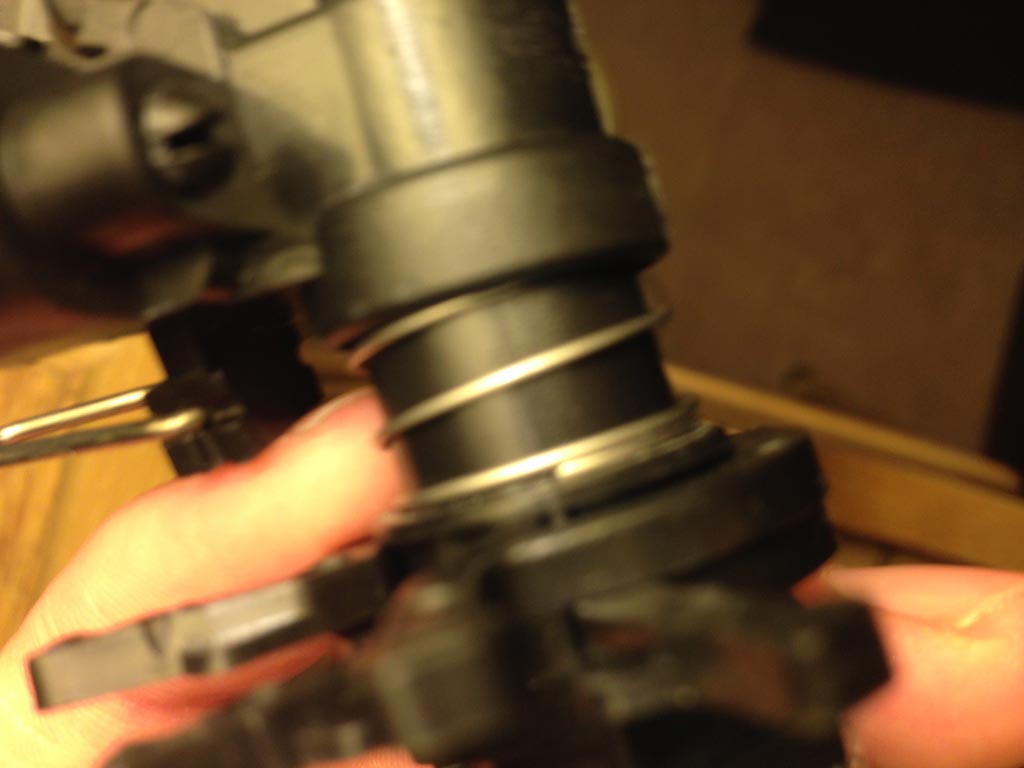
Close-up of the plastic ridge, and the spring-end caught on it.
…if your sprinkler always sticks in the same 1 or 2 locations (on opposite sides), this ridge is the main problem. However, if your sprinkler sticks in random locations, the problem is usually a very sharp edge on the spring, either bent slightly in towards the shaft (causing it to dig in) or tucked under the inside of the coil above it.
Make sure the bottom edge of the spring catching the plastic really is the cause before continuing further. Light taps in both directions while watching the spring is the way to go about verifying this. These plastic sprinklers aren’t exactly made with military-grade precision, and you could have something else causing the sprinkler to stick (for example, the top part of the spring hidden in the housing could be warped.
—
There are a number of ways you can go about fixing the issue. I’ve listed 3 of them below, so examine your sprinkler and choose whatever method seems to fit best.
Obvious disclaimer: These may void your warranty, aren’t guaranteed to work, the sprinklers are pretty easy to break, the spring edge may be sharp and cut you, etc., etc. Do at your own risk.
Fix #1: A few seconds to do, but not always reliable.
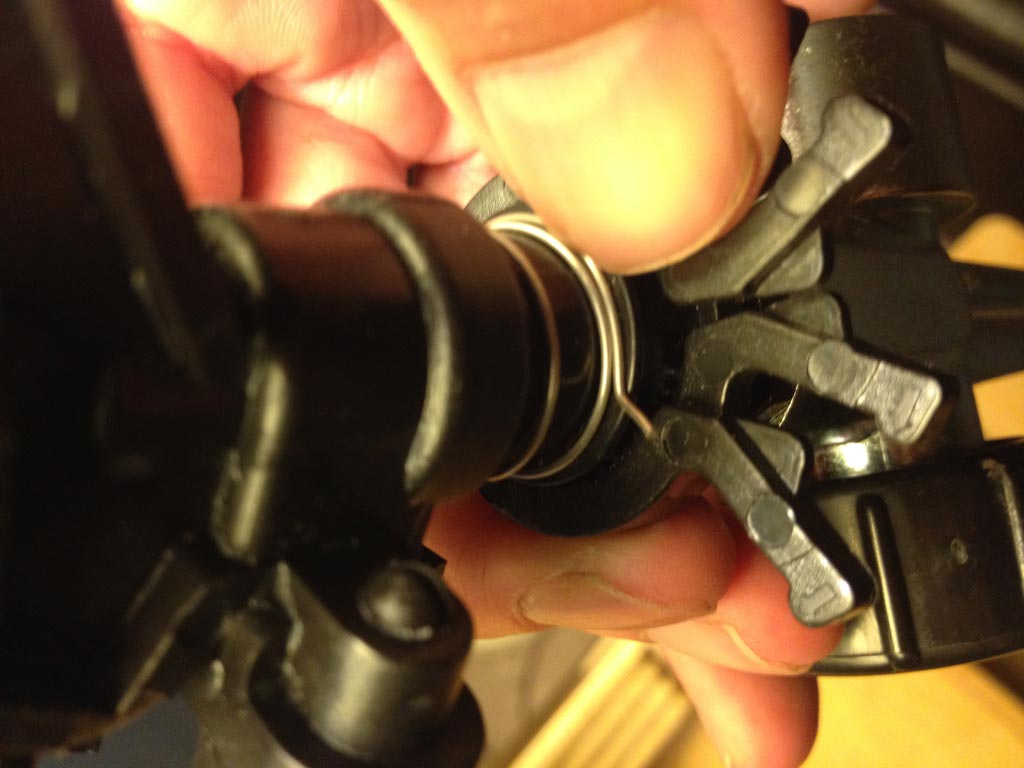
The first thing you can try is flipping the bottom of the spring out (usually possible with your fingernail) so it rides along the outside of the coil. Picture below:
Instead of riding along the bottom, the edge of the spring has been flipped “outside” so that it rides along the outside of the adjacent coil.
I’ve got about a 50% success rate with this method. If the spring isn’t warped and the edge isn’t particularly sharp, it tends to work well and is a quick “permanent” fix as long as the spring doesn’t immediately try to pop back down.
—
Fix #2: Time-consuming sanding if it sticks in 1 or 2 locations.
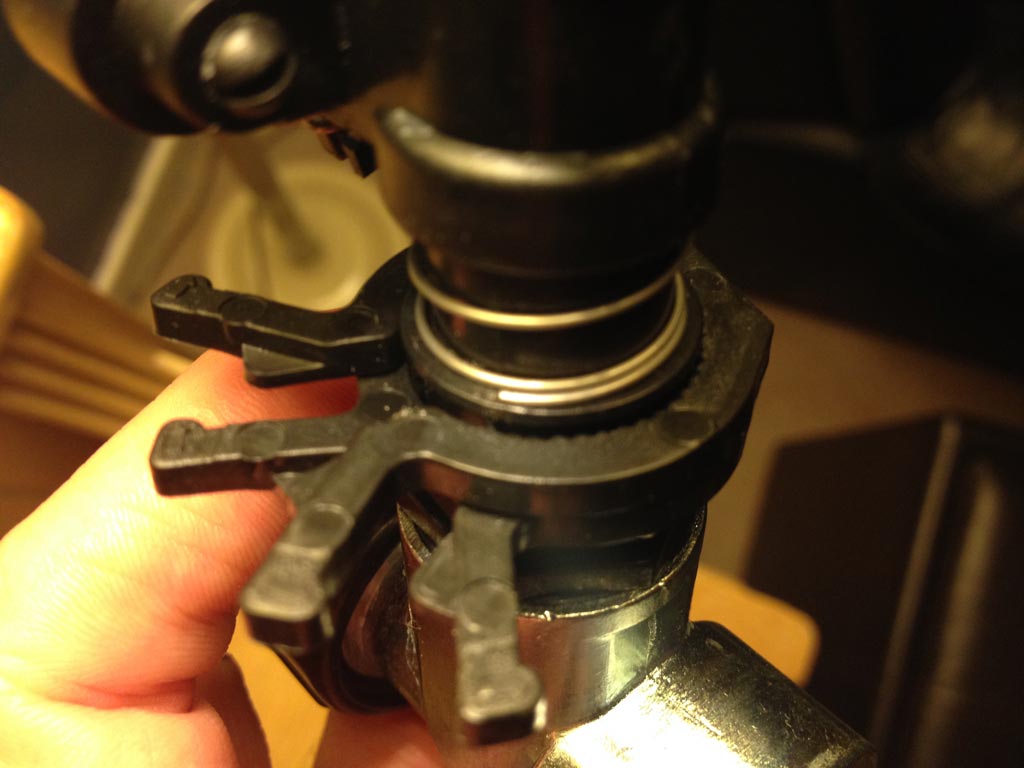
If the sprinkler’s sticking in 1 or 2 places, it’s almost always on one/both of the plastic ridges along the shaft. To address this, you can sand down the ridges themselves with some fine-grit sandpaper. Just lift the spring up as shown below, and lightly sand down the ridge until it’s smooth.

If you’ve determined that the ridges in the plastic moulded shaft are the cause, lift the spring and sand down the ridge.
…if the ridge is *really* bad, you can use a nail file to work down the bulk of the ridge before moving to the fine-grit sandpaper, but be careful not to tear through the plastic too quickly.
—
Fix #3: Voiding the warranty and bending the edge of the spring out.
The last option is pretty risky, and obviously removes any chance of being able to return the sprinkler. I’ll start with the picture, as it will be pretty obvious as to what I’ve done here:
A very deliberate bend at the end of the spring to keep it from ever catching or digging into the plastic again.
I deliberately bent it out a lot for the write-up (don’t bend it this much!). You only need to bend it ever-so-slightly: just enough that the edge of the spring can’t catch anything. To do this, you’ll need:
- A sharp knife or screwdriver to pull the spring out a little.
- A good needle-nosed pliers to grip the edge of the spring and give it a bend.
Be very careful to only bend the edge out, and try not to stretch the spring while you’re doing it! It’s very easy to accidentally warp the spring, in which case you’ll have a spring that no longer rotates smoothly on the shaft. Try to do this gradually – bend the spring a little, then try rotating & repeat only if necessary.
—
—
If you’re in the same situation that I was and had a lot of troublesome impact sprinklers, hopefully this has helped. If it worked (or didn’t), or if you’ve come across issues, tips, or solutions, feel free to leave a comment below!
I tightened the screw a little bit for a wider water stream, and then set the two metal thing-a-ma-jigs to tell the sprinkler where I wanted it to start and stop. I locked in the metal thing that tells the mechanism to stop and reverse by pushing it down between the two barriers aaaaaaaaaaand....
Well, I started the water up to see if the resulting spray pattern needed adjusting or not, but when the sprinkler rotated from its left starting position to its right position it simply stopped there and wouldn't rotate back. This actually happened on on all three sprinklers, and I'm mind-boggled since I'm prrrrrrrretty sure I set the things correctly. I'm also pretty sure my water pressure is fine, so I'm going to open these up and check out the spring, as you mentioned above and see if something is sticking. Warrantly voided or not, I'm going to take the things back to the store, explain that I bought an inferior product that doesn't operate as advertised, and will politely demand a trade for the more expensive model that I should have bought to begin with. Sometimes it doesn't pay to cheap out -- especially on this type of thing apparently!
Thanks for the advice, by the way, whether it ends up working for me or not.
Why is the public ripped off by these sprinklers that don't work?