So it was time for a little pre-emptive replacement of the oxygen sensor on the 1998 Honda Civic… I didn’t know when the last time was that it had been replaced, and since I’d already replaced most of the other maintenance options, I figured this was probably due anyway.
This should be virtually identical for 1996, 1997, 1998, 1999, and 2000 Civic models (96-00).
If you’ve replaced an oxygen sensor before, you probably don’t really *need* this write-up… the O2 sensor here is pretty easy to get at and they’re “all the same”. That said, if you’re tackling an oxygen sensor for the first time ever, hopefully something here will help you.
Before we get started, let’s identify what we need to disconnect. You can click on the image for a larger version.
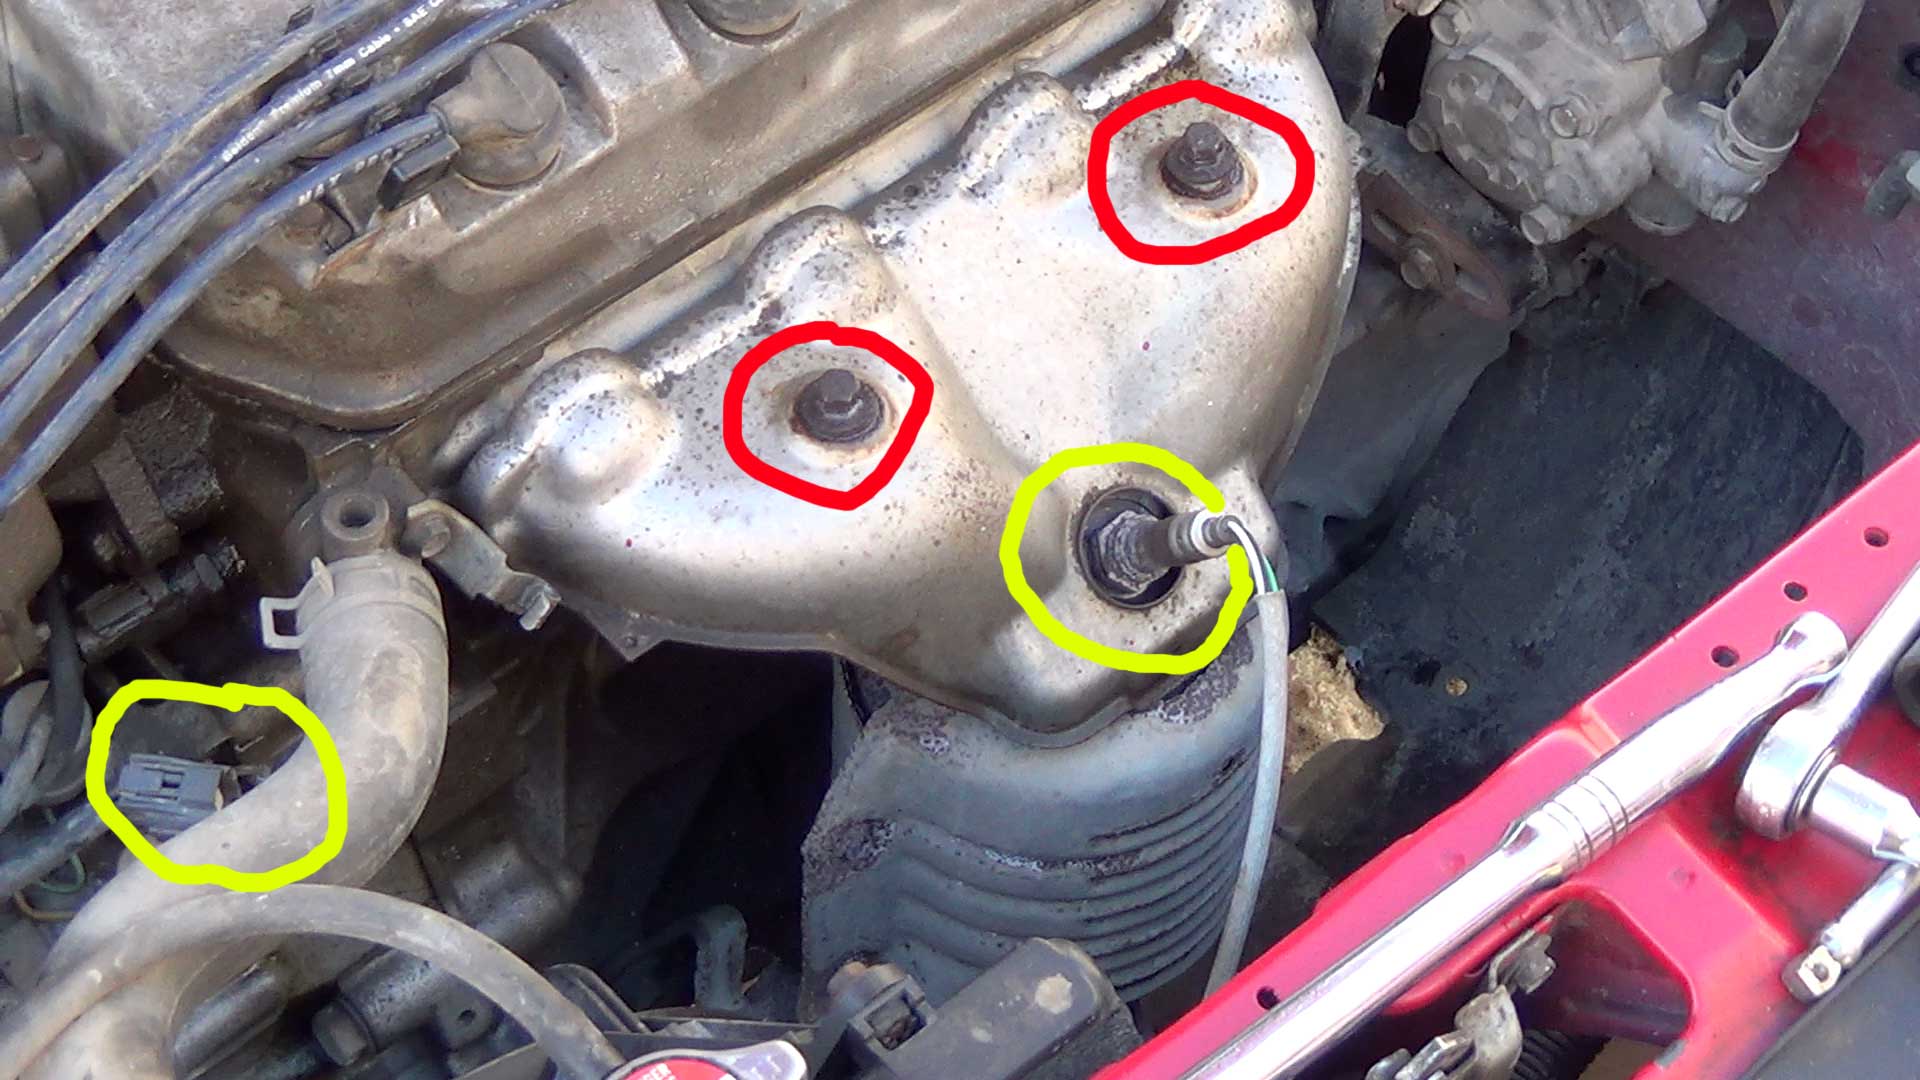
What you’ll need to disconnect (yellow=mandatory, red=possibly)
Circled in yellow are the 2 things you’re going to disconnect. On the bottom left, we’ve got the plastic connector, and near the center, the oxygen sensor itself. If you’re watching the video, I’ve actually disconnected these already so you don’t have to watch me fight with them, but I’ll show you how we go about it anyway.
Depending on how you go about disconnecting the sensor, you may have to remove the shield from the exhaust manifold as well. Those bolts are circled in red. More about that later.

The 1998 Civic O2 sensor plastic 4-wire harness
Starting with the plastic connector to get the easy thing out of the way. There are 2 clips. The first is on the top – you can essentially use your finger or thumb to squeeze in the tab at the left, while pulling these 2 plastic pieces apart. Because years of crud has usually worked it’s way into the socket, it usually helps to have a flat-head screwdriver and gently pry them apart while squeezing down the tab. Eventually you should end up with the left plug separated from the right plug.
The 2nd clip is on the bottom and attaches to an engine bracket – again, you can use your finger and thumb to squeeze this, but there’s a little slot for a screwdriver that can make it a little easier. If something is really sticking you can spray a little WD40 or some other lubricant in to help things slide apart more easily, but usually all it takes is a little wiggling and a little patience.
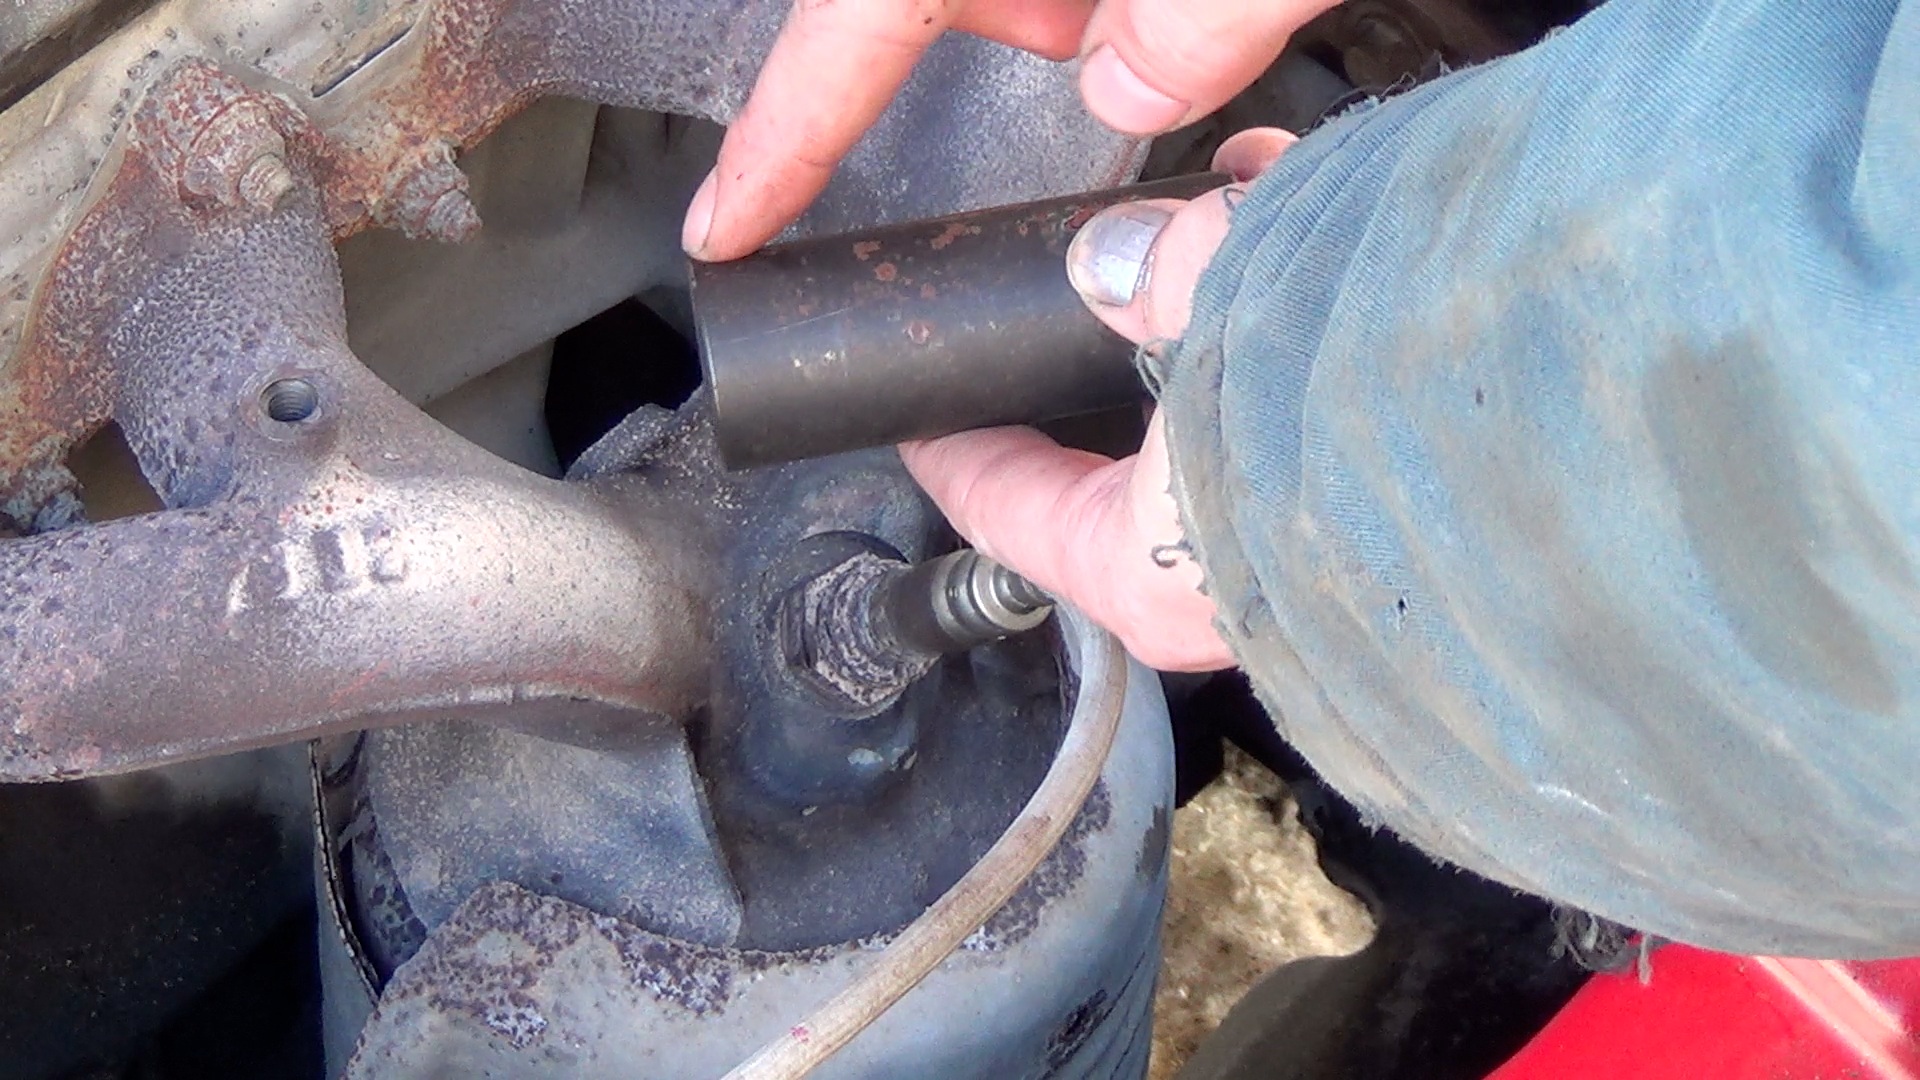
A deep impact socket is an option, though you’ll need to cut the wires.
With that done, let’s move to the sensor itself. This is where things can get tough. Sometimes you get lucky and the sensor comes out really easy. I’m not usually that lucky. In any case, you actually have a few options here for removal:
1) The first is to buy an oxygen sensor socket. You’re usually looking at a minimum of $15 for a single socket and anywhere from $50-100 for a set. I don’t use them, but if this is your first time changing a sensor, nothing beats having the right tool for the right job. Most of them look like a deep impact socket with a slot cut out for the wires. It fits over the sensor, you hook up your ratchet, breaker bar, or impact gun, and boom – give it a crank, and the thing comes out.
2) The second option is a regular deep impact 22mm socket. This is like using the oxygen sensor socket except that you have to cut the wires to fit the socket over. If your know your old sensor is toast, you may as well cut the wires, use a deep impact socket if you have a set laying around, and save a few bucks.
3) The 3rd option, and the one I used here, is using a wrench. This is probably the worst way – if you get lucky the sensor might come without too much grief, but there’s a higher chance you’ll strip the edges on the oxygen sensor.
In all 3 cases, if the sensor won’t budge, you might have to use heat. The most common way is to just run the car to heat up the exhaust, but you’re better off using an oxygen-acetylene torch set if you have one available. I had to use a torch set to get this one loose.
Ok, so let’s get started. I know I’m not wearing gloves in the video, but seriously, wear gloves. Burns aren’t pleasant, busted knuckles which a wrench slips aren’t pleasant. and greasy slices all over your hand when a wrench slips are very hard to clean. Do as I say, not as I do.
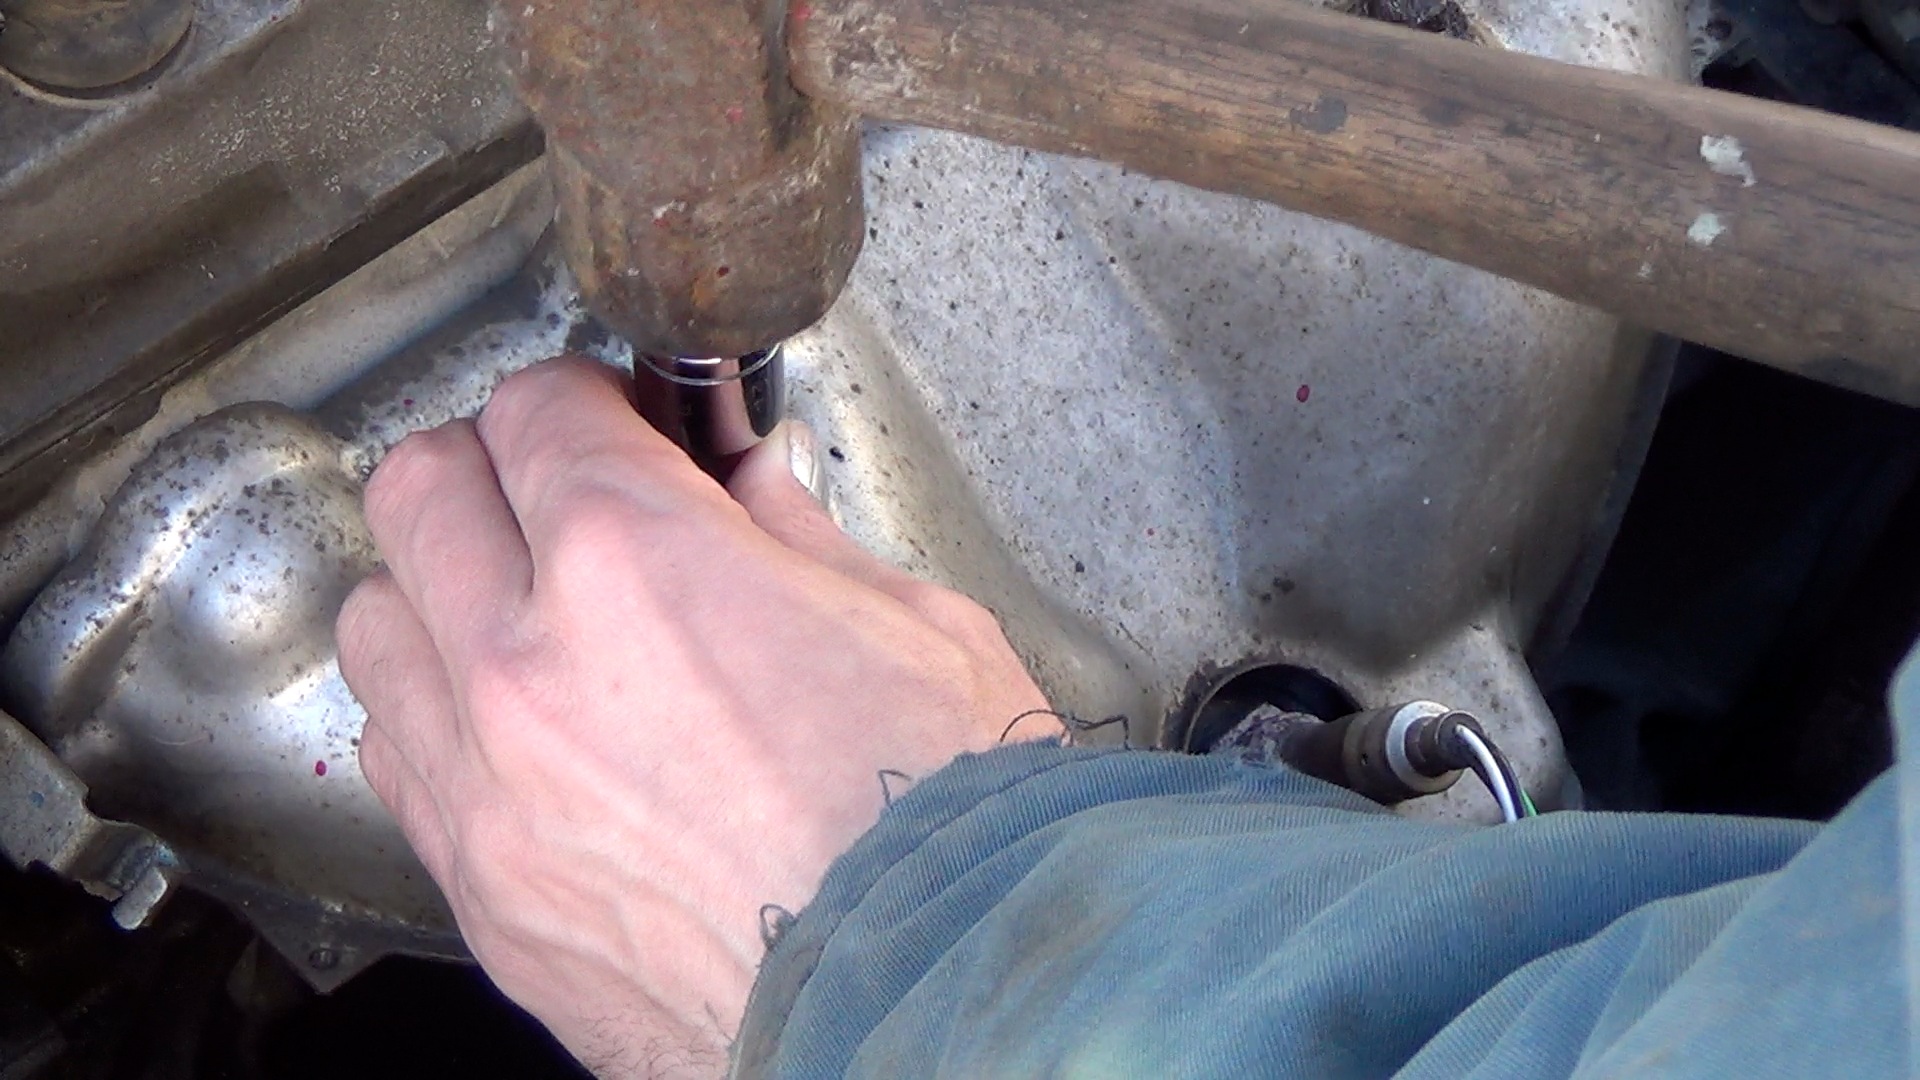
If the bolts for the manifold cover have rusted enough, you won’t get a snug fit – I had to hammer on a socket.
Because I used a wrench, I had to remove the cover. These bolts can be rusted in pretty bad and I’d need 20 hands to count the number of times I’ve had the head of an exhaust bolt snap off, so you might want to soak it in PB blaster a few times to hopefully loosen things up a little. You’ll probably need an 11 or 12mm socket. Because of all the rust that built up on this one, an 11mm was too small and a 12mm was too large, so I hammered on a 7/16 socket and used a breaker bar to crack them loose. Whether you’re using a breaker bar, a ratchet, or a wrench, if the bolt isn’t coming easily, you’ll probably want to “jar” it loose instead of just pulling harder and harder until the head snaps. If you’re using a wrench, tapping it with a big hammer can work. If you’re using a breaker bar, putting on a glove and giving it quick bursts of strength can work too. If you have an impact gun, that will usually work, but don’t set it too high or it might just snap the head off.
Remember that if all else fails, soaking it with more PB blaster and using heat are perfectly viable options.
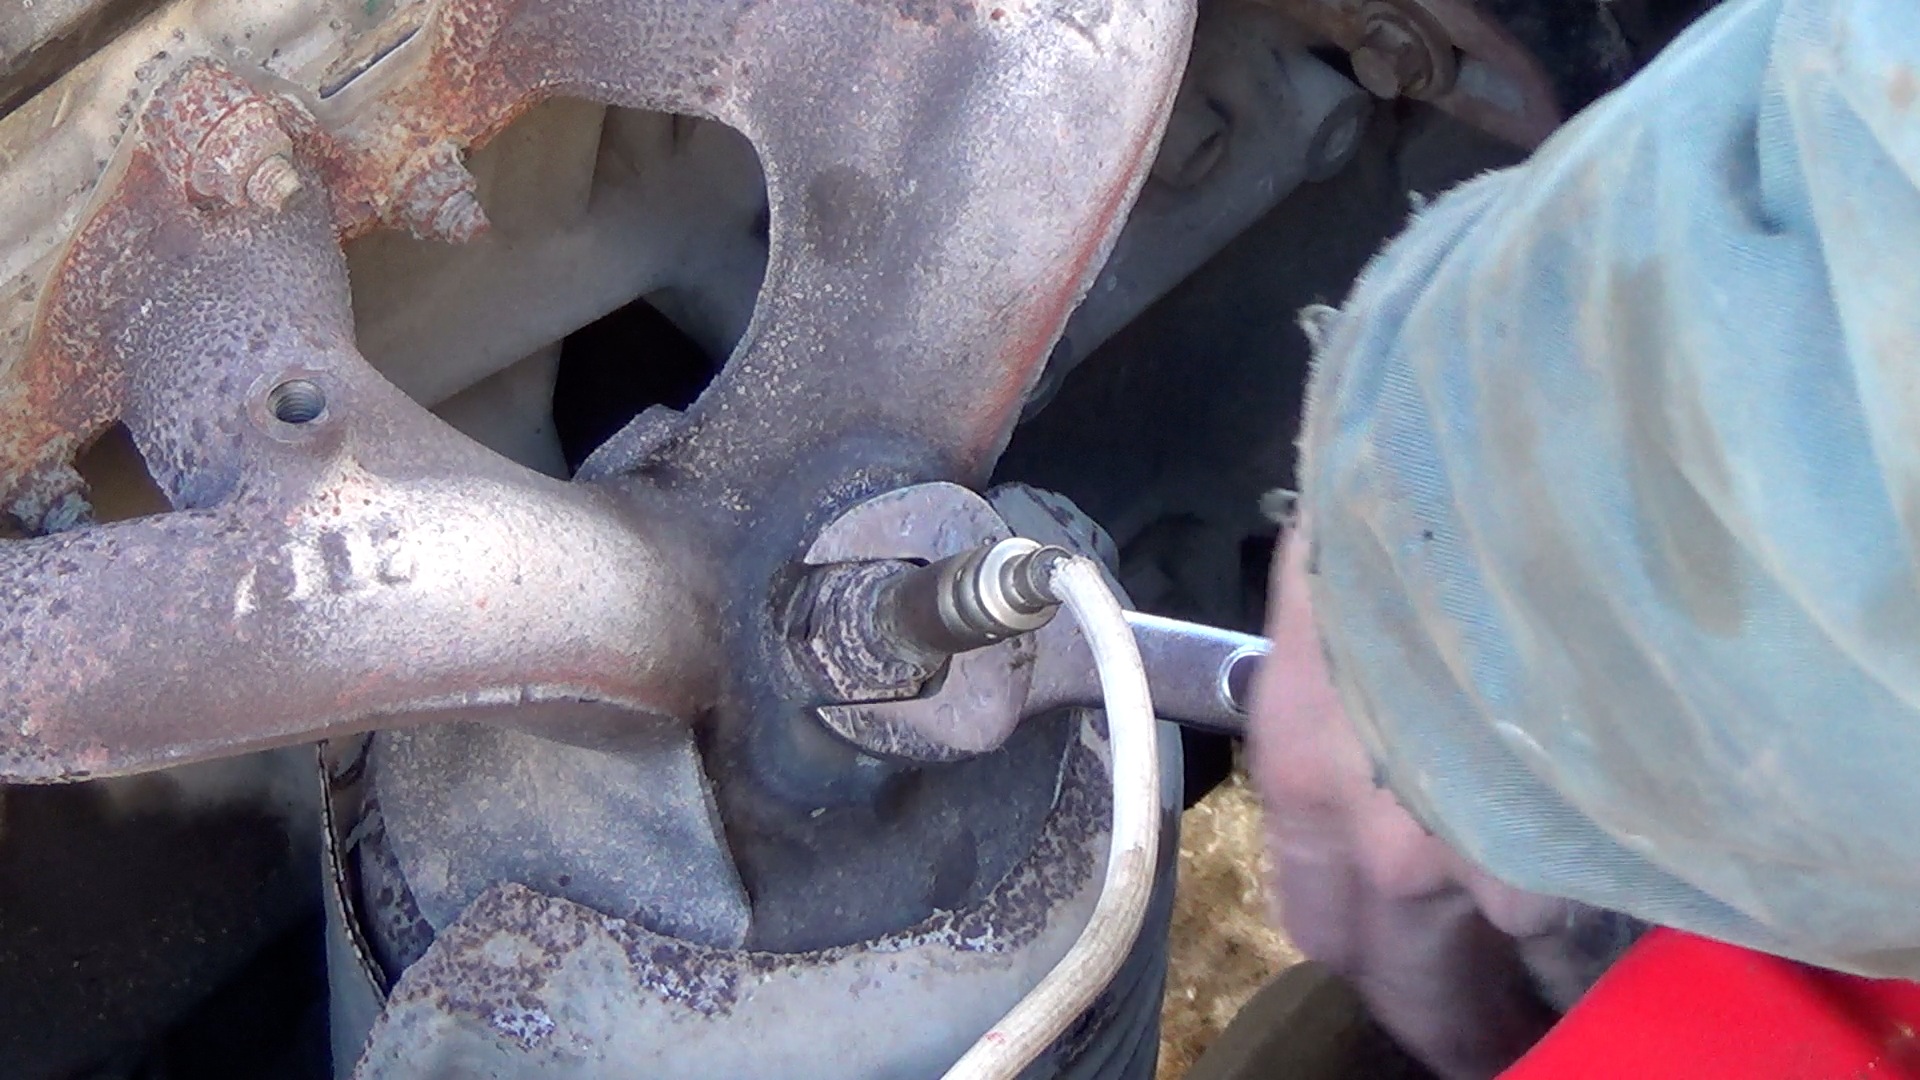
A 22mm wrench fit. Using the box-end would be smarter and have less chance of stripping, but would require the wires to be cut. Thus, I used the open-end. Since the oxygen sensor was very tight, this required the use of torches.
With the cover off, it was time to take out the O2 sensor itself. To do it, I soaked it with some PB blaster beforehand, and to remove it, used a wrench. A 22mm fit closely enough – that said, I used the open-end and it didn’t want to come easily, and I didn’t want to strip it, so I pulled out the torch set. If you’re using a wrench, your *best* bet is to cut the wires and put the box-end of the wrench over. The open end of the wrench will strip things quickly, while with the box end, you can give it a lot more muscle before it strips. A 6-point wrench or socket is of course better than a 12-point wrench or socket when it comes to stripping.
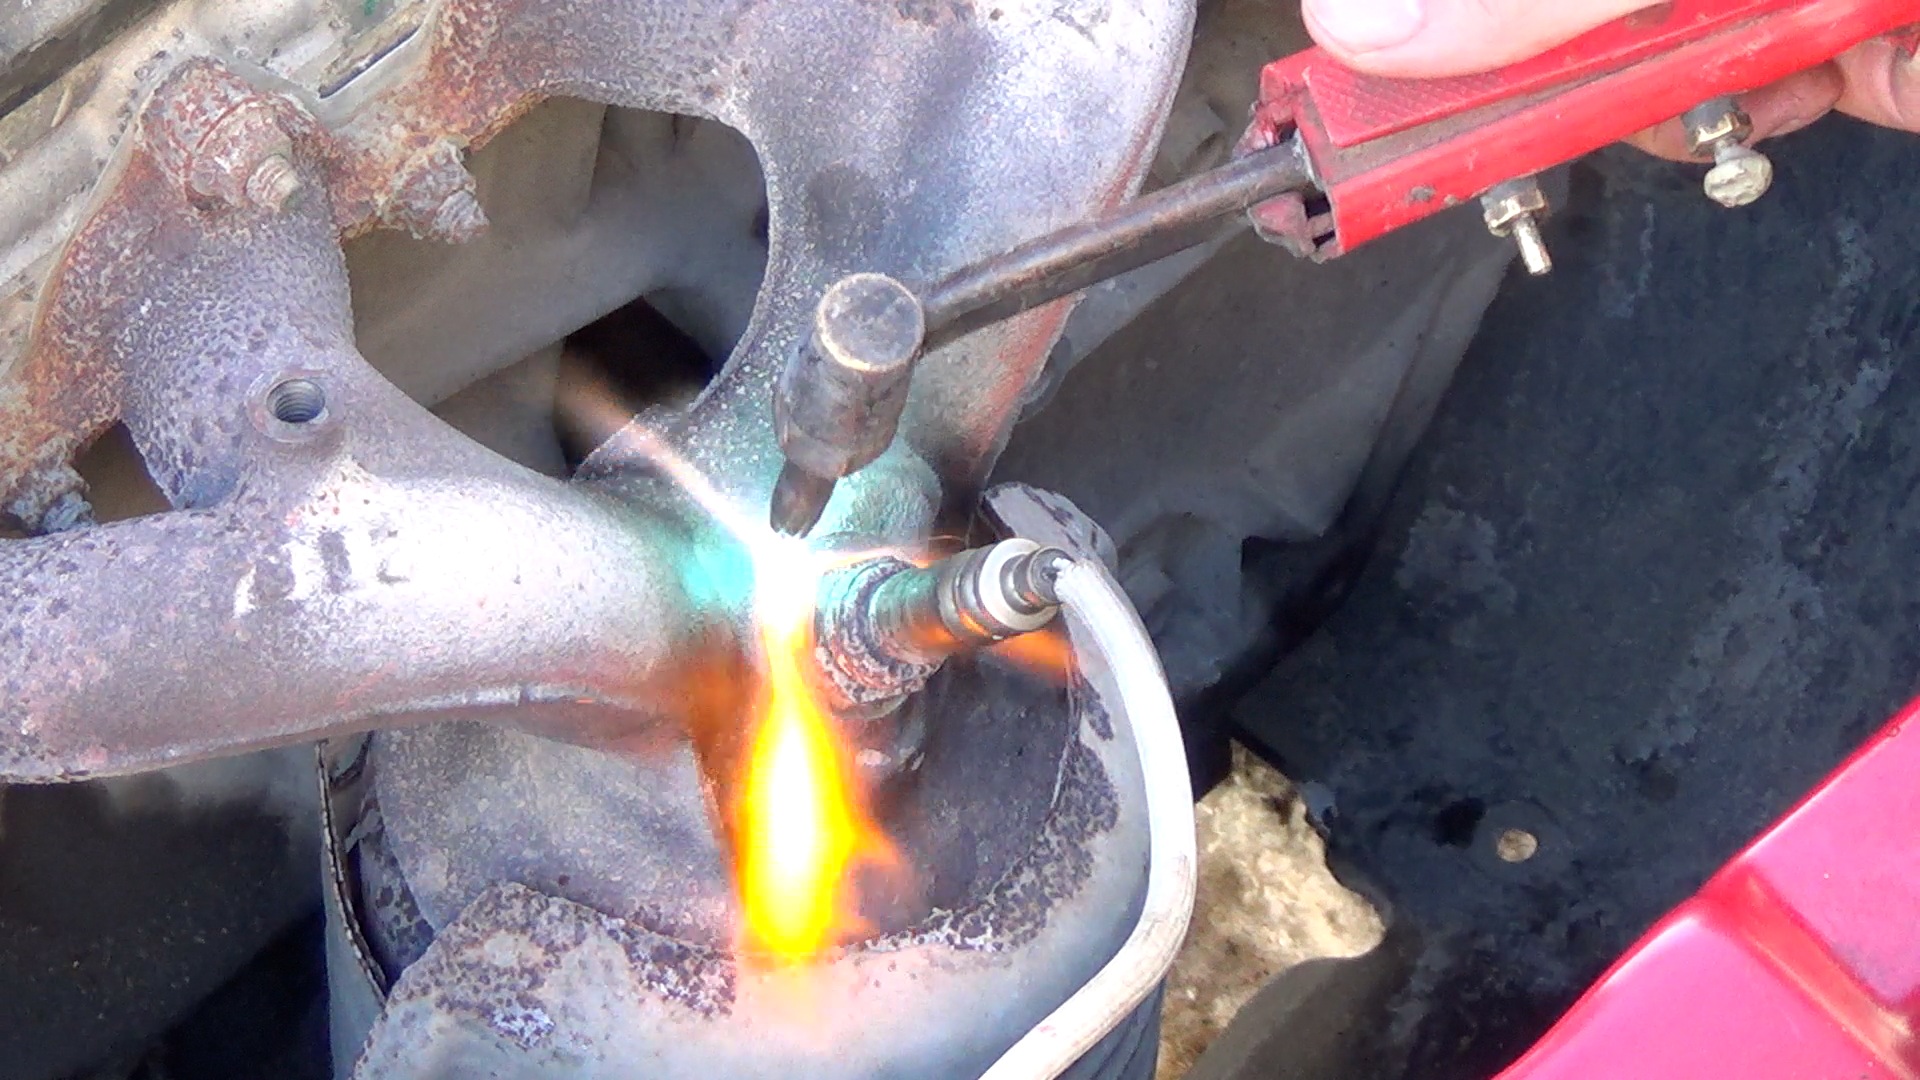
Heating the manifold around the sensor with an oxyacetylene torch made the sensor come out really easy. If you do this, wear gloves!
With the torch, I heated the area *around* the sensor – not the sensor itself. This is fairly important – when you’re trying to remove a threaded item, whether it’s a bolt or an oxygen sensor, you want to heat the metal *around* it. If you were to heat the oxygen sensor itself, the threads would expand and it just becomes tighter. Sometimes that will work anyway, because the metal is softened, and the expanding and contracting can loosen up the rust but it’s very risky because the metal is softer when hot and if the threads are really seized and you pull hard enough, you have a higher chance of just snapping the top half of the sensor right off. Even more important if using a torch, wear gloves – one slip and you’ve got 3rd degree burns in less than a second.
If you don’t have access to an oxygen-acetylene torch set, a lot of people have luck simply running the car until the exhaust heats up. This isn’t as good since it heats everything pretty evenly, but if you aren’t having luck anyway, it could be worth a try.
Whatever you do, don’t bother with a propane torch set. The reason an oxyacetylene torch works so well is that it heats a small area very very fast. A propane torch heats a large area very very slowly. You’d be better off just running the car at that point.
With the manifold hot, the sensor came pretty easily. To give you an idea, an 8 year old probably could have turned it. Seriously, if you live in a region where every car part is always rusted together, an oxyacetylene torch will save you hours of work.
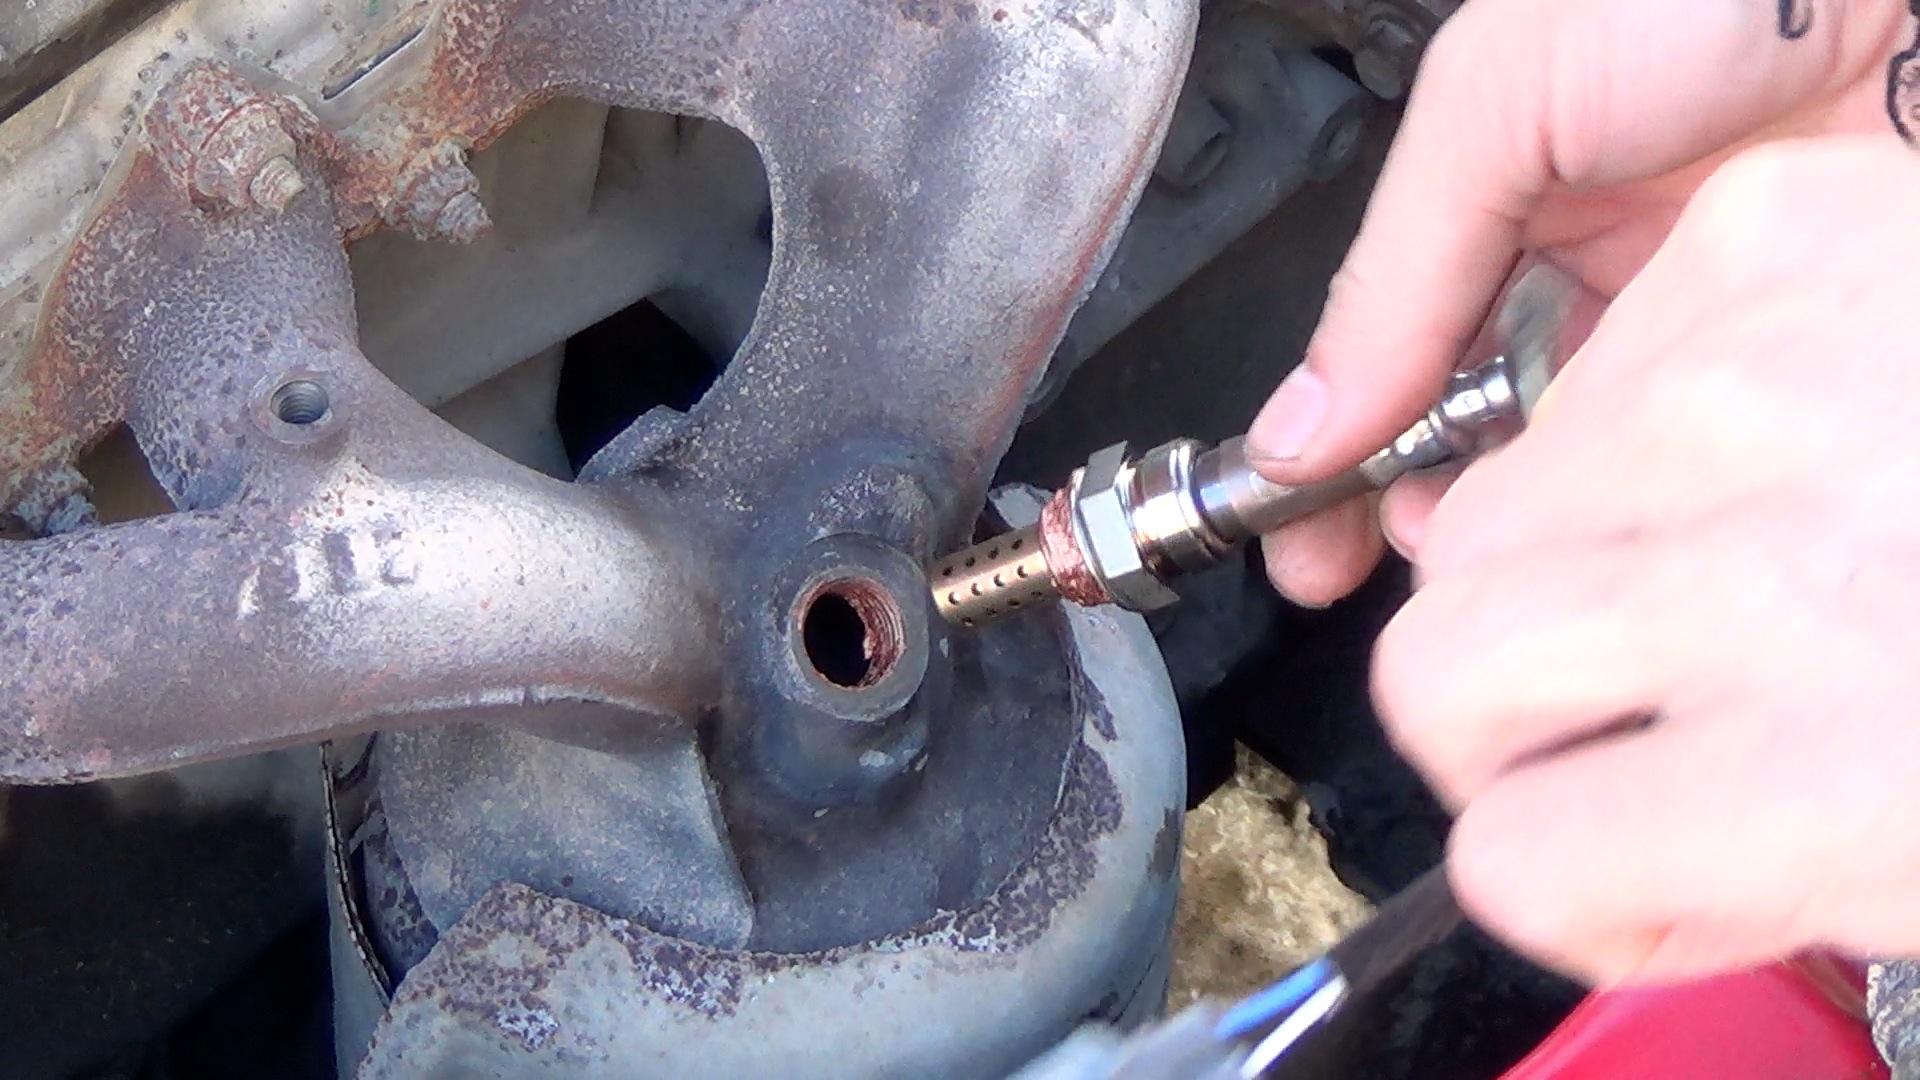
Lots of anti-sieze on the threads. Careful not to get any on the sensor itself!
Installing the new one is essentially the opposite of removal. Be sure to use a healthy amount of anti-seize on the threads – most oxygen sensors come with a tube of it. Don’t get any on the sensor itself, but feel free to slather it all over the threads – you want to make sure you used enough that it comes off easily the next time. When tightening, you want it pretty snug, but don’t over-tighten it. Really it just has to be tight enough that it’s sealed and exhaust gas doesn’t come out – you’d probably want it a little tighter than a spark plug or about the same as an oil drain plug. I used some anti-sieze on the exhaust cover bolts too because even after slathering it on the O2 sensor, I had a lot left.
Worth noting that for the Civic, from what I gather either NTK (NGK) or Denso is the OEM manufacturer for most years and most Honda fans seem to recommend going with the OEM. On the 98 Civic, it appeared that Denso was the OEM so that’s the sensor I grabbed, for about $50 shipped (to Canada) on eBay. NTK/NGK would have a fair bit more expensive, but all indications seem to be that it would have been just fine too. Quite a few compatible Denso part numbers were listed, but 234-4099 seemed to be the “ideal” one so it’s the one I grabbed.
If you’re peaking at sensors and are seeing 1-wire vs 2-wire vs 4-wire…. go with the 4-wire. These cars aren’t terribly hot at idle (or in winter), and a 4-wire should get the sensor functioning more quickly.
If your old sensor was still good, you might want to keep it around in case your downstream sensor decides to kick the bucket. The only job of the downstream sensor is to make sure the catalytic converter is working – it doesn’t affect the fuel ratio, won’t affect your fuel economy or anything else so even if your old primary sensor isn’t accurate anymore, if it’s at least functional, it’ll probably be just fine as a secondary.
Once everything’s installed, you should be good to go. If your check engine light was already on, you can use an OBD 2 tool to reset the code, or most of the time you can simply disconnect the battery for about 10 minutes to reset it.
As a final note, if you’re at the point where you’re pulling with all your might, sweating up a storm, and the sensor still isn’t coming, there’s no shame in driving to an exhaust shop and having them zip it off for you. The alternative is that you pull so hard that the thing snaps and then you’ll have half a sensor stuck in the manifold. At that point you usually end up having to remove the manifold and bring it to a shop where they’ll either work the thing out or drill a new hole and weld in a new bung. And that’s a lot more expensive than just letting them zip it off for you.
So, that’s it. Hopefully something here has helped you.
9 Comments | Leave a Comment
Sort by Oldest | Sort by Newest