I’ve never been a fan of video card fans… if run at a high speed, particularly in the case of fans that use sleeve bearings, they have a tendency to get noisy fairly quickly and replacements often aren’t readily available. This time around it was a Zotac GeForce 1660 SUPER that had started to buzz and was in need of some oil.
I decided to take a few pictures as I disassembled the fan.
Before continuing, I should caution you on a couple things:
- “Disassembling” the fan is a nice way of saying “using brute force to make the fan shaft pop out of the hub”. To be blunt, even if you do everything right, it’s possible that something will break before the fan comes out. Before proceeding, decide what you’ll do if it breaks during the process.
- There are other methods out there to remove the fan from the hub – if you’re not confident when it comes to using this method, please search out others. Personally, I’d avoid methods that require you to pry/pull against 2 fan blades due to the risk the blades will snap off, but go with whatever route suits you best.
Let’s get started (click the images for a larger view).
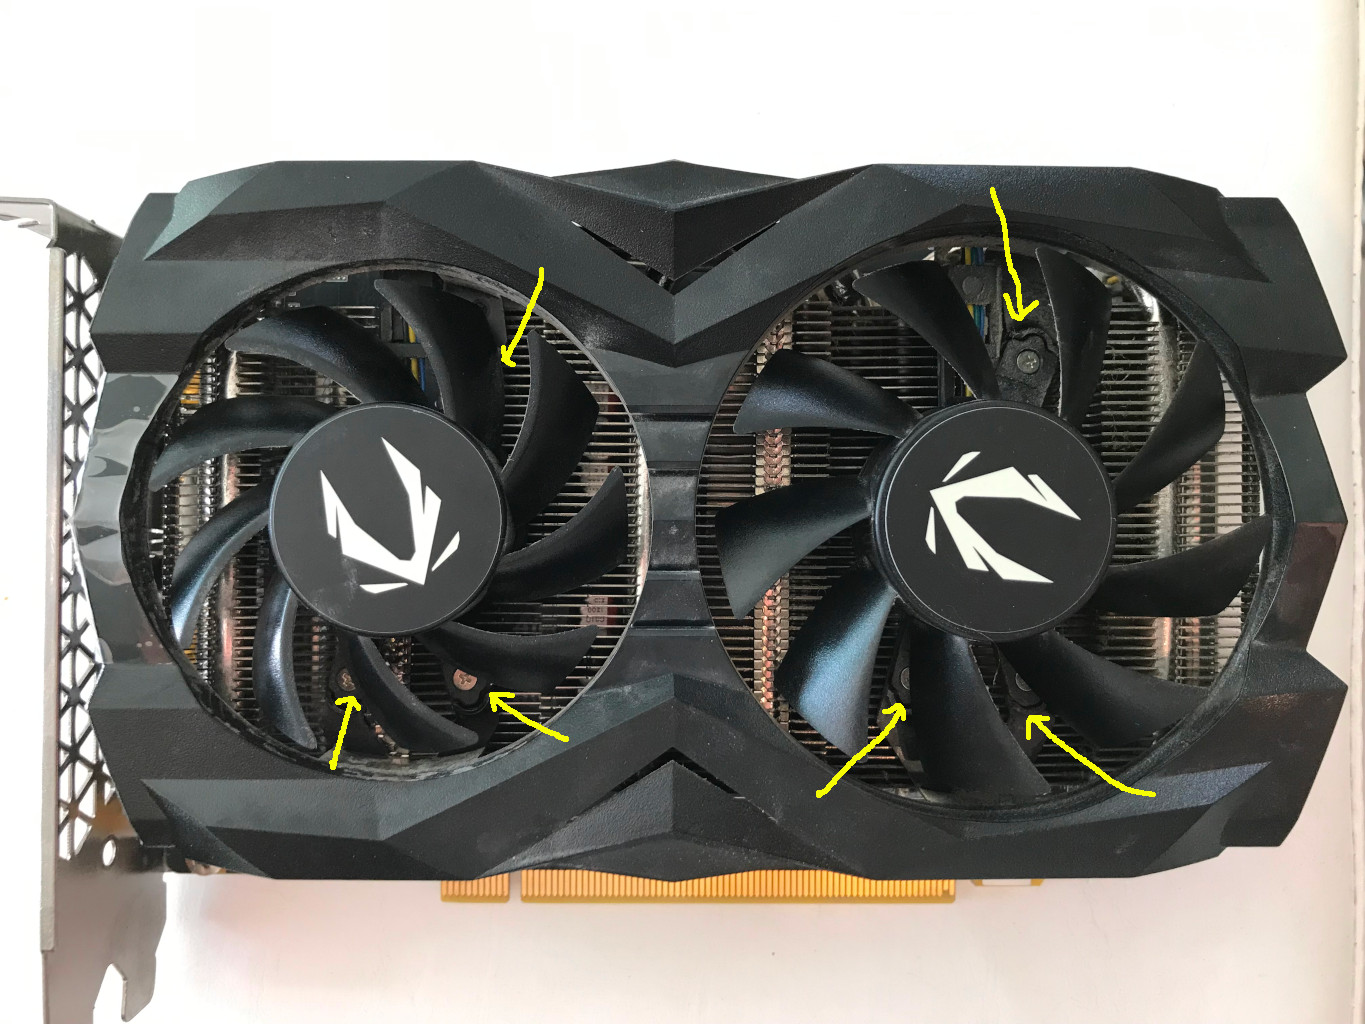
Above: The yellow arrows point to small phillips-head screws which hold down the fan assembly. Removing these allows enough space to work on the fan. However if you’d like more space you could consider removing the entire fan shroud.
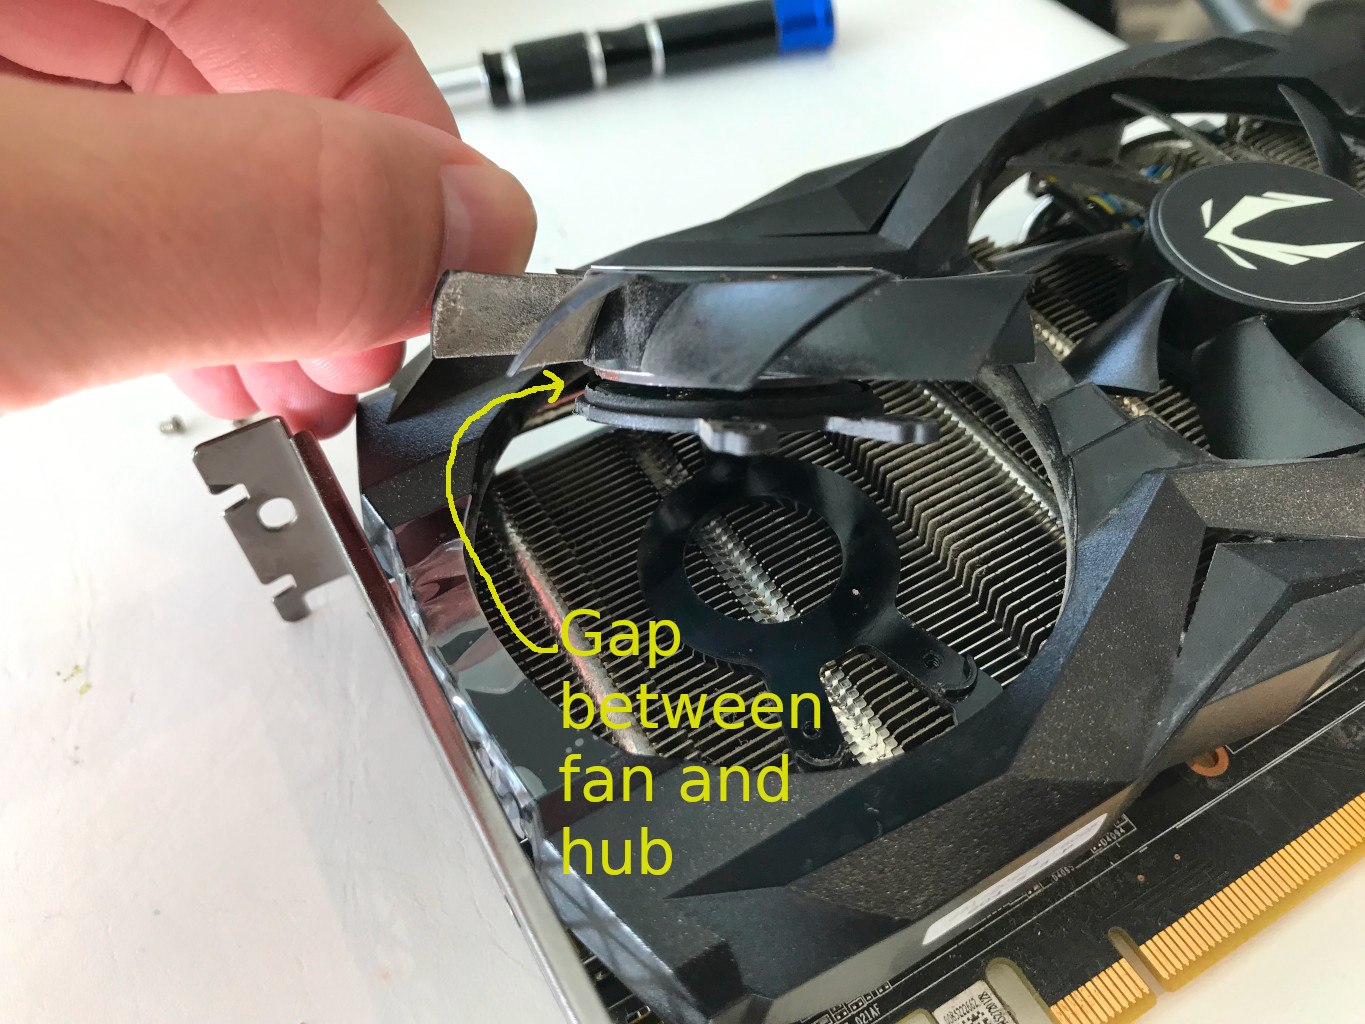
Above: After the screws are removed, the assembly lifts up. Notice the yellow arrow pointing to the gap between the fan and the hub. We will be prying that gap open.
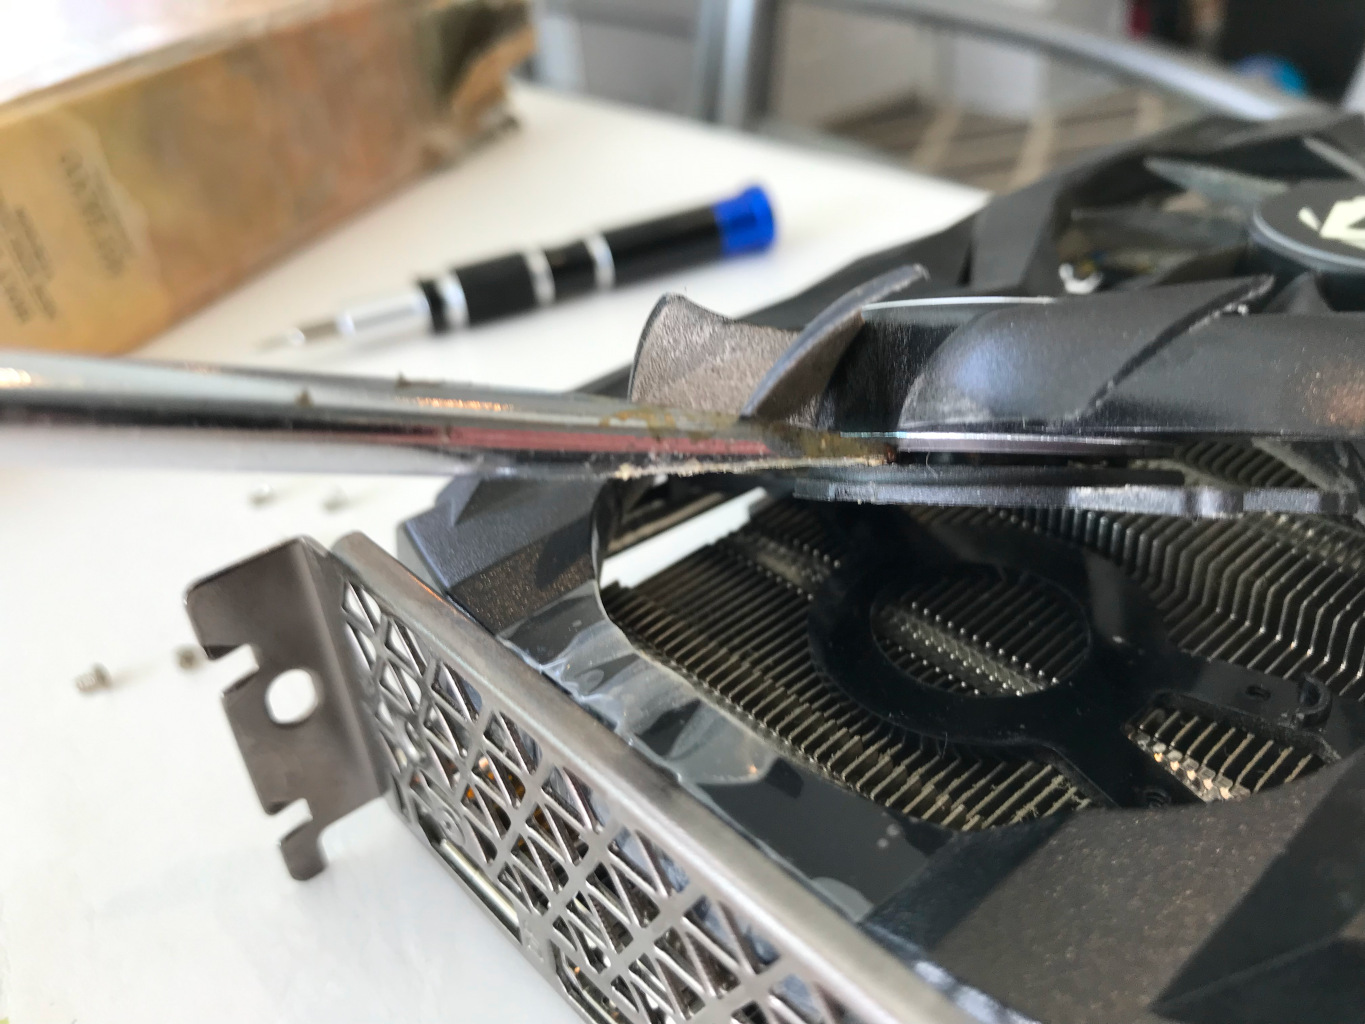
Above: You can see a screwdriver in the gap. A few very important notes at this point…
- You want to pry on at least 2 opposite sites simultaneously, not just on 1 side (I was holding the camera, hence why you only see 1 screwdriver in there – imagine a 2nd on the opposite side). I used 2 flat screwdrivers. Since there wasn’t anything to really “pry” cleanly against, I just twisted the screwdrivers simultaneously to force a gap to form.
- You are better off using a plastic spudger or some other soft pry tool. You’ll see a little cosmetic damage further below due to the screwdrivers used.
- Whatever tool you use, do not stick it in very far. Just insert it the bare minimum necessary. Otherwise you will either hit/damage the circuit board, or may get under the magnets and tear them off.
Be patient when prying. There isn’t a lot of room to work. Getting a helper to hold the fan up while you pry, or removing the entire shroud so that you have better access are both options if your having trouble. Make sure you can see the depth of the screwdriver tips while prying – don’t let them go in too far.
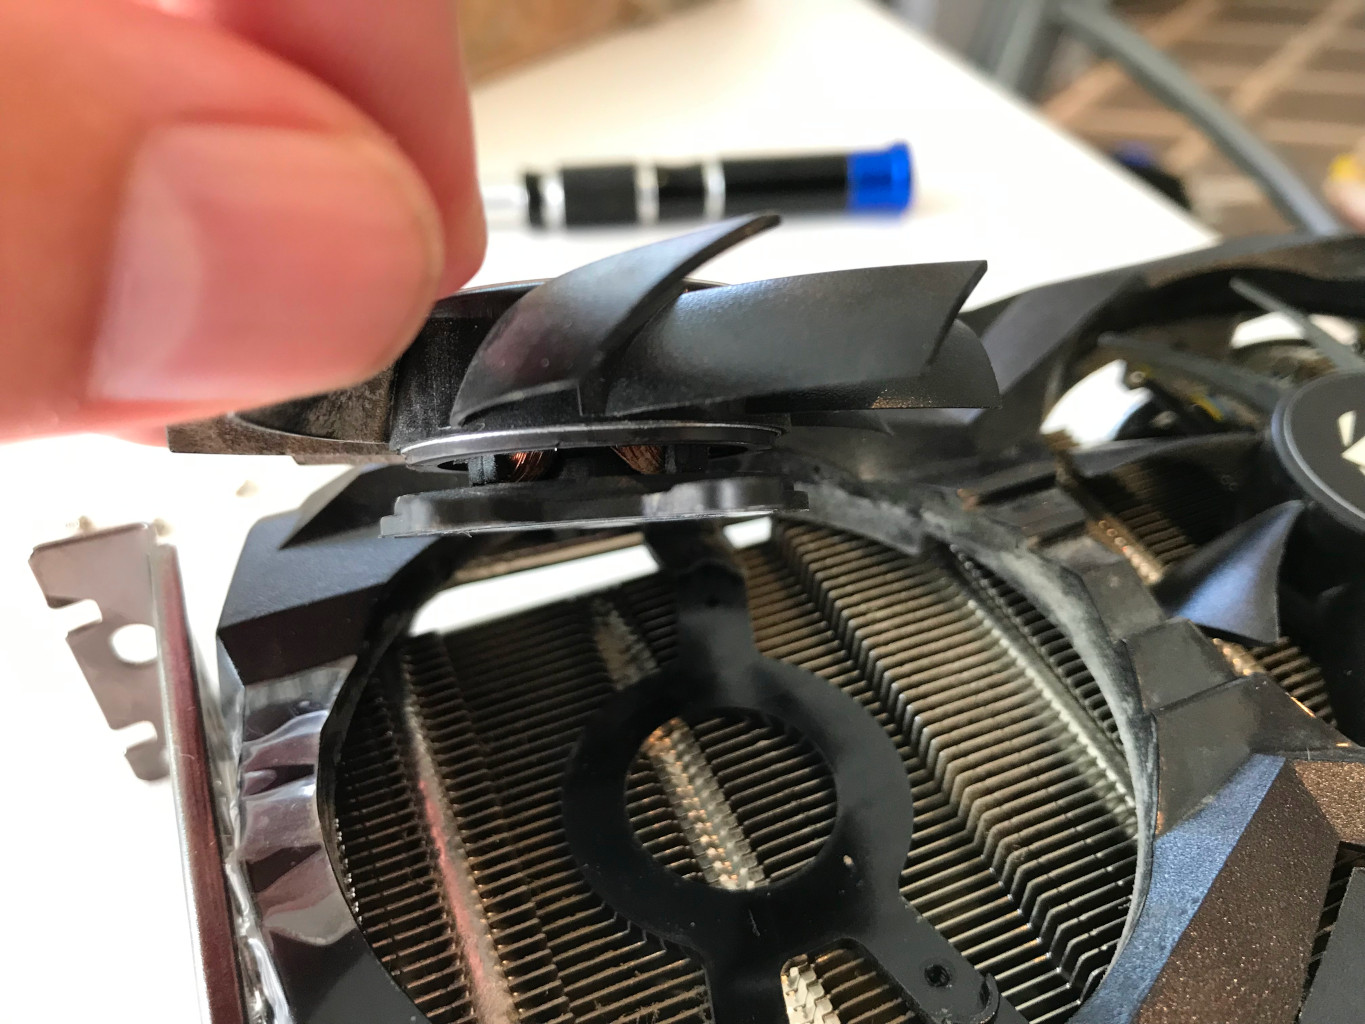
Above: I actually had to use a surprising amount of force before I heard a “pop” and the gap opened up to what you see above. At this point the fan can be separated from the hub by hand. You’ll feel a little resistance as you fight the magnets inside.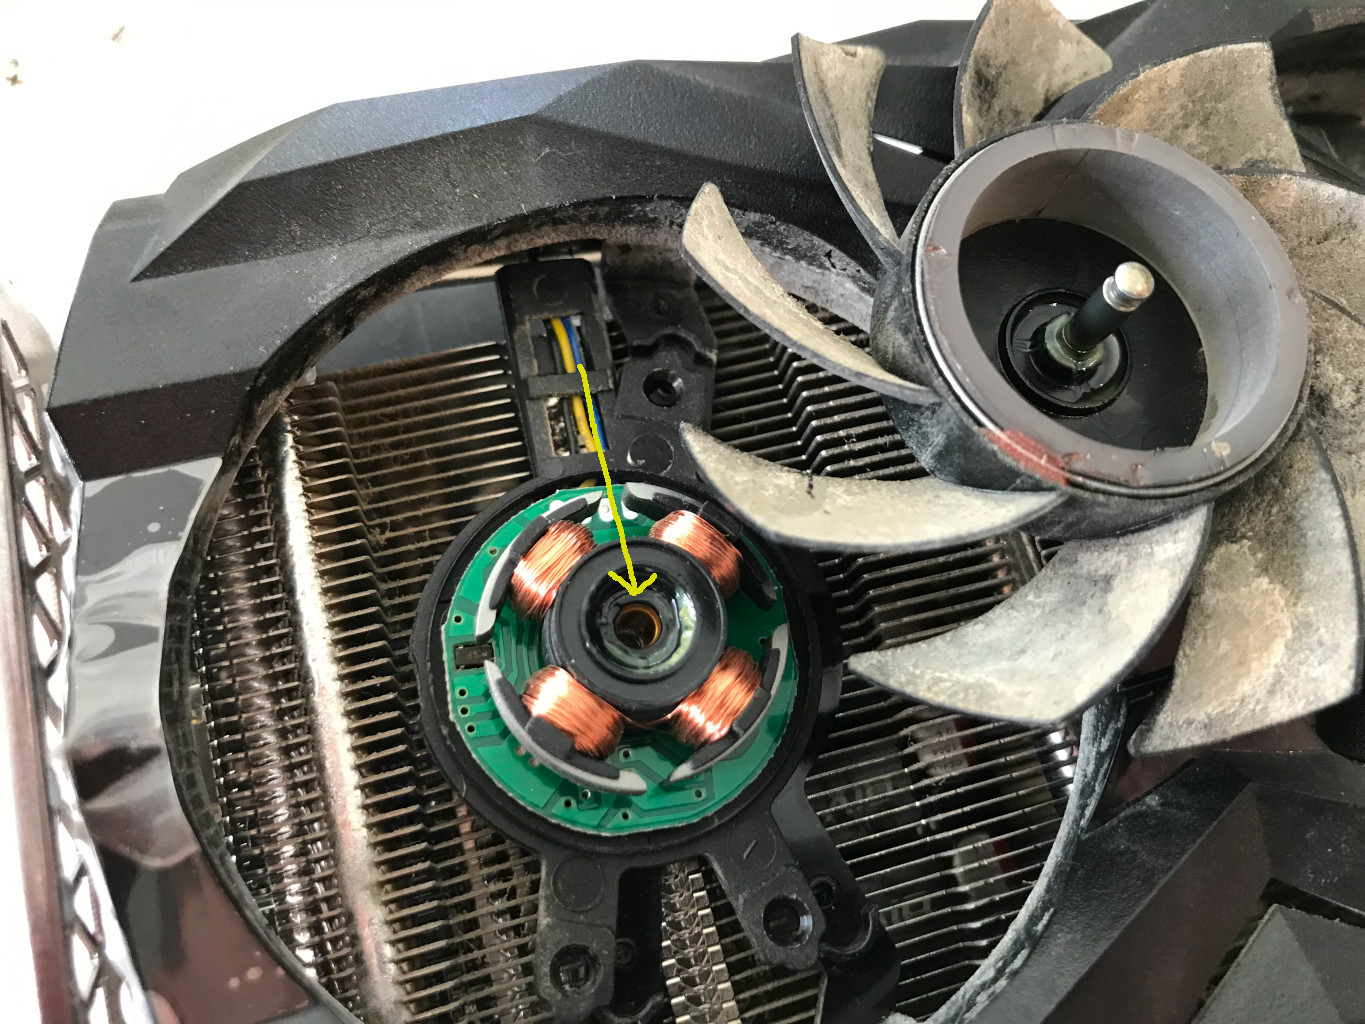
Above: You can see the fan has been removed. I drew an arrow pointing to the location you want to oil, right at the bearing. If you inspect the portion attached to the fan blades on the right side, you’ll see a lot of indents from the screwdrivers – using a sturdy plastic spudger instead of a screwdriver might avoid this. Notice how much space the circuit board takes up on the hub: this is part of why you don’t want the screwdrivers pushed in very far when prying – you don’t want to hit the circuit board.
Above: Oil has been added. I used a little Mobil 1, though you can probably use whatever oil/grease/lube you have laying around as long as it’s stable and won’t evaporate quickly (3-in-1 sewing machine oil is popular, whereas WD-40 is almost universally considered to be a bad idea). To keep from creating trapped air bubbles inside (as I did), you’re best to trickle the oil down gently. If you get air bubbles, stick a toothpick or twist-tie down the bearing and stir a bit to encourage the air pocket to come up.
Keep in mind that during reassembly, the shaft will cause excess oil to be pushed out which might make a mess. After letting the oil soak a while but before reassembly, I used a paper towel to pull out some of the oil.
To reassemble, put the screws back in, then just line up the fan and push it back into place (pushing on the center, not on the blades) – you’ll hear a firm “click” as it snaps back in. Give it a quick spin by hand to ensure it’s not binding.
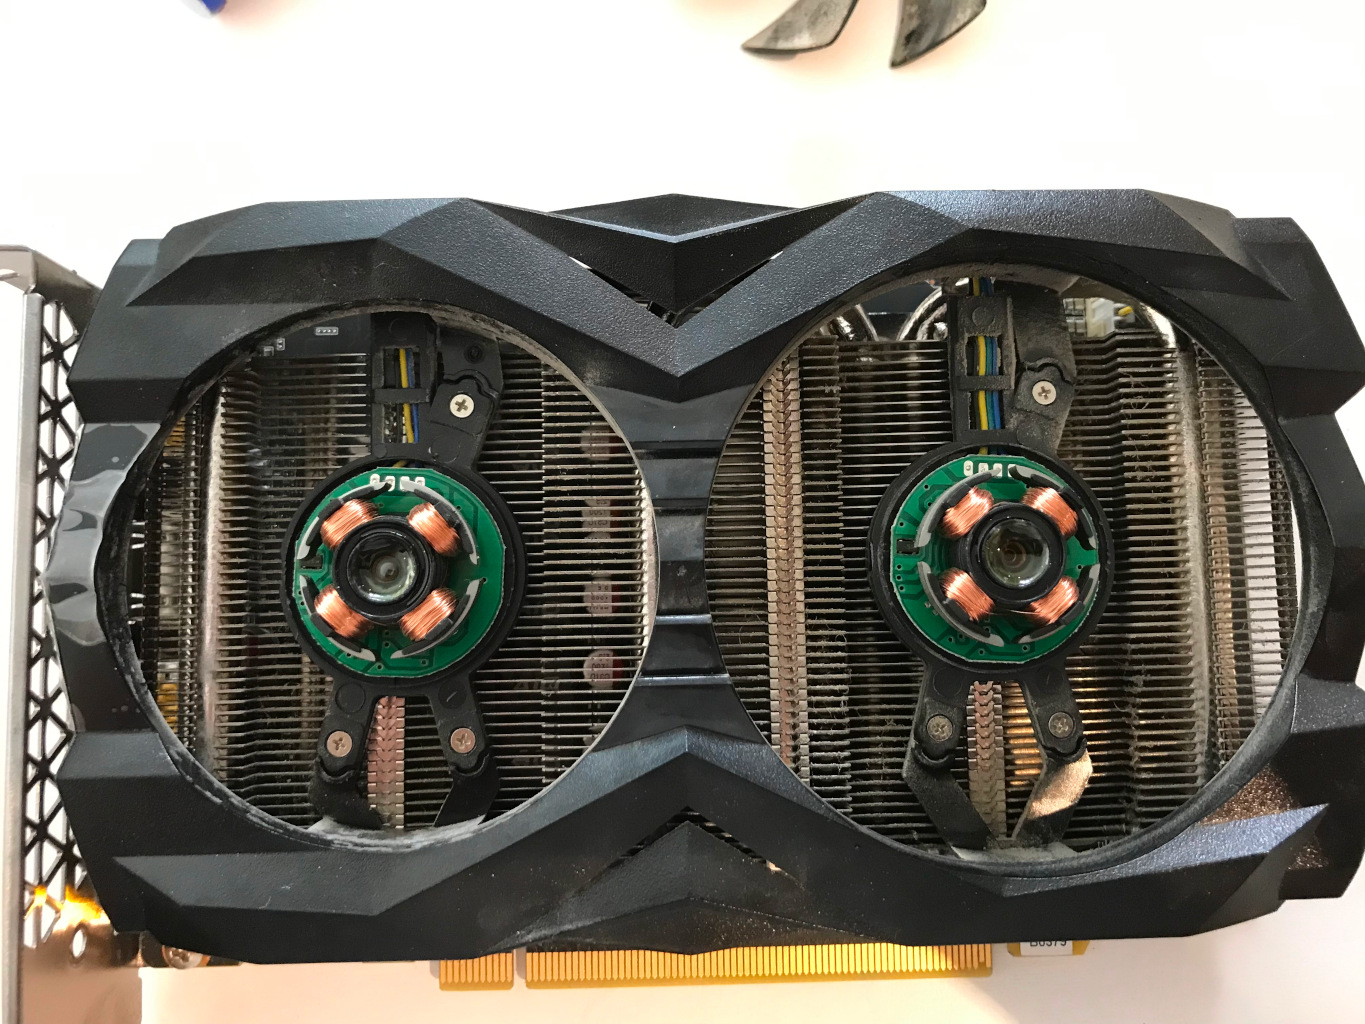
Final Result
The Zotac GeForce 1660 SUPER fans still made a little noise at certain RPMs after being oiled. It’s much better, but it doesn’t compare to the alternative of strapping on a couple Noctuas (something I recently did on a 5600XT).
However, with a good dose of high quality oil inside now, I expect the fan to go a long time without getting noisier or seizing up.