We got a 6.5HP “Power Fist” motor for our rototiller, which worked for most of the year and started getting temperamental the following spring… It wouldn’t run, or would run with full choke, or would run properly for moments at a time. Figured I’d pull it apart and clean it up.
Removal isn’t actually all that hard. You’ll need a 10mm socket, and possibly a needle nosed pliers to get at some clips.
Note that the standard “do at your own risk” disclaimer applies.
First, the air cleaner comes off.
(click for larger image)
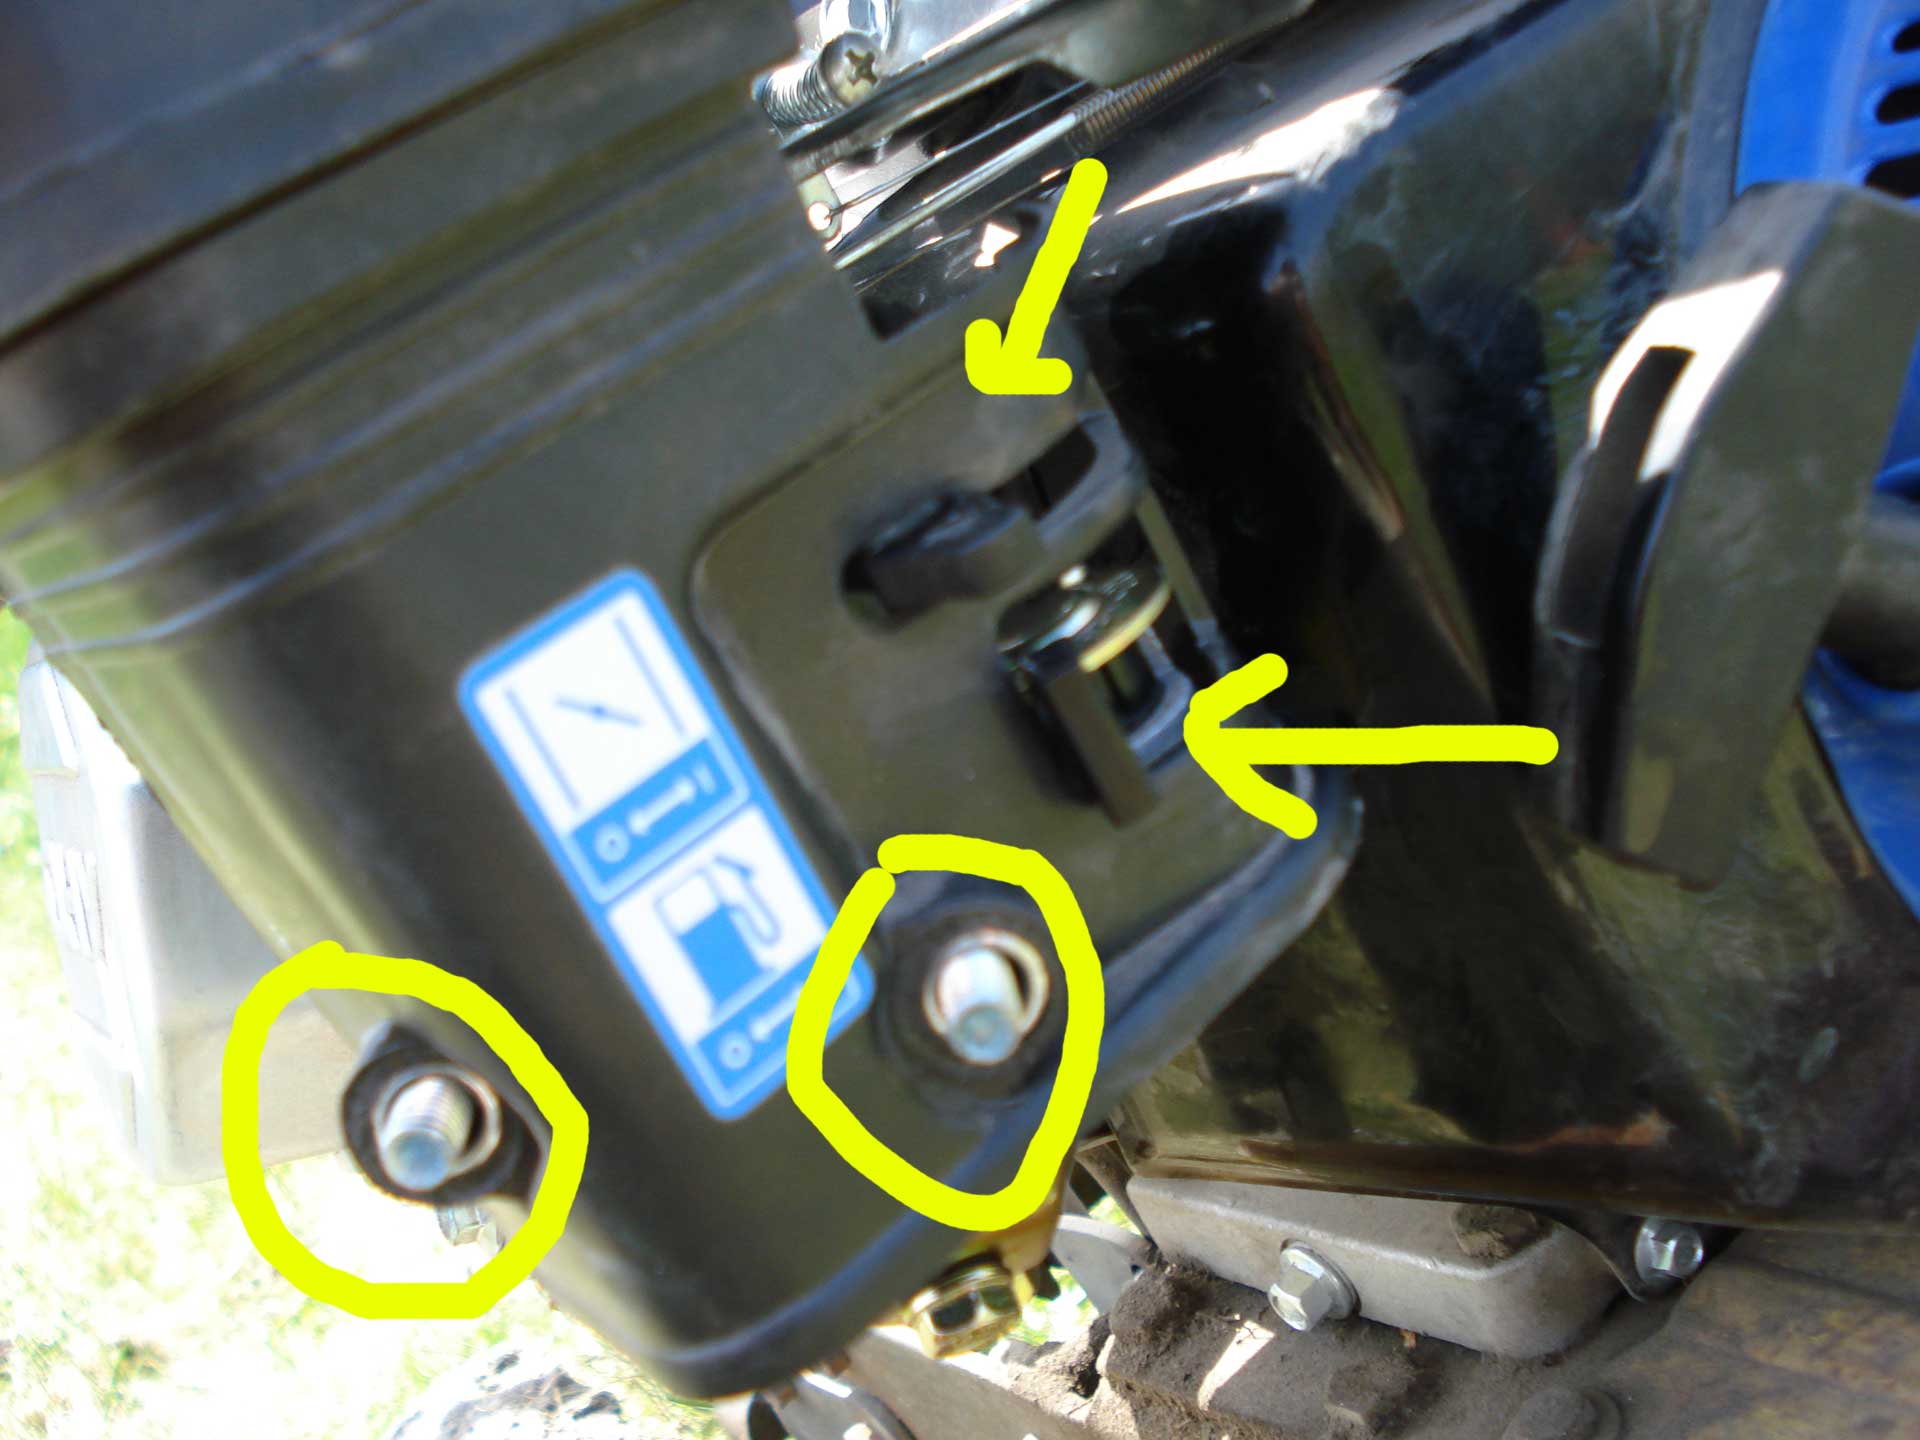
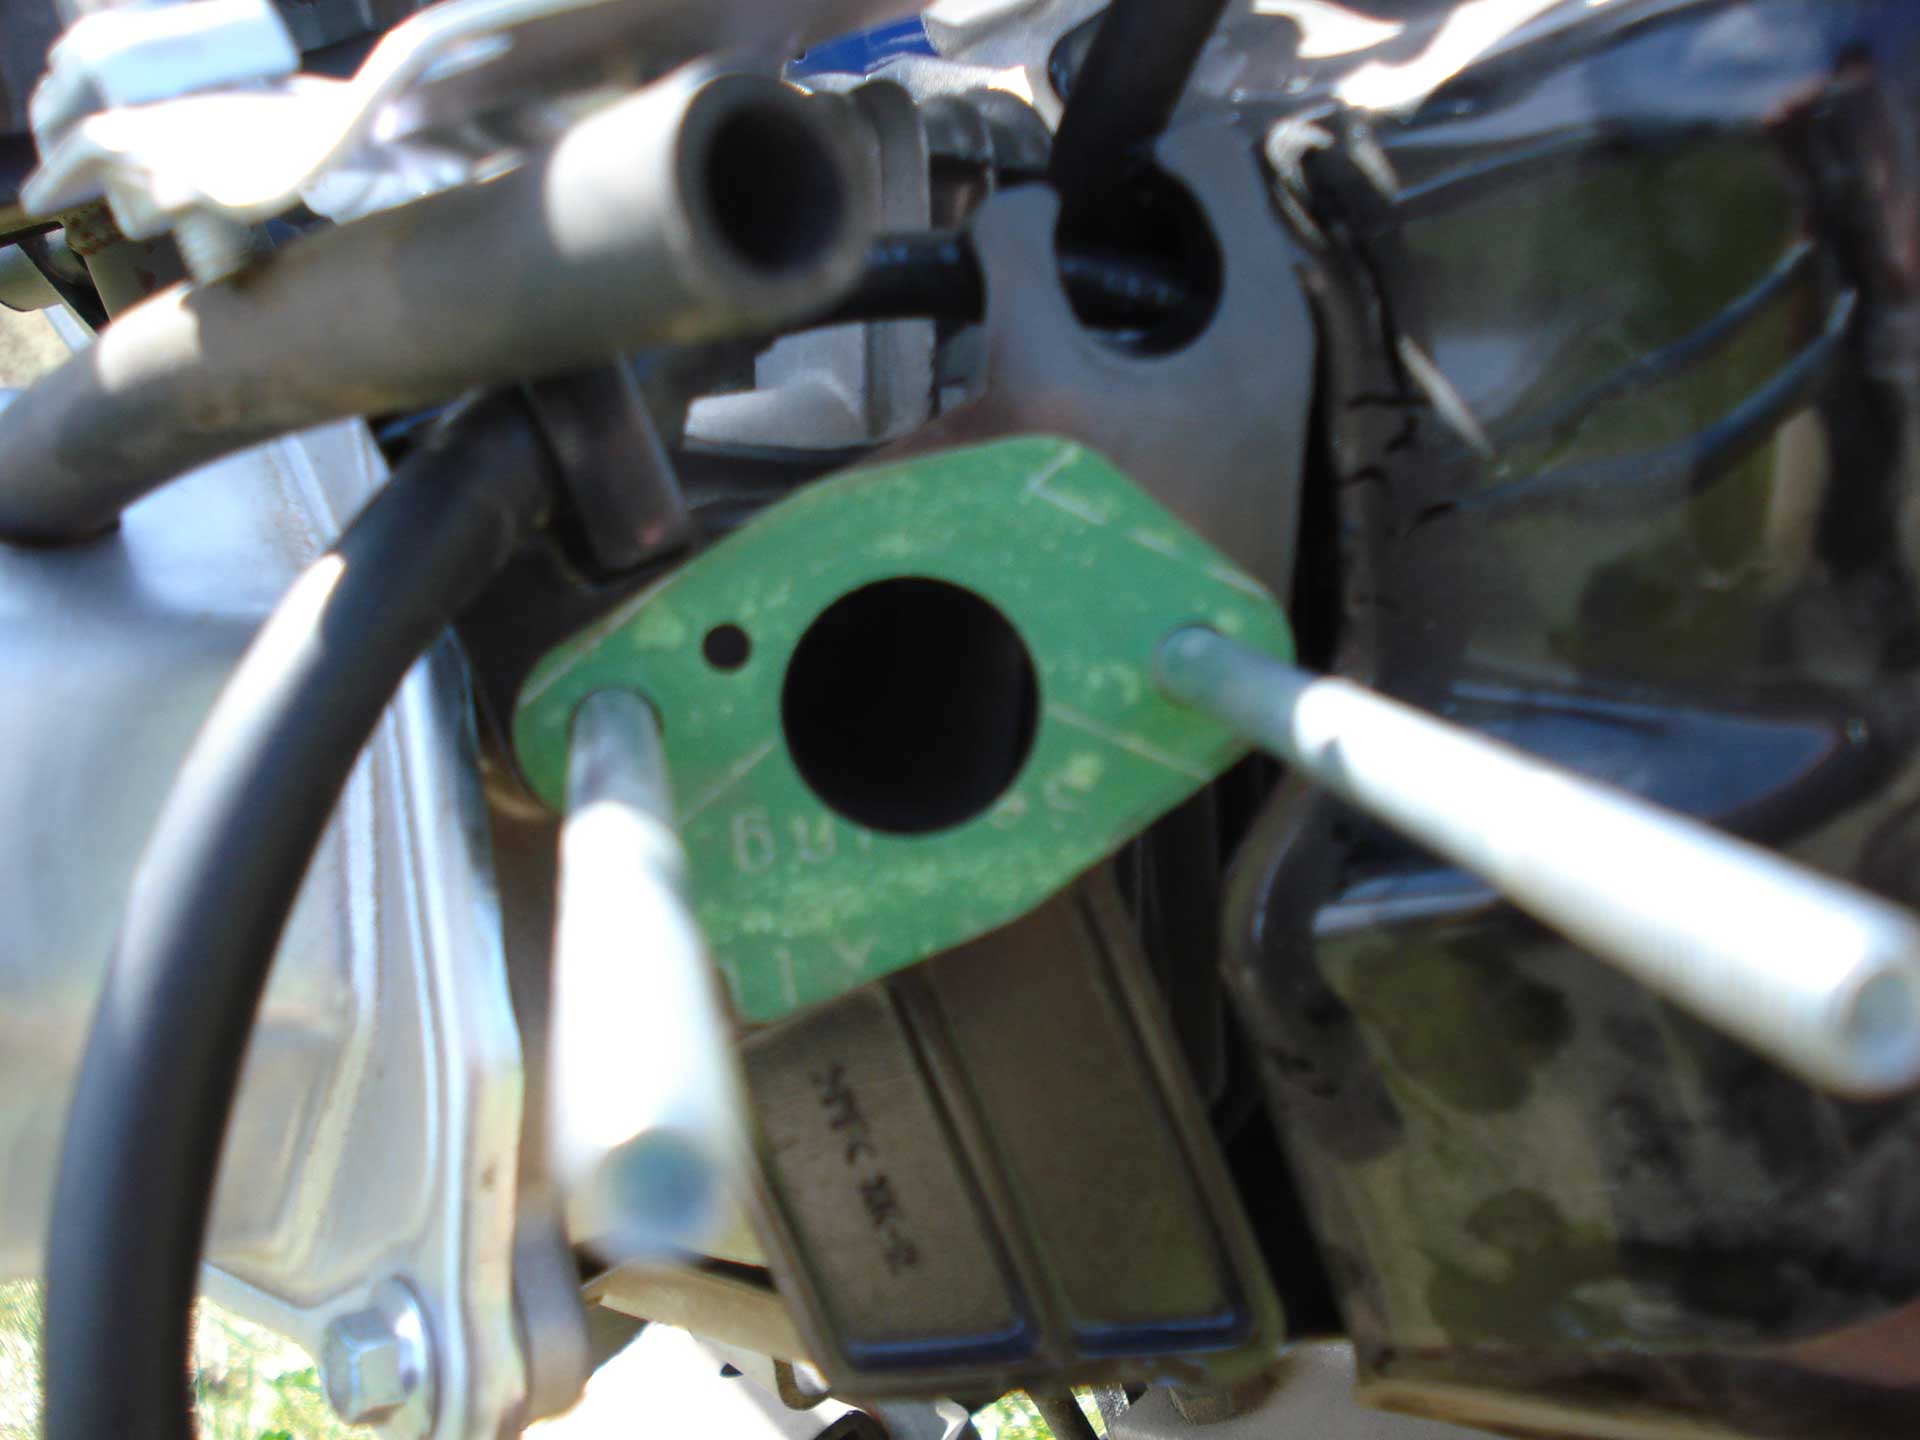
Shown above: Take off the 2 nuts and slide the 2 levers to the left. Don’t yank it out yet though, a couple hoses to disconnect first.
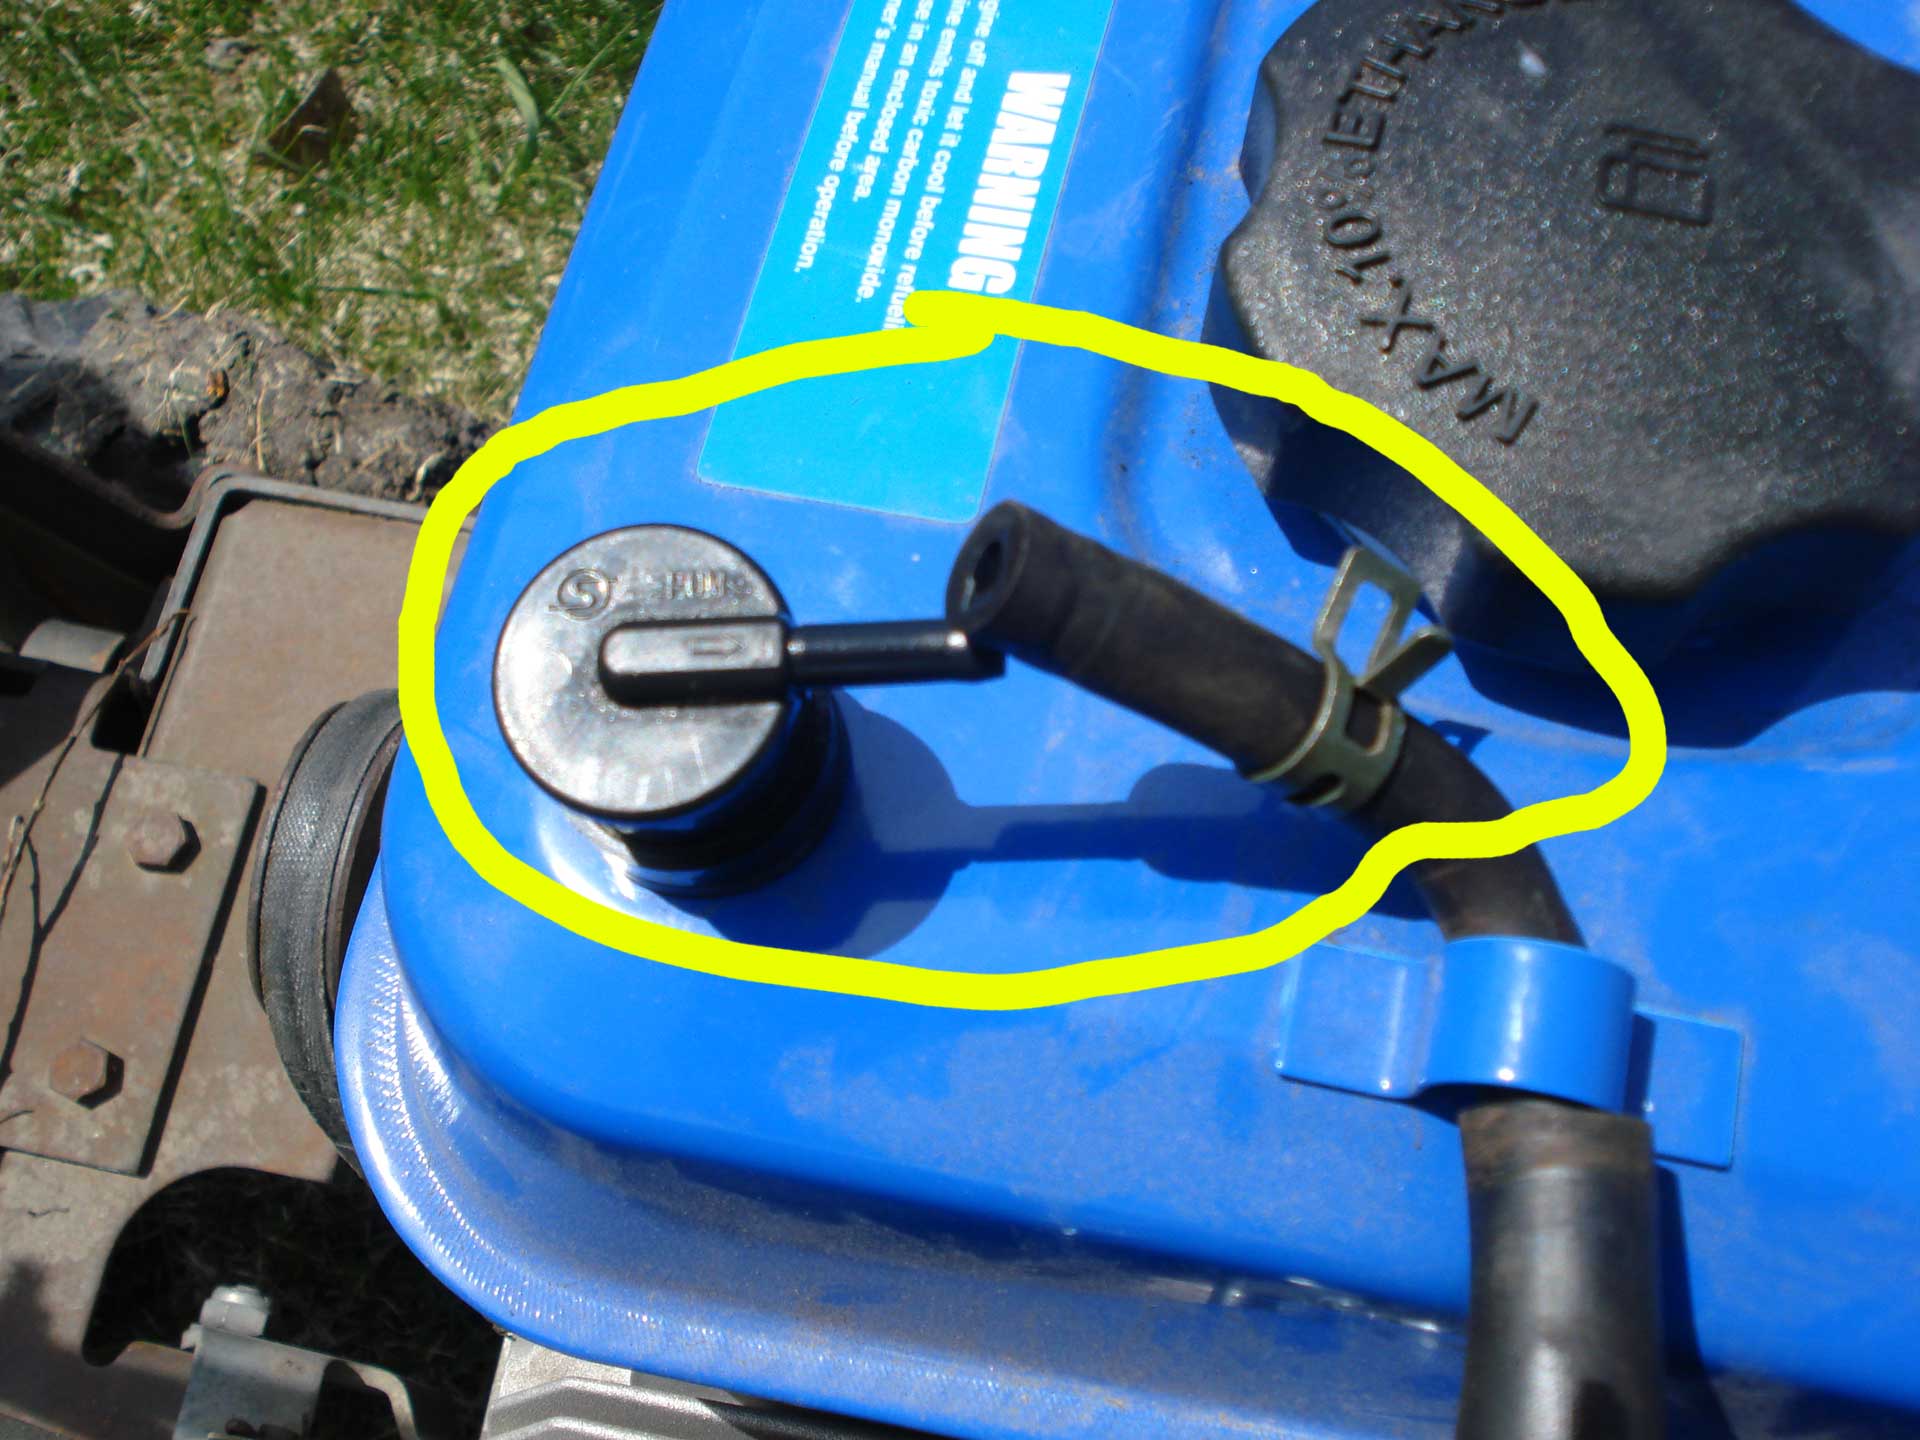
Above: The fuel vent line will prevent you from pulling off the air cleaner. Rather than disconnect it from the air cleaner, it’s simpler to leave it attached and remove the top portion that connects to the tank. Clip above you can just open up by hand.
Above: Pinch the clip (pliers if you don’t have tough fingers) and pull the line off. The valve stays connected to the tank (unless you want to pull it off and use it as I did quite a bit further below).
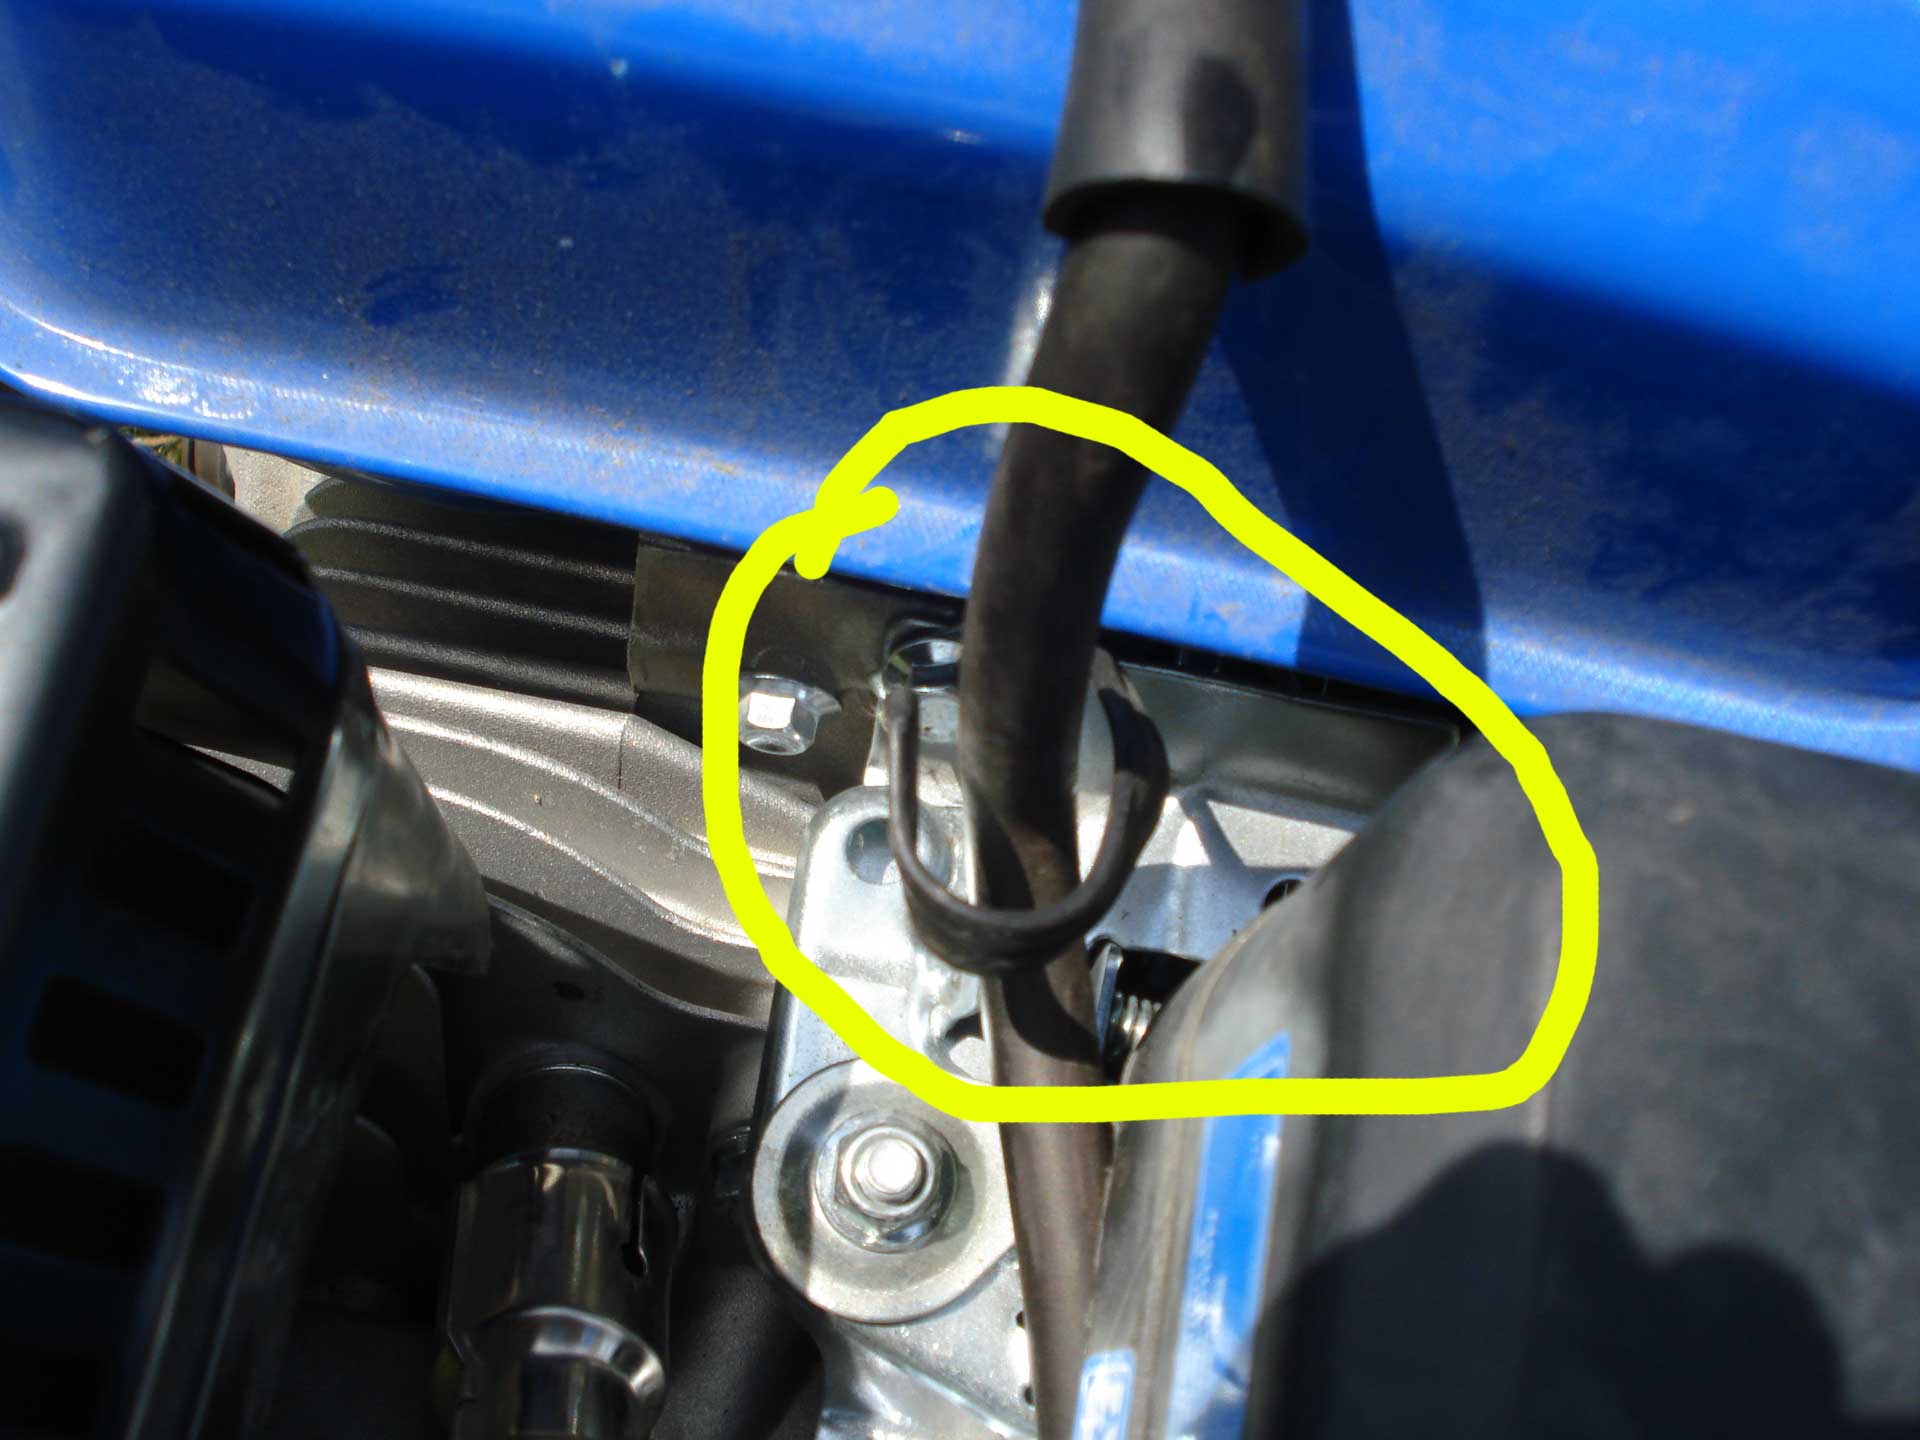
Above: This hose for the engine breather just slides right off. No clamps.
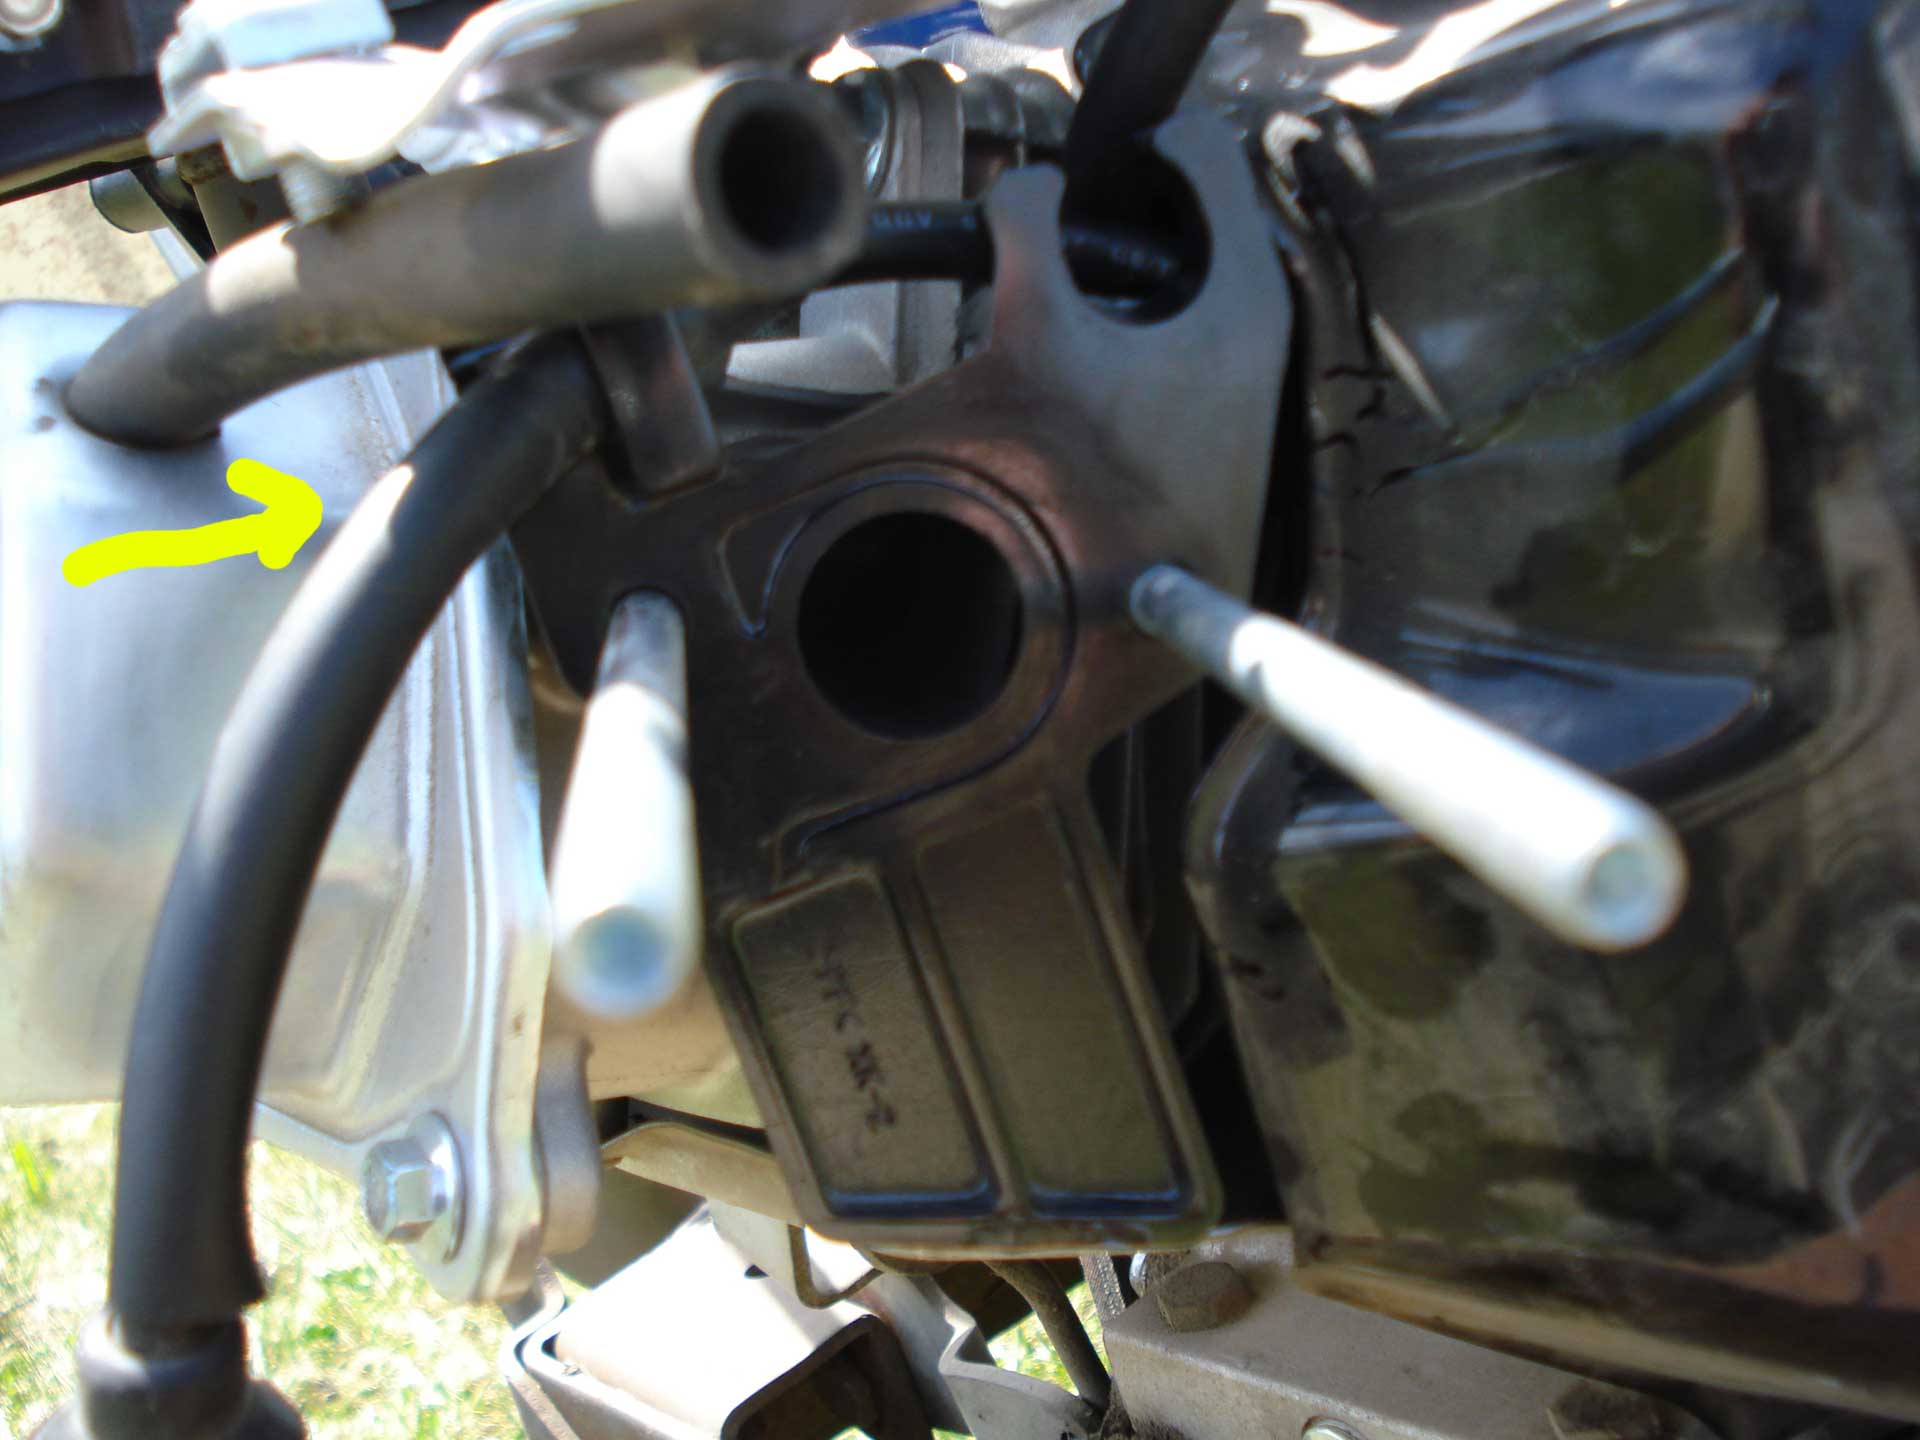
You can now slide off the air cleaner! The switches you slid to the left in step #1 should clear the air cleaner housing, and 1 of them can be removed once the cleaner is off by lifting straight up (otherwise it’ll fall out at some point).
Now to remove the carb!
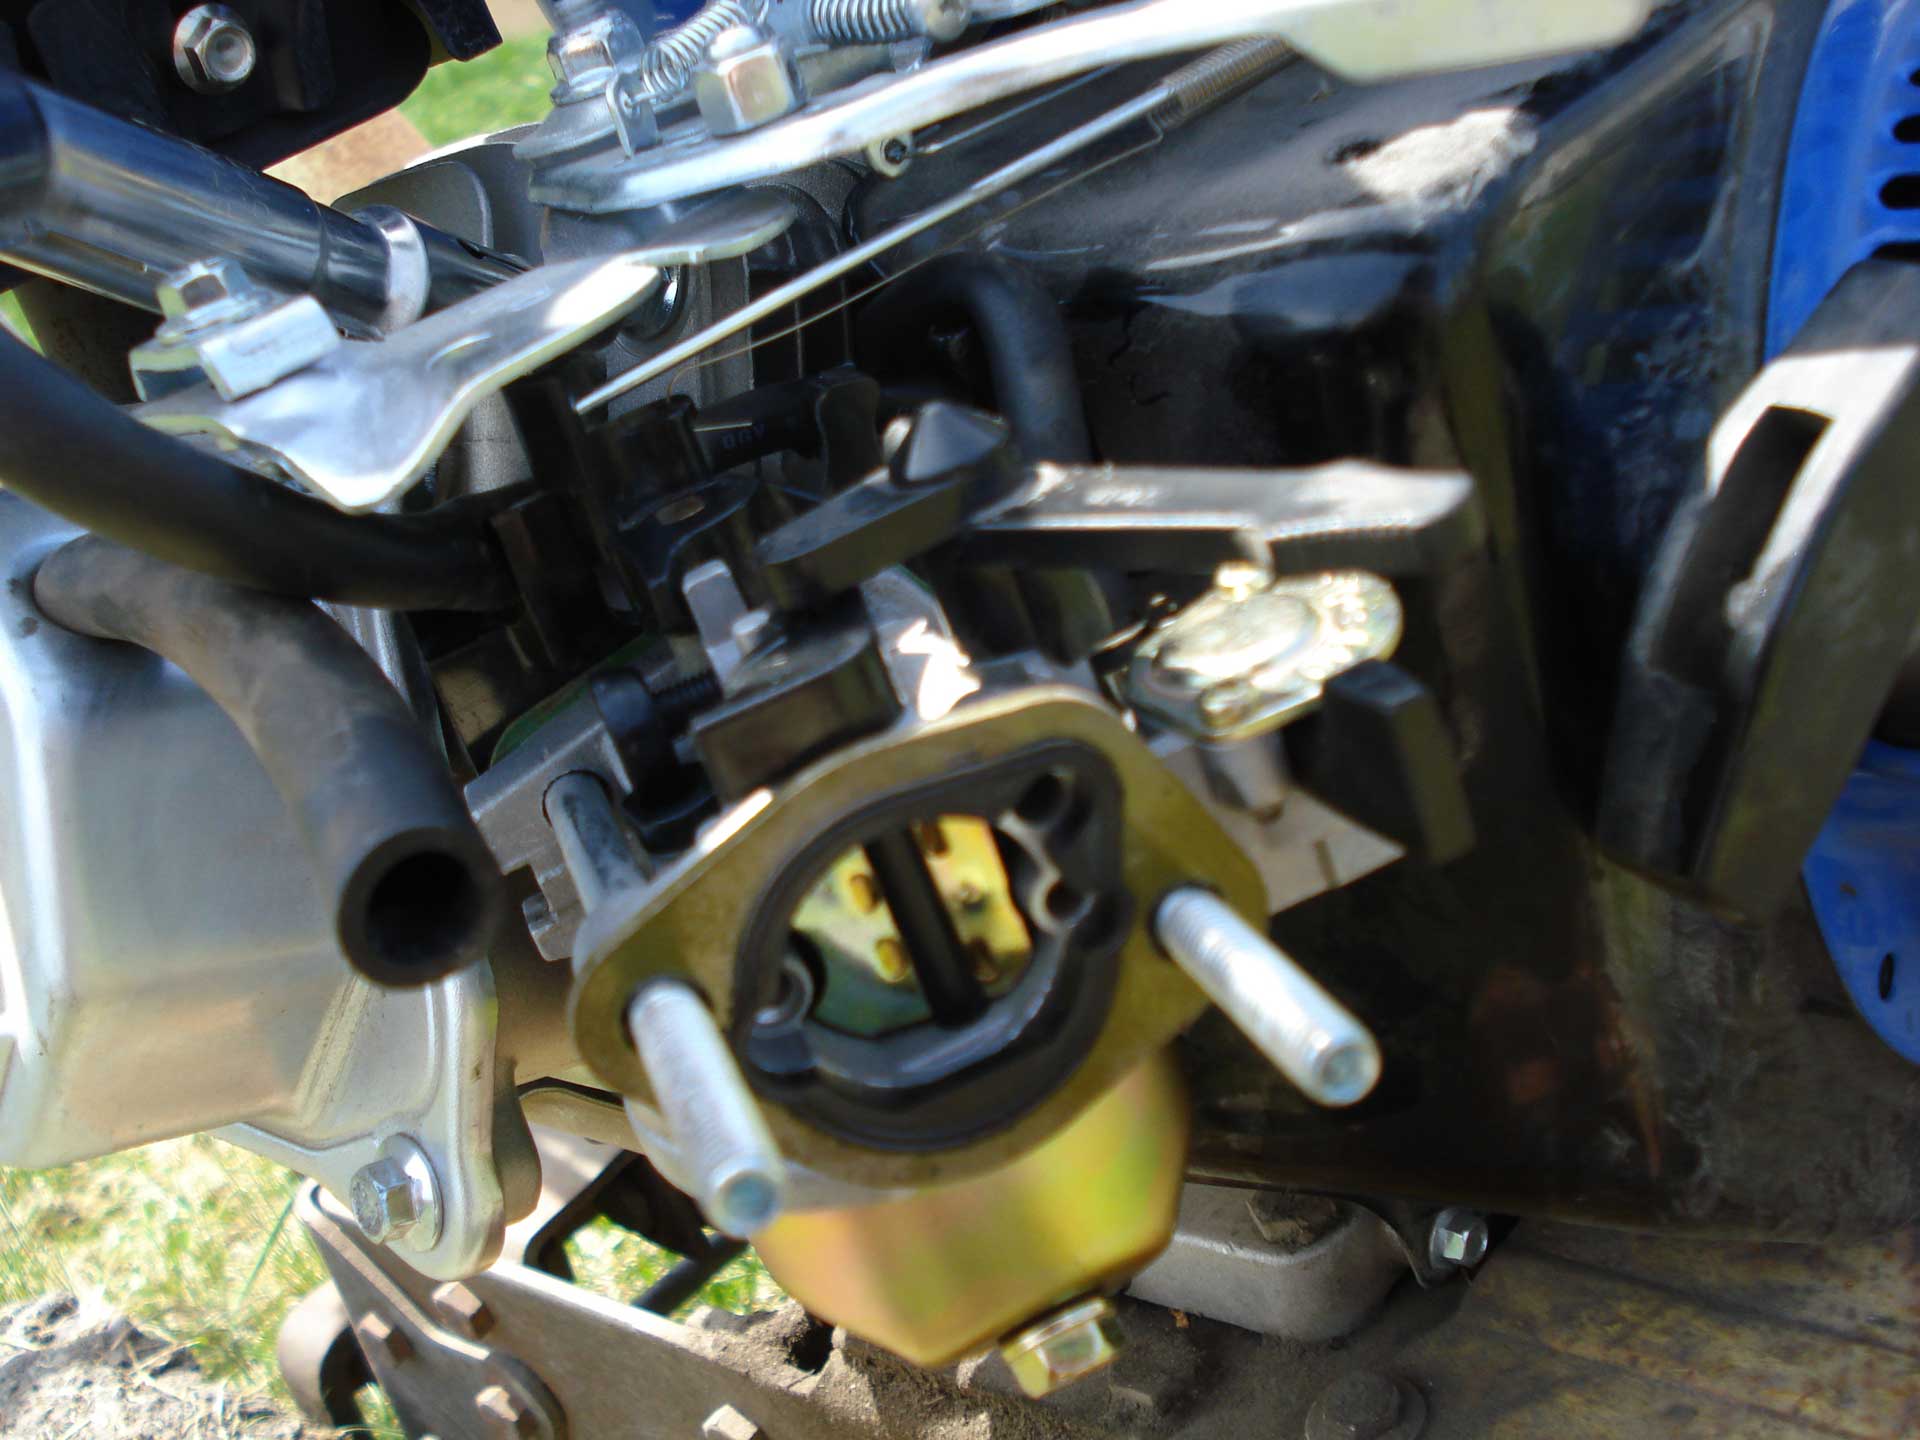
Above: You’ll see a gasket. Keep track of it’s orientation and slide it off.
Above: A little hard to see but this is where the fuel line connects to the carb. It has a stupid annoying clip that you probably don’t have the right tool for, so between your fingers and a needle nosed pliers, see if you can wiggle the clip off.
Warning: Gas will probably start pouring out of that line from the tank right away. Either have a container large enough to hold all the gas nearby, or have something handy to plug the line with.
Above: If you have a bolt that will plug the line, that’s usually the way to go. Because I was lazy, I instead pulled the valve from the top of the tank (which I mentioned earlier), put it upside down, and used it to plug the line. Note that it’s probably not great for the valve to be full of gas, so repeat at your own peril. You could also use a lightweight vice grip to just pinch the line, but obviously it’ll help wear out the line faster.
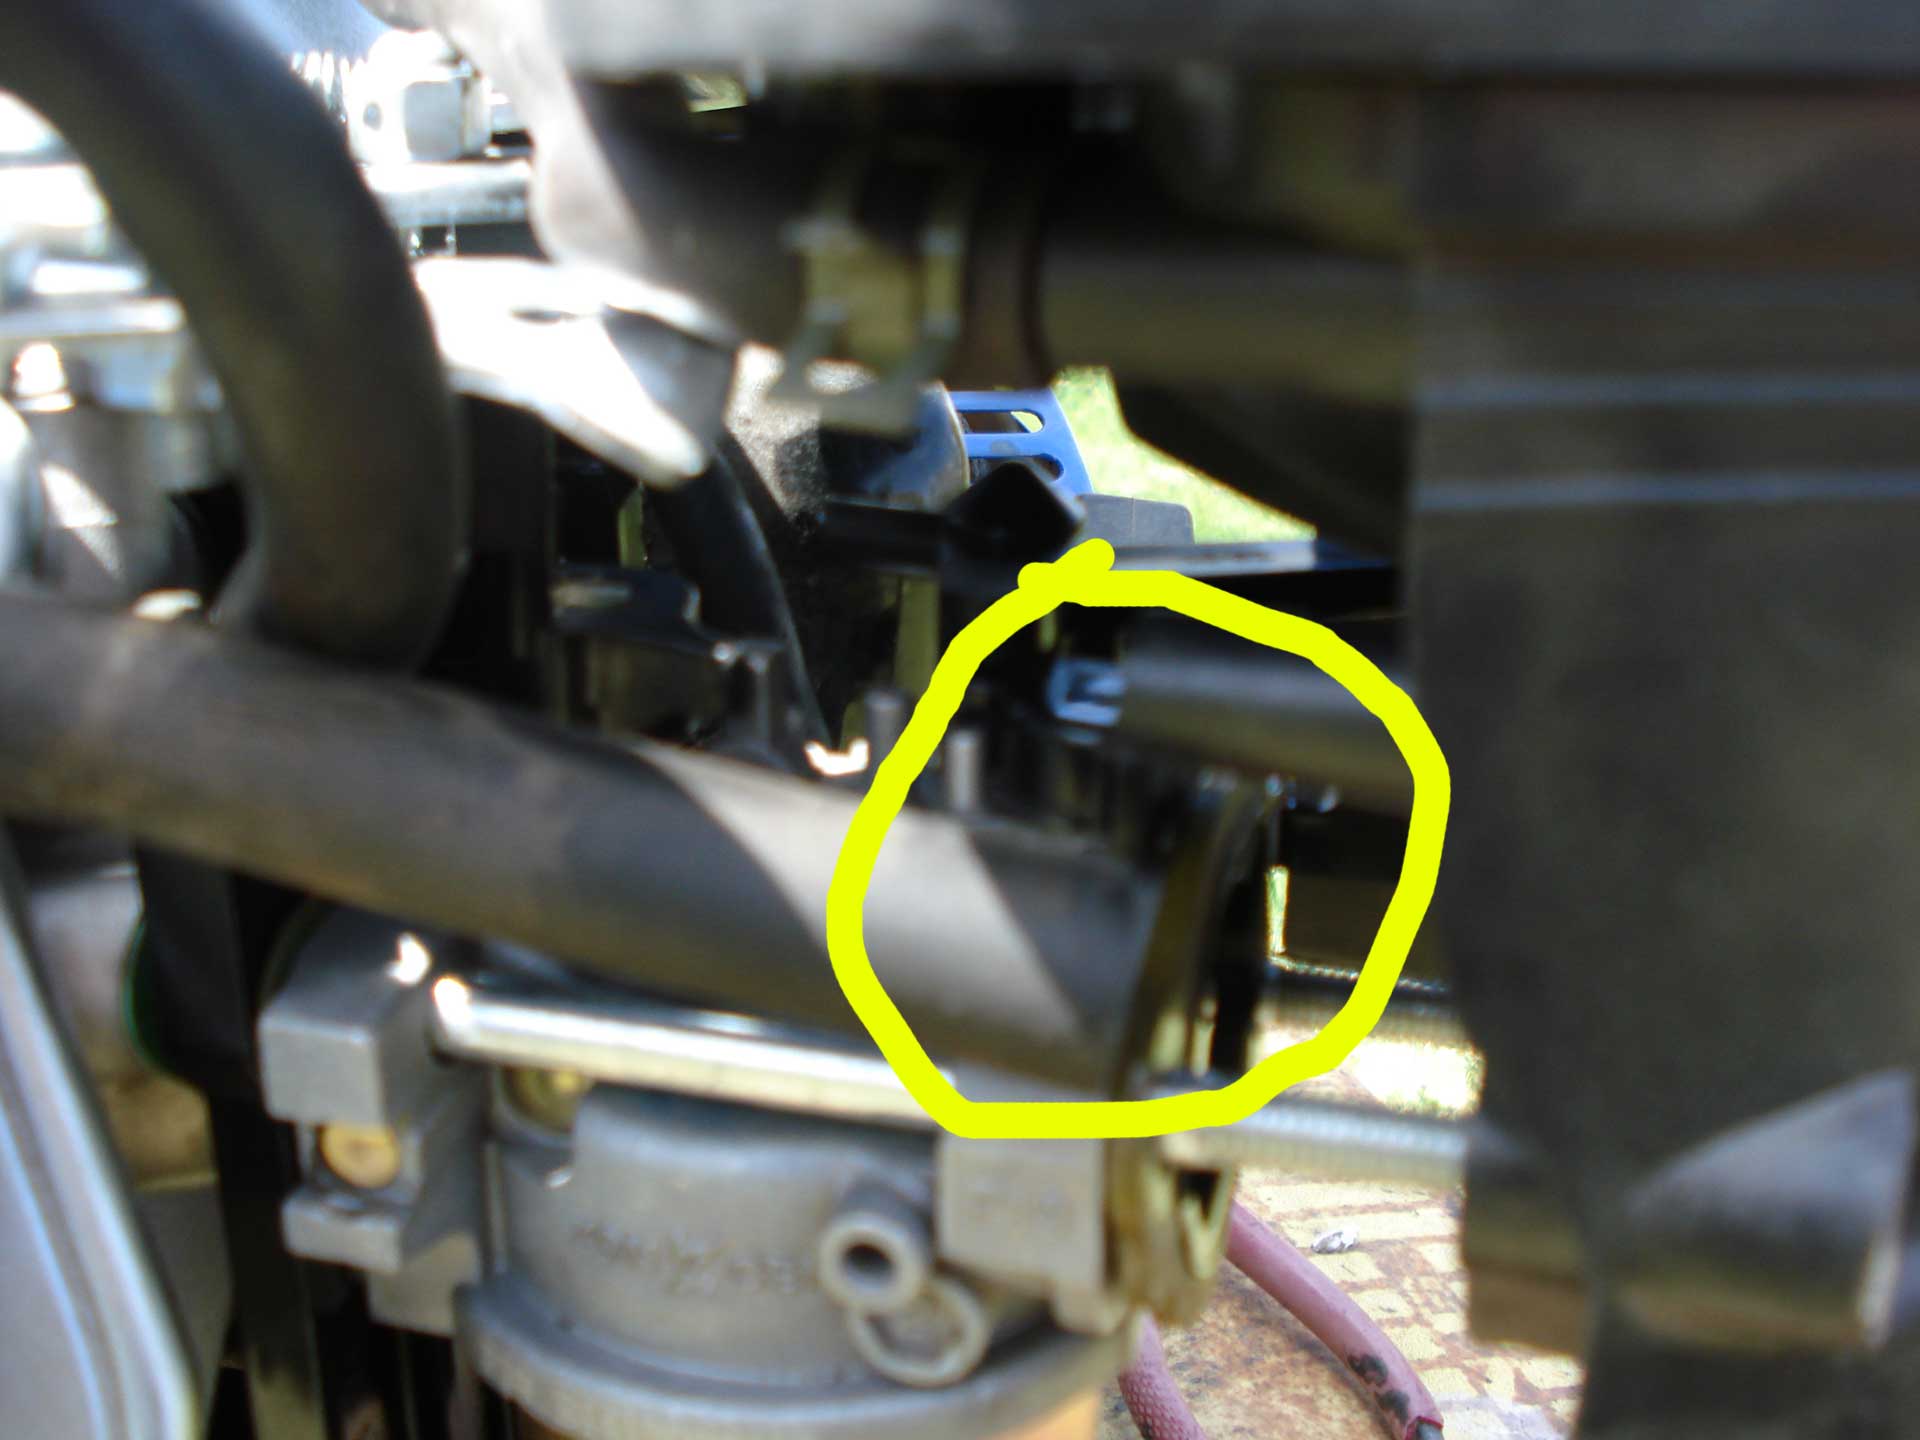
Slowly start sliding the carb out. A linkage is still connected, but the carb has to slide out a little for the linkage to disconnect.
Above: Once the carb is far enough out, the linkage should be lined up with the cut-out and can just be popped/lifted up. The spring can be removed with your fingers fairly easily.
Now you can remove the carb. Warning: The bowl is probably full of gas (unless you removed the drain plug and drained it first).
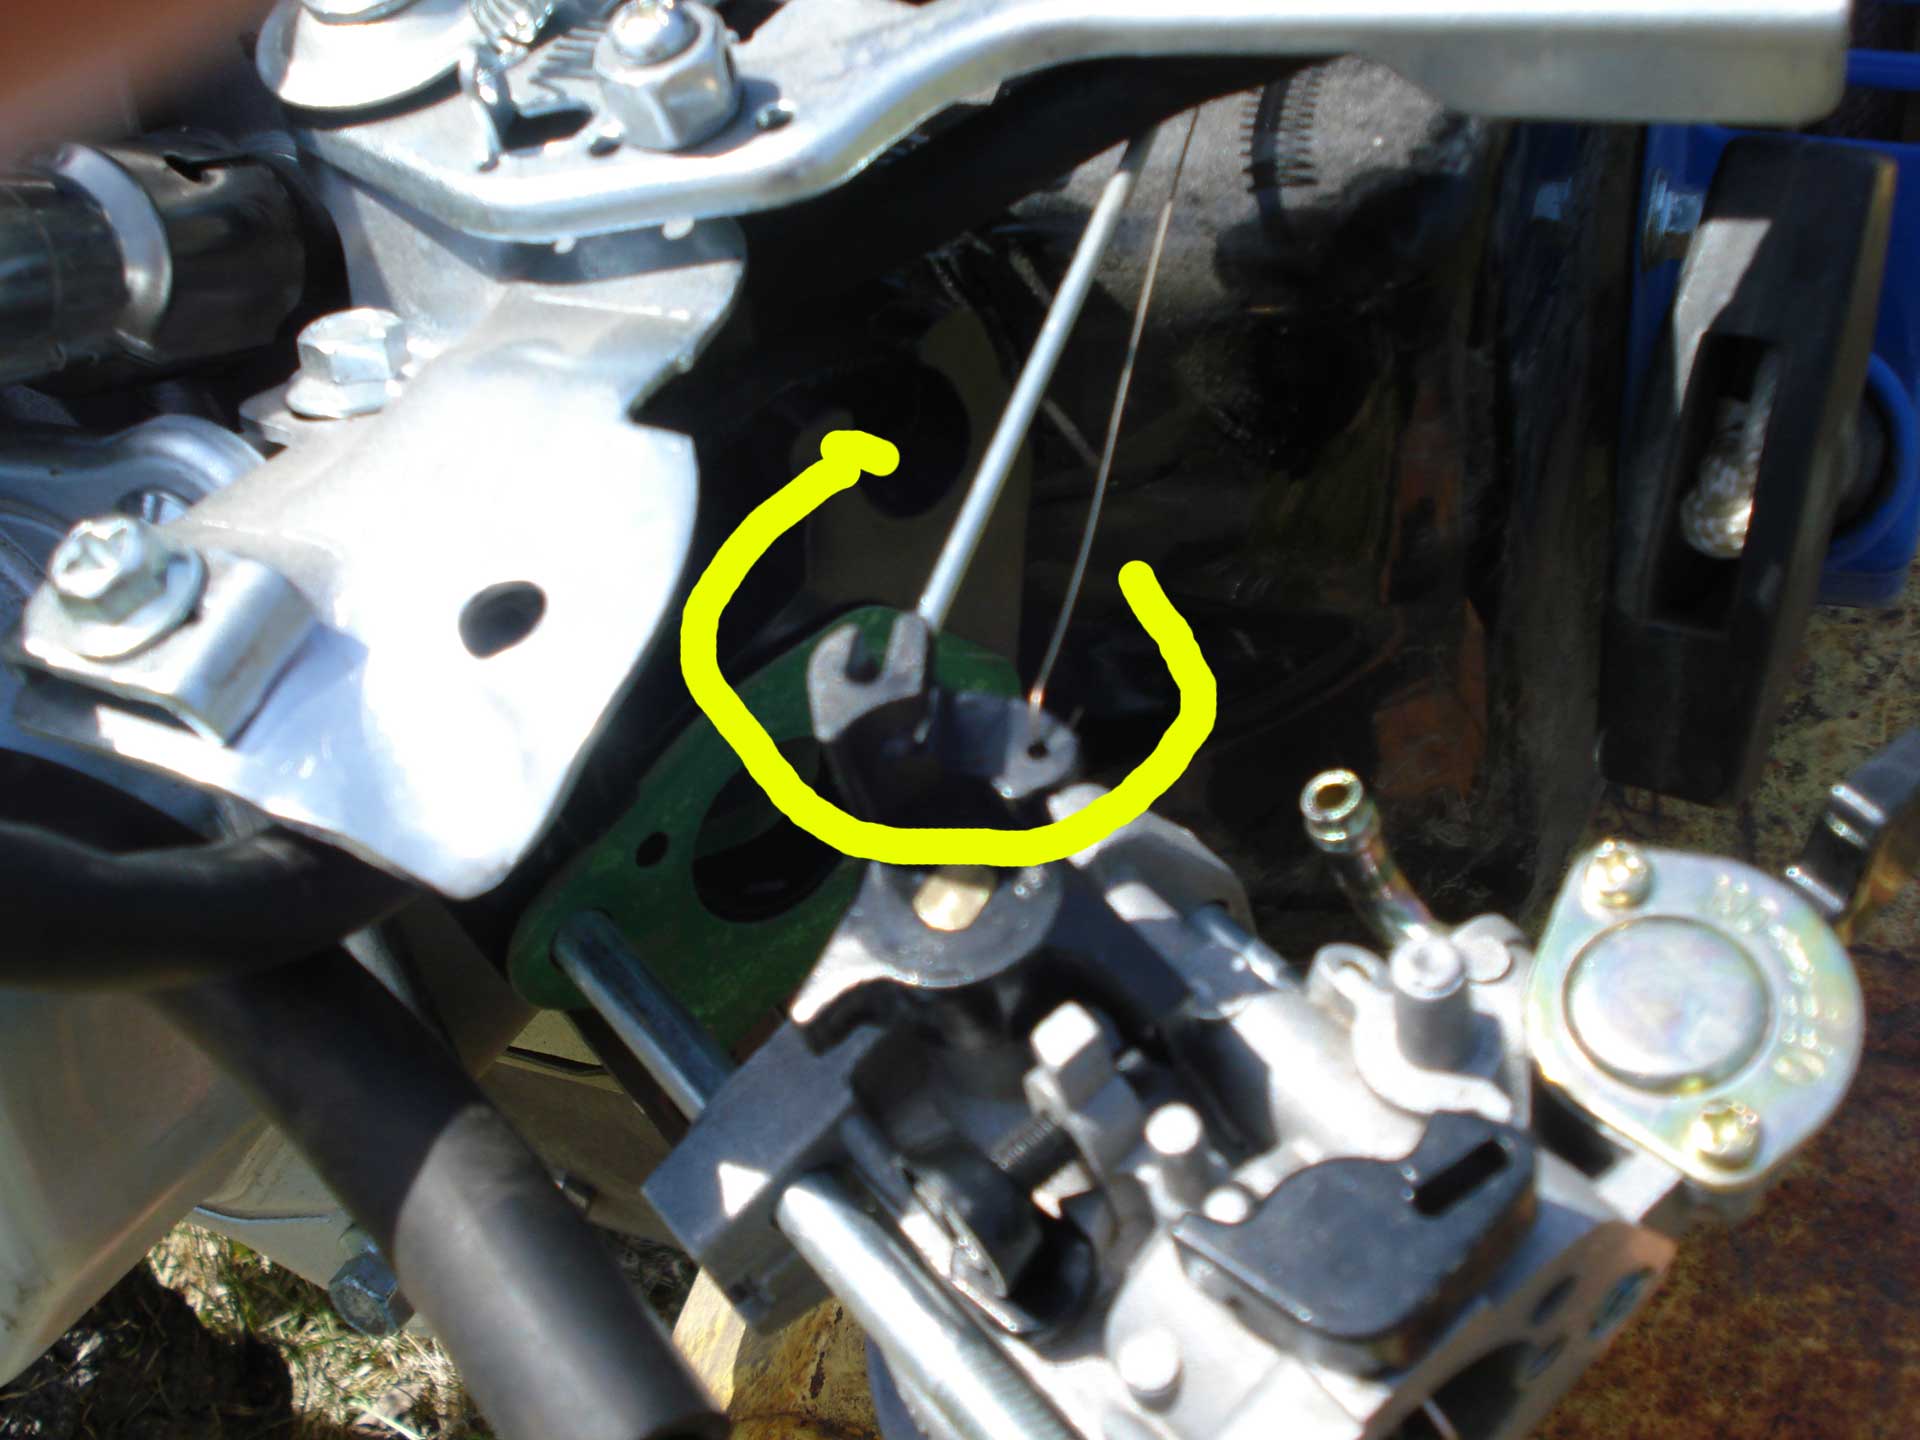
Above: A gasket is still left, and 1 more piece remains to be removed. It may not be dirty, but you can pull it out and clean it anyway if you’d like.
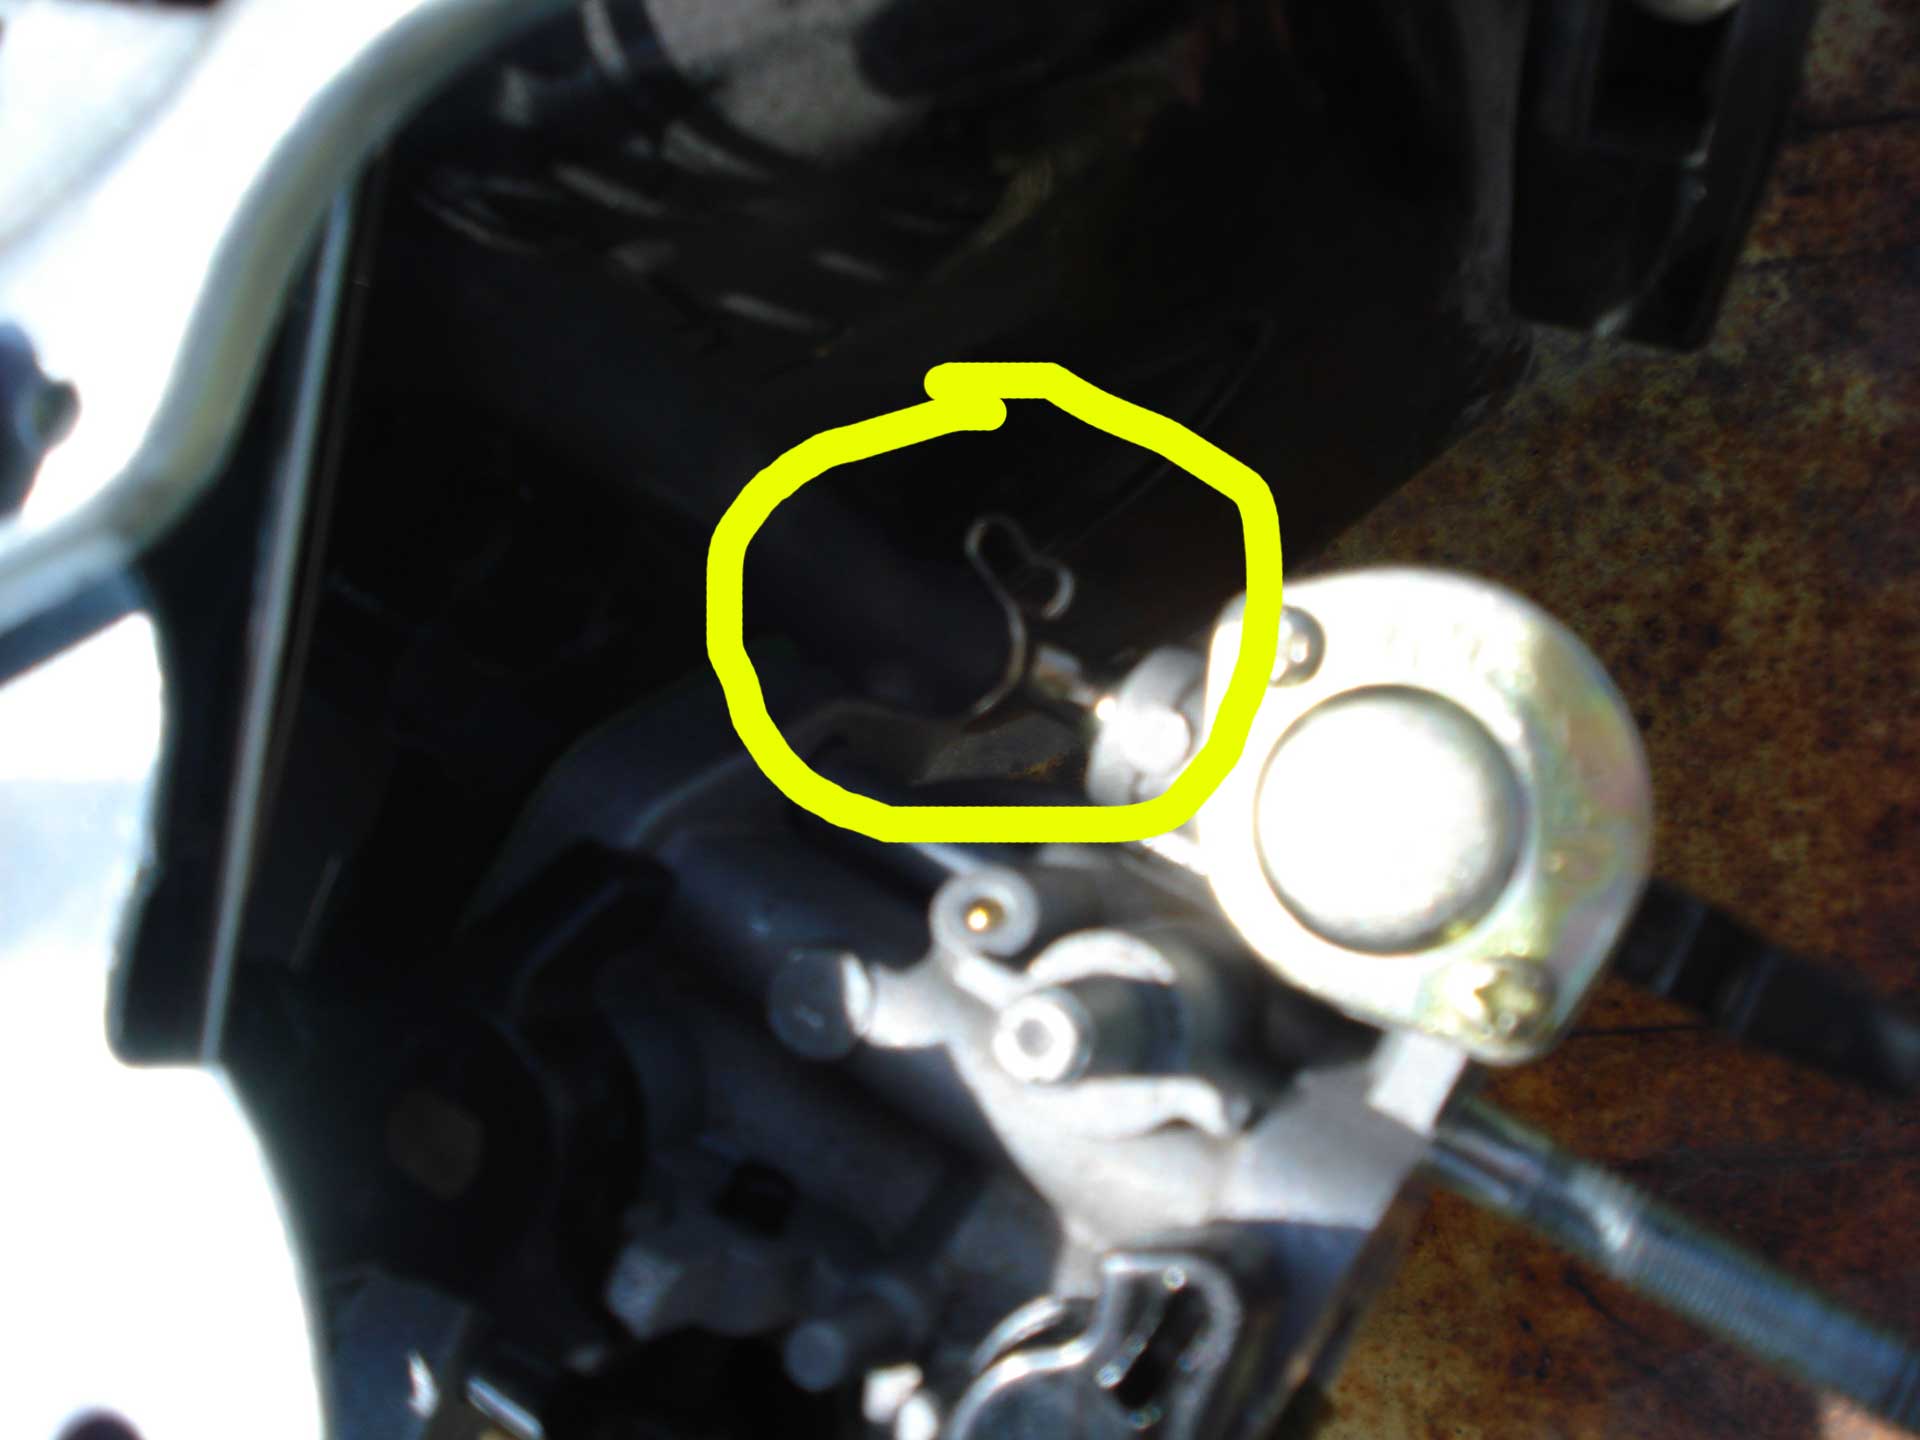
Above: Disconnect the wire/boot from the spark plug (not seen) so that the cable can be moved around. As you slide the final piece out, the spark plug cable will catch and you’ll need to fish it out carefully.

Above: Everything has been disconnected. You can leave the final gasket in place if you’d like.
Opening up the carb and cleaning it!
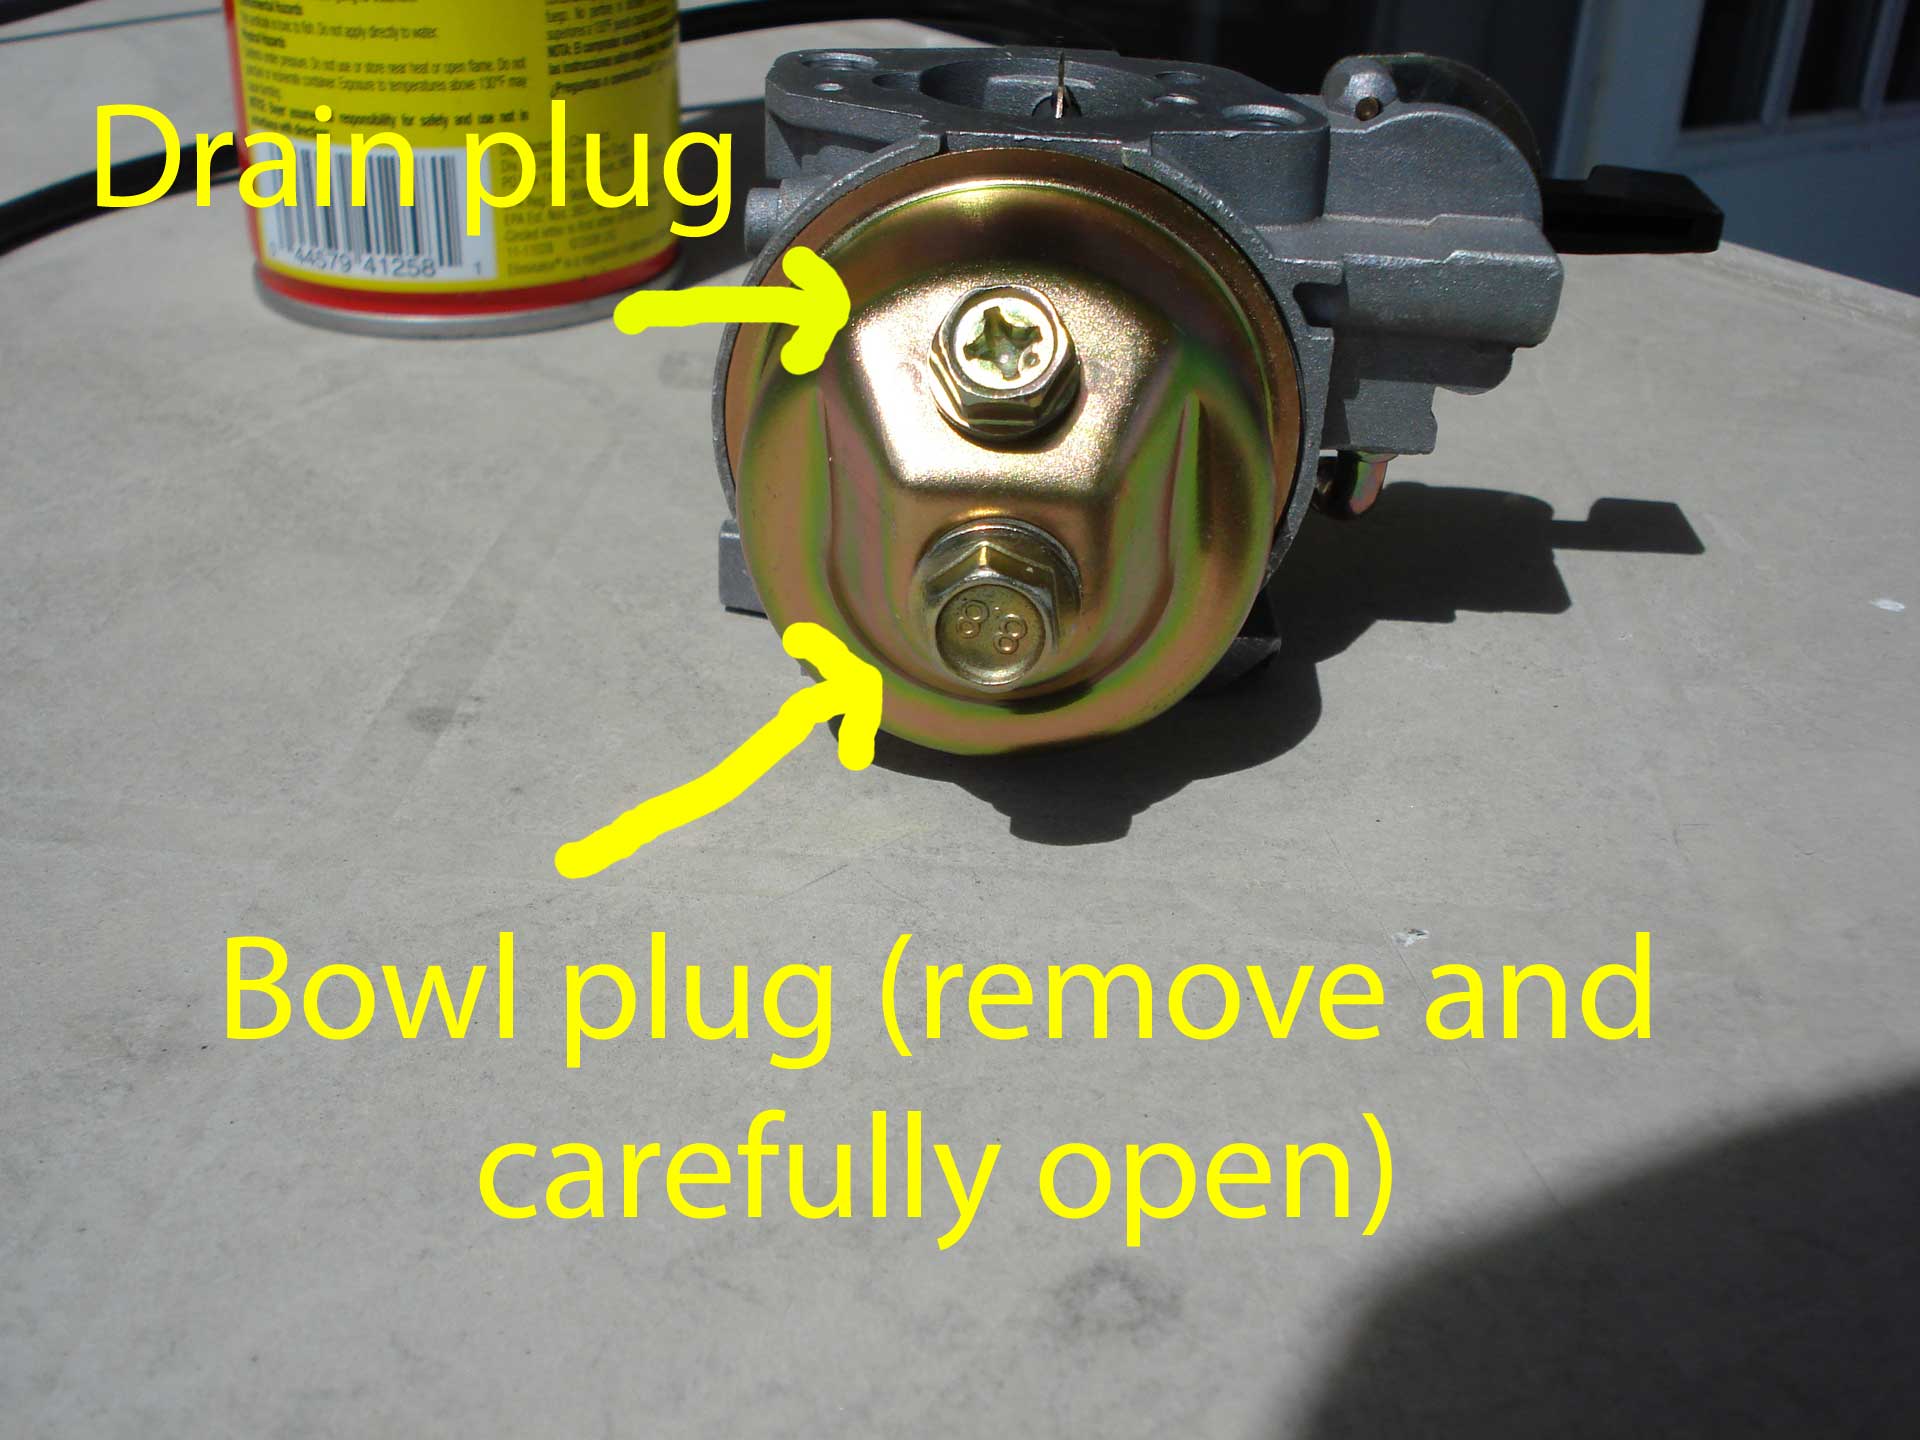
Above: If the gas hasn’t dumped all over the place yet, and you’ve managed to keep it right-side-up (not sideways like the picture) you can remove the drain plug to dump out the rest of the gas from the bowl (this is actually easiest done with the carb still installed, but hindsight and all that…). 10mm, just like the main nuts were.
Above: The bowl plug is also 10mm, and has to be removed to remove the bowl. This one can be a little tight, so if you can’t crank it off, slide the carb back on the engine long enough to crank it off.
Remove the bowl SLOWLY and OVER A TABLE in case the pin drops out – you don’t want to lose it!. There’s probably still some gas in it by the way, so don’t do it over a fancy table or one located near a fire hazard.

Above: With the bowl off, you can now see the float assembly. The pin will slide out (or probably fall out and roll under a chair if you turn the bowl sideways).
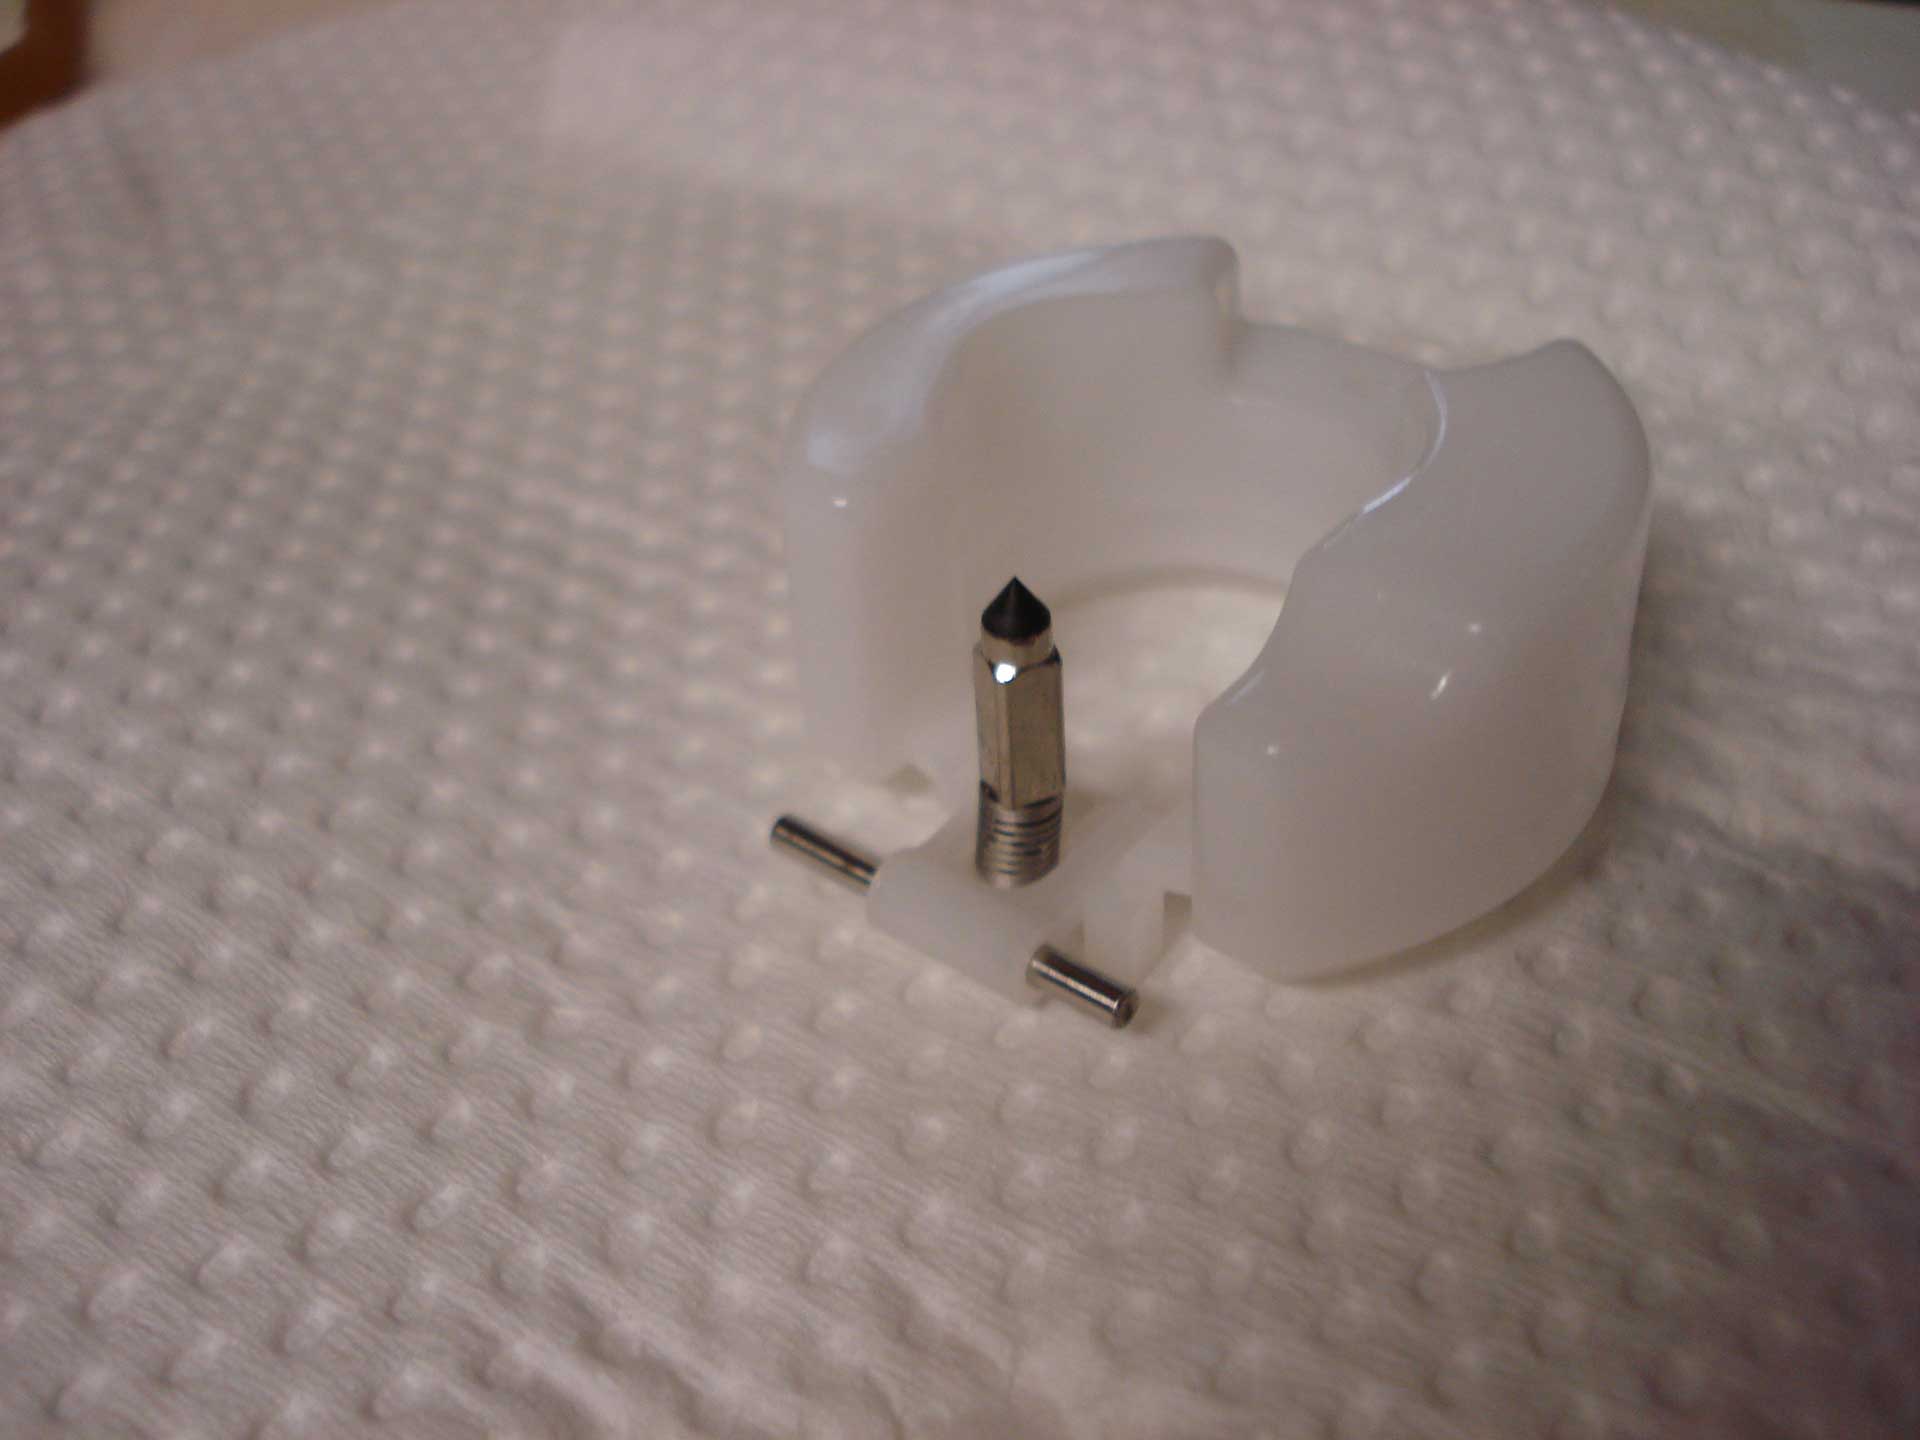
Above: A closer look at the float, needle, and temporarily-reinstalled pin. You can remove the needle by compressing the spring and sliding the needle sideways (you’ll see a slot). Don’t lose the spring!
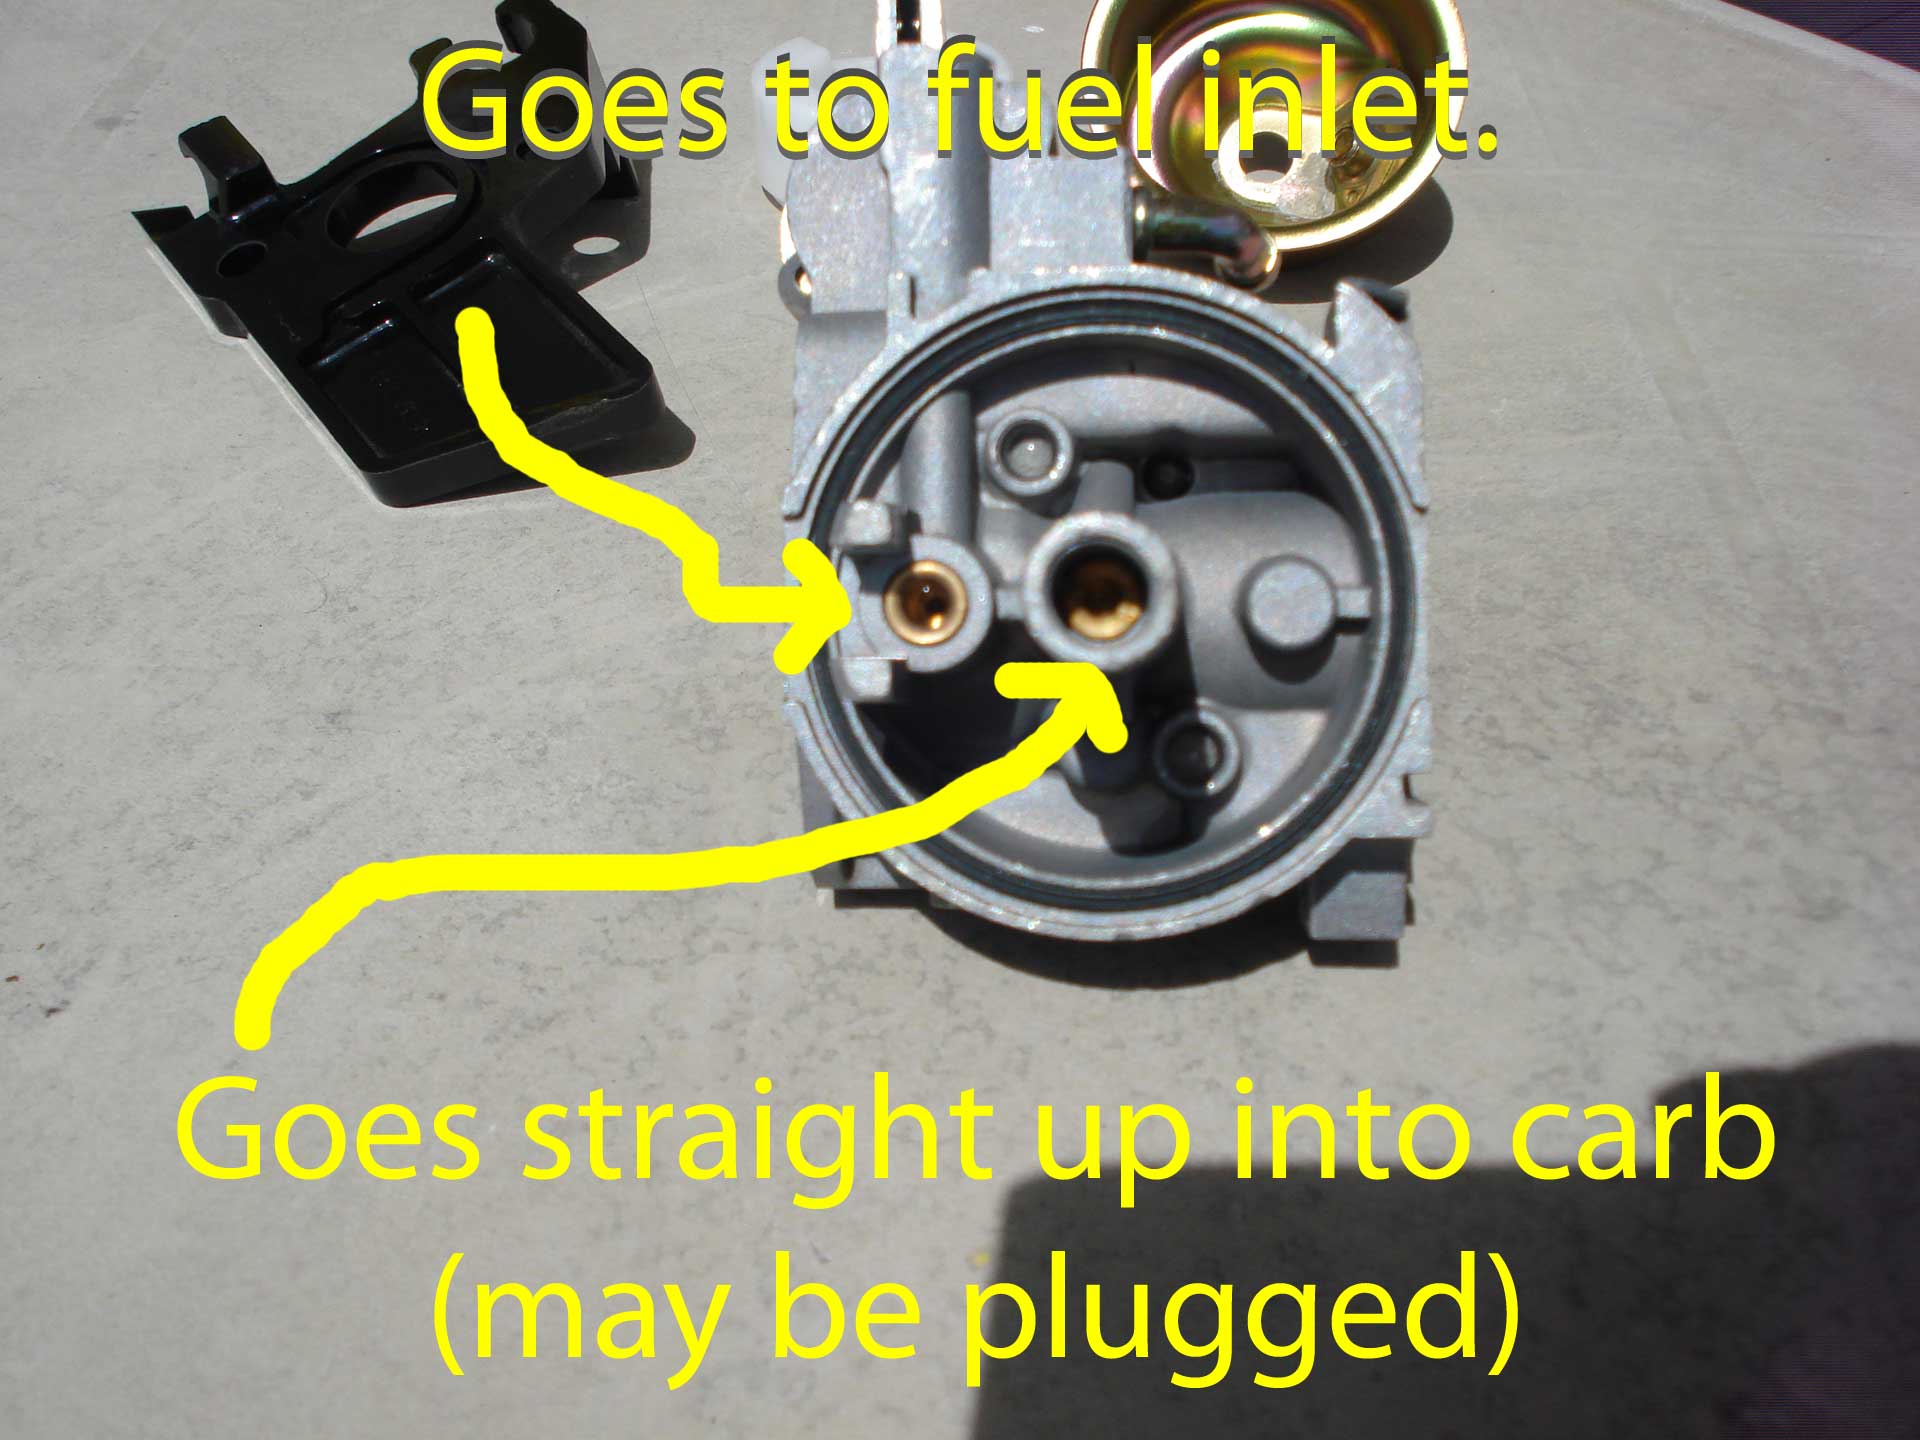
Above: The 2 channels that might be filled with gunk.
I generally like to give the whole thing a bath in some Simple Green, scrub with a toothbrush, and clear the center channel with a twist tie wire (burn the ends of a twist tie off and use the wire portion). Be careful if you use the twist tie wire to clear the center channel – if it breaks in the channel, you’re screwed. If it gouges the metal, you may have future problems. Simply using compressed air is probably the safe bet. Note that you can NOT use a wire for the fuel inlet part, as it’s curved and travels through the fuel I/O switch.
Finally I rinse with hot water, blow through both channels to ensure they’re clear, and let dry.

Above: A good chance you have some gunk sitting in the bowl. I usually bathe this in Simple Green also and scrub with a toothbrush. Then rinse with water and dry. You may want to lightly lube the bolt threads later if you do this, since the water might encourage the bolts to stick/freeze in the future otherwise.
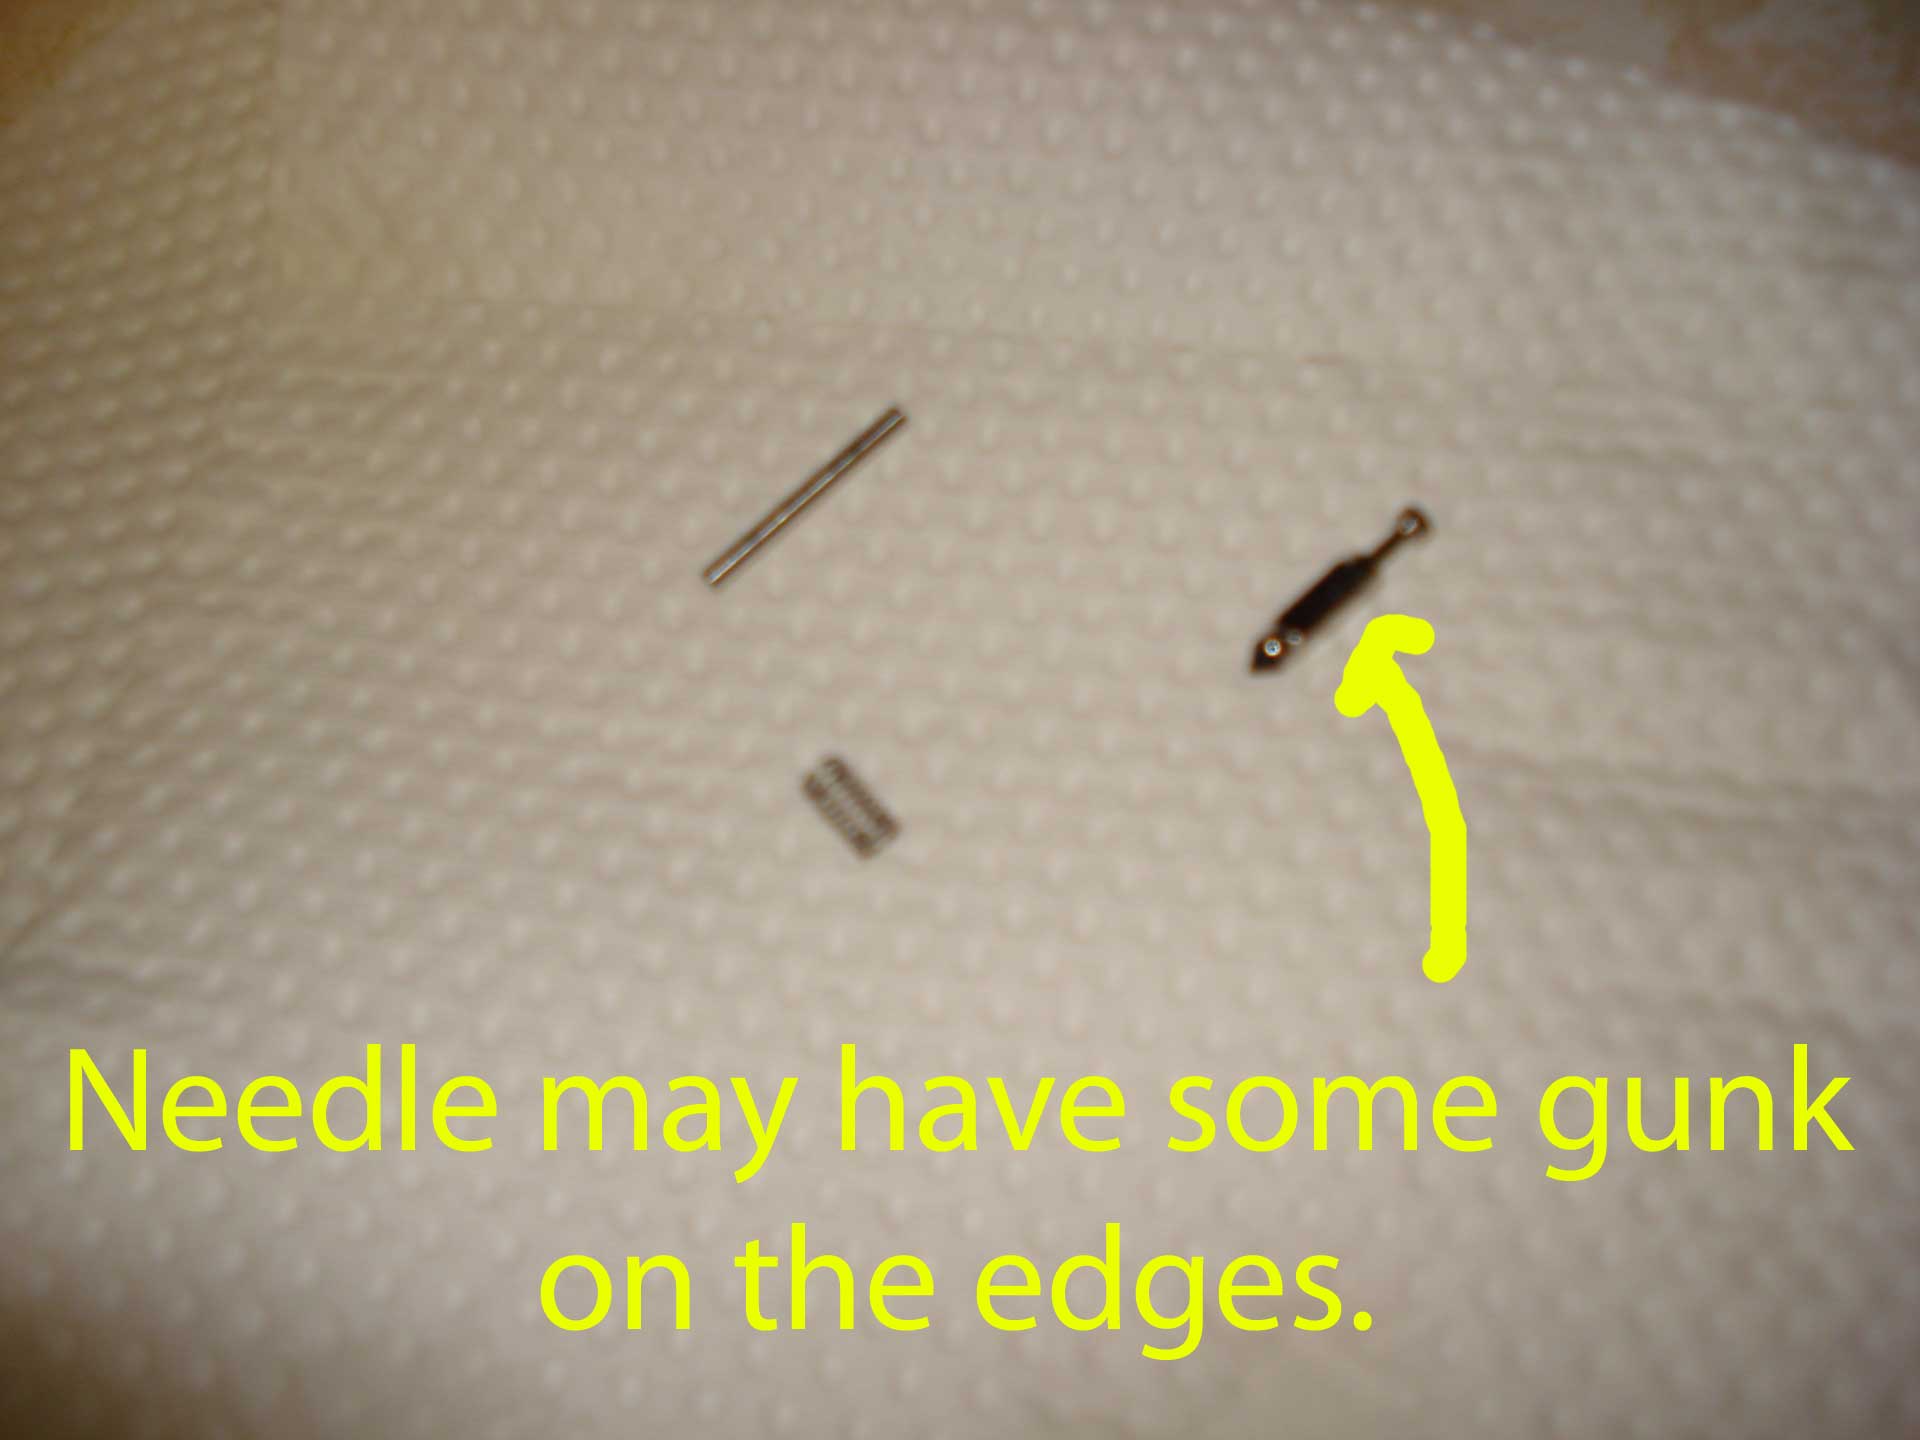
Above: The needle may also have a little buildup on the sides. On it’s own it isn’t enough to plug the carb, but you may as well clean it off so that it doesn’t migrate it’s way through and plug something else up downstream at some point. Very slight sandpaper on the sides (1500+ grit), or a little Simple Green and mild scrubbing should do the trick.
That’s it! Throw everything back together in reverse, cross your fingers, and hope for the best! A few notes:
- Make sure the 2 nuts that hold the whole assembly on are tight afterwards (although not to the point of stripping, and don’t be pinching any wires/lines). If they’re not tight enough, you’ll have a vacuum leak somewhere.
- Double check the 2 bowl bolts to ensure they’re tight enough that gas won’t leak.
- Some of the lines are a bit finicky about being positioned in the right place once everything is crammed together. If things aren’t pushing together nicely, check to see which one is the culprit and do some routing.
- Check for gas leaks before turning it on, and once it’s running.
5 Comments | Leave a Comment