Note: This is a WIP and has had a few updates. It may have additional updates in the future.
Looking for a cheap cheap cheap laptop that stood a chance of being usable, I settled for the ASUS X541NA-PD1003Y.
I was looking for something with a decent sized screen (15.6″), a keyboard with a numpad, minimum 4GB of RAM, and a modern processor. It came down to a choice between this (Pentium N4200 Goldmont/ApolloLake) or an i3-7×00 (Kaby Lake) for almost twice the price.
Initial impressions that struck me, in no particular order:
- Power brick is small (about the size of the larger AC/USB adapters).
- Power connector had to be pushed hard to click into the laptop power port.
- No USB on the right side, meaning a wired mouse cord has to run across the front or back.
- Decent speaker positions (above keyboard).
- Screen is glossy so expect reflections if there are light sources around.
- Odd keyboard… see picture below.
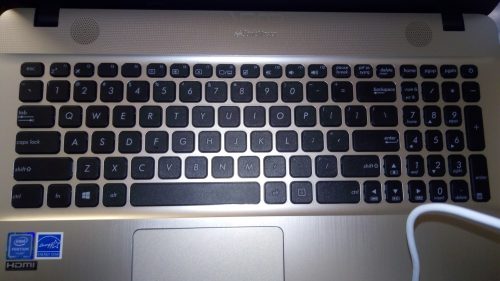
A few major things stand out about the keyboard:
- It contains the power button (top-right key). Possibility of accidentally hitting it while using the numpad, but not a huge concern.
- All the dual-characters (number/symbol, colon/semicolon, etc) are printed middle/top, as opposed to standard keyboards that use bottom/top. Doesn’t matter when blind-typing, but if looking for a key, it takes some getting used to. Note that HP keyboards are laid out in a similar fashion.
- Arrow keys bleed into the numpad. Again, takes getting used to. I prefer this to the HP half-sized up/down arrows which are painful to use, but don’t like it as much as the Dell arrow key layout.
I’ll leave physical observations there, since the big publications tend to cover that sort of thing in great detail.
Windows, bloatware, the first boot, and yes the random restart issue.
If you’ve read enough reviews about this thing, you’ve probably come across the following at some point:
- Horribly slow.
- Randomly restarts.
These are true. For some reason ASUS decided that throwing a bunch of bloatware on the machines was worth it, even if it meant a bunch of them would end up being returned.
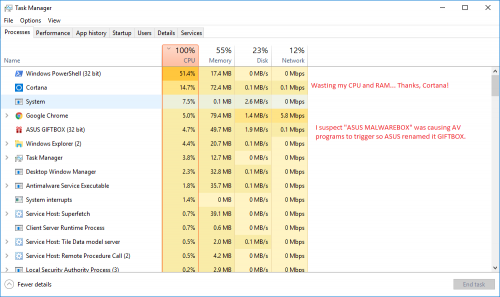
When the bloatware isn’t actively running, the machine is actually quite responsive and snappy. It still slows to a crawl when Windows 10 is doing it’s own bloaty stuff (pushing updates, sending your data to Microsoft, etc), but when Windows is “idle” and the bloatware is “idle”, the machine’s really solid.
The down side is that when Windows is “busy” at the same time the bloatware is “busy”, the machine is brought to it’s knees.
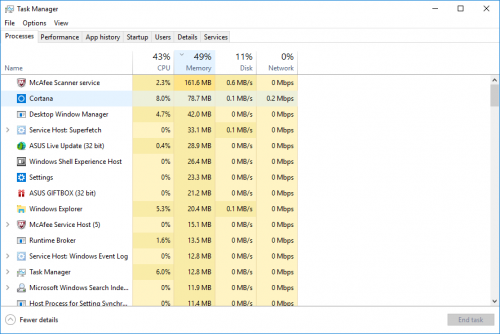
Above you can see some of the inherent wastefulness of your resources that Microsoft and ASUS teamed up for. This is after the initial period where they both thrashed the system and kept it at 100% load.
Random Restart – I did experience this. Just before the restart, the CPU usage pegged for a few minutes, the system became almost totally unresponsive, yet NO PROCESS was listed with high cpu usage in Task Manager. This means it’s either a hidden Windows process, a Windows bug, some hidden ASUS bloatware, or some really really odd hardware bug. I’m guessing it’s not a hardware bug.
Before someone asks why I’m pointing to Windows and/or ASUS mucking things up behind the scenes, I did some stress testing in Linux and couldn’t reproduce it. I then went on to do some stress testing in Windows and again couldn’t reproduce it. If anyone suspects power delivery, note that in this case the power adapter’s rated for ~33 watts, CPU power throttling correctly kicks in at around 10w, and the battery was charged.
I’ll continue to keep an eye out though, and update if I come across anything further.
Beating the Bloat: Option 1: Using Linux
At this point you might be thinking “I’m not sure if I want Windows 10. It sounds like slow garbage”. Fair enough. Ubuntu 17.10.1 running from the Live USB image was really snappy FWIW.
Trackpad worked perfectly with stuff like 2-finger scrolling, tap to click, etc all working. The only thing I had to muck with was the scroll direction (similar to Windows it uses “natural scroll direction” by default which I dislike and changed).
Wireless, bluetooth, and sound were all detected automatically and worked. Using Function+Volume also worked. I didn’t test beyond that (there are a few function buttons), but will update if I do.
In any case, Ubuntu was a really clean, hassle-free, “it just works” experience.
Update: If a mouse is not plugged in (trackpad only), I found that the trackpad will stop responding in Ubuntu 18.04 after waking from sleep. If you generally don’t have a mouse plugged in and are using Linux, you may want to consider disabling sleep.
Beating the Bloat: Option #2: A clean Windows 10 install
I’ll assume not everyone is going to put a Linux distro on the machine. Whether you’re on Windows by choice or by necessity, you’re certainly not alone. Windows still owns the vast majority of the consumer market.
The good news is that a clean install really helps with the CPU usage.
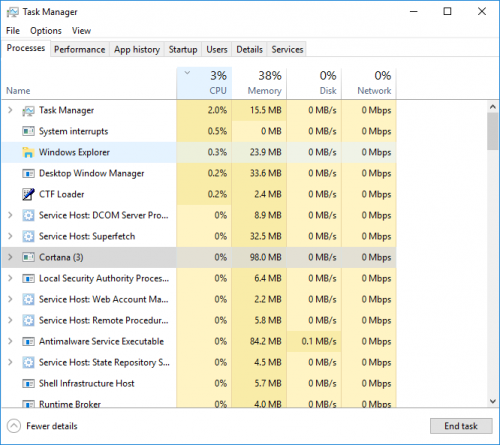
Ok, so I had to cherry-pick that a bit. OneDrive thrashed the CPU for a few minutes on startup, and the various Windows processes like to burn 30-50% CPU randomly for periods of time, but the end result is a much calmer, lower (overall) push on system resources. No ASUS bloatware.
So how do you get there?
A couple popular options are either using “Start Fresh” ( https://www.microsoft.com/en-us/software-download/windows10startfresh ) or creating fresh installation media ( https://www.microsoft.com/en-us/software-download/windows10 ) and doing a full wipe/install that way.
I opted for the latter – a full wipe/reinstall.
The bad news: some function keys were inactive after the reinstall. For example, changing the brightness moved the on-screen meter but the brightness didn’t actually increase/decrease. Updating the driver resolved this, but you may run into other quirks.
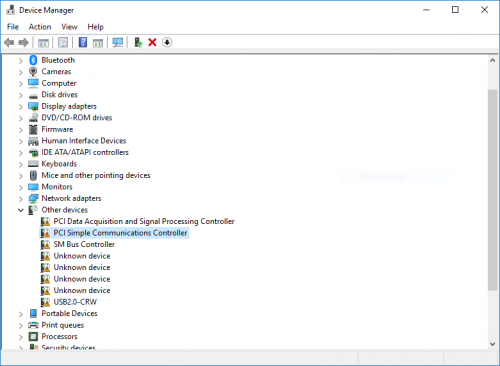
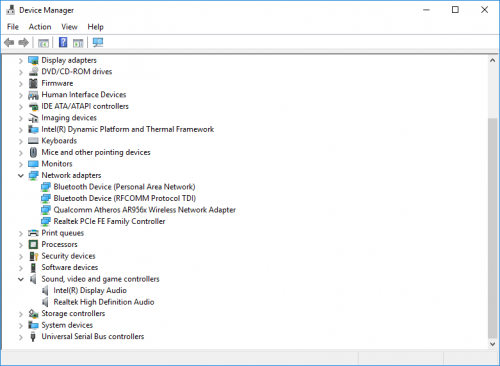
After the lengthy install process (where I removed all partitions and then created a new one), Windows detected the wireless adapter on the fresh install and would allow connecting to the internet, but a few non-network items were missing:
…each of these can be found (again in Device Manager) by right-clicking and choosing “Update Driver”. Let Windows search online and it finds the item. You have to do this for each item so depending on your internet connection speed, plan for 5-15 minutes doing this. Also, manually update the Display Adapter (it may show as “Microsoft Basic Display”) if you want adjustable brightness to work again – it’ll say “Intel HD Graphics” once updated.
While you shouldn’t have to visit the ASUS site to get the drivers for these missing items, if you want to grab any ASUS stuff you feel may be missing, the site is: https://www.asus.com/Laptops/X541NA/HelpDesk_Download/ .
One bit worth noting since I didn’t mention it previously: I always turn off all “options” after the install (it asks about location, sending data, using Cortana, etc). I did this both on the initial install and the fresh one. If you turn them on, expect a bigger hit on your CPU usage.
Entering the BIOS, booting from USB stick
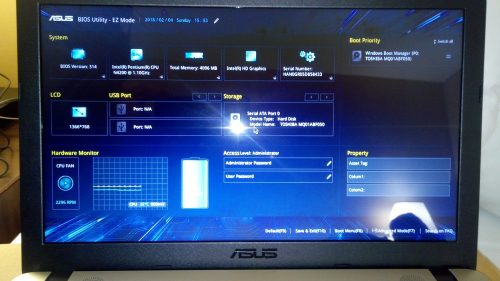
If at some point you need to get into the BIOS (say… to allow booting from a USB stick with a fresh Windows or Linux installer), you do so by holding down F2 and *then* powering on the laptop while the button is held.
Once in the BIOS you can press F8 to get the boot menu.
There’s also an advanced menu (F-keys are listed in the bottom-right of the BIOS screen), but it’s pretty minimal.
Some other tech bits in case you’re researching laptops
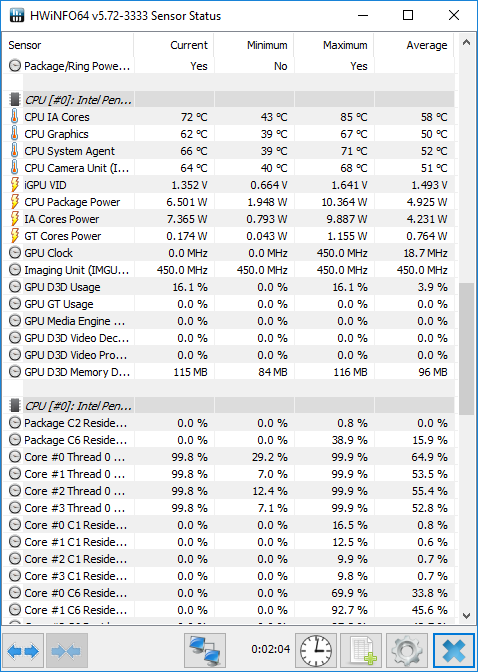
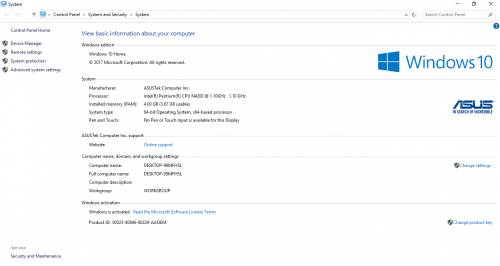
The most interesting bits are:
- Ethernet is a RealTek RTL8101/2/3
- Wireless is an Atheros/Qualcomm AR9565
- Bluetooth is also Qualcomm
- CPU Temperature can actually get fairly high… Note that this *was* while running a stress test, but I certainly didn’t expect 85 degress C from the low power N4200, particularly since the unit’s also got a fan. I’ll have to check out the heatsink at some point (update: I did, it’s further below).
Windows Casual Gaming – a few results
I was curious how the Pentium N4200 would fare in a few games at the native resolution. And not just any N4200, but the one in the ASUS X541NA. I make the distinction because different manufacturers/models can have different power level limits set – the X541NA seems to kick in at around 10W for example (though TDP is listed as 6w and a long duration power limit at 7w/28s). Other tweaks and design choices could have other impacts as well.
So it’s an area where you can’t necessarily look at results from Dell Laptop A and assume ASUS Laptop B will be the same, even if they both use the same N4200. Similar sure. But a manufacturer who capped their N4200 at 6w won’t put out the same as manufacturer who capped at 10w or didn’t cap at all.
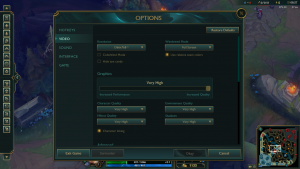
First up: League of Legends

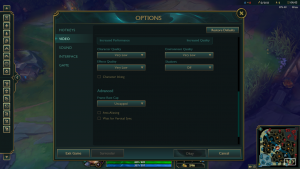
Very Low – ranged between 60-70fps

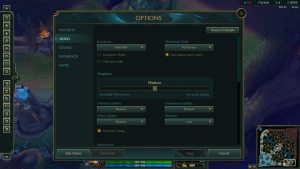
Medium (default) – ranged between 50-60fps
The Windows Game overlay for screenshots dropped the FPS seen in the images a bit. The text represents what I actually saw without the overlay running.
Since I was using a trackpad and didn’t want to enrage a team, this was a 1v1 bot game. So it isn’t representative of a typical 5v5 when there’s lots of action and framerate can drop. But it should give a rough idea for a start point. Short version though: LoL is absolutely playable on this laptop.
–
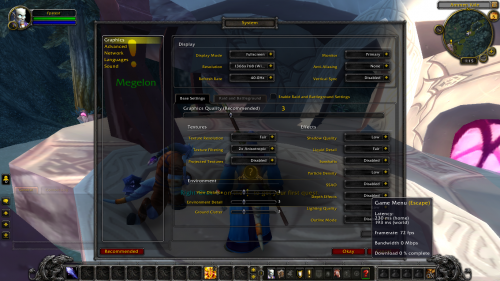
Next up: World of Warcraft
Default settings except that Fullscreen was used instead of Fullscreen (Windowed).
While 72fps is shown, wandering around it tended to fluctuate in the 40-70fps range. Very playable, but keep in mind this was in a starting zone.
Going to a busy area (Stormwind in front of the AH), frame rate plummeted to around 25fps. Reducing the graphics settings to minimum didn’t help enough to be measured (maybe 1-2fps?). Changing from the default DirectX11 to DirectX 9 only brought the framerate was similar (1-2fps?), but since DX9 is on the chopping block for future versions of WoW right now anyway it’s hardly worth a mention.
All that said, the game is certainly very playable – I’ve played (and raided years past) on much worse.
The Best Tower Defense*: Alarameth TD
* My game. “Best” is subjective.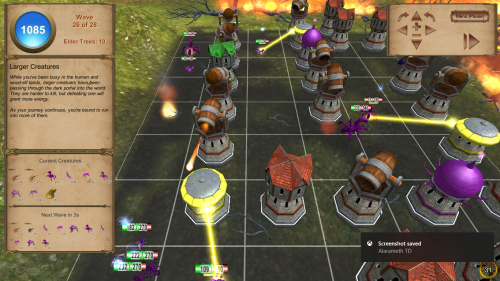
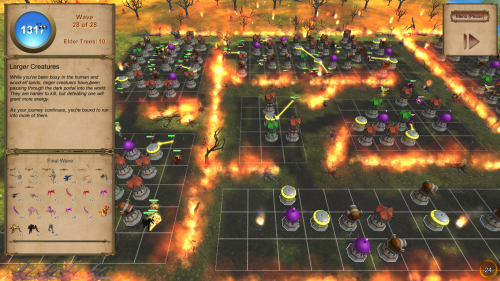
At the default setting, frame rates start at the v-synced 60fps and generally stay that way through the early waves.
I’d developed this game with low-end systems in mind a couple years ago (pulling out every optimization trick in the book during development), so it (unsurprisingly) performs pretty well.
When it comes to later waves, I chose Level 2 here because it can get quite busy with a lot of creatures and potentially a lot of towers as the level progresses. In other words, it’s a “worst case scenario” for fps.
I also cheated to place more towers than you’d normally have, further increasing the polygon count and putting even more strain on the system. As you see reflected in the built-in fps meter (bottom-right), I bottomed out in the 20-30fps range here. The game continues to be very playable here.
One final game: Civilization 5
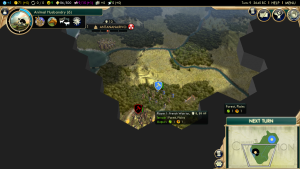
The default video settings in Civ 5 make things really janky. Huge lag in the “Next Turn” button region, notably choppy panning of the world, etc.
Turning the video settings down to the minimum took a couple attempts: the final 2 options glitched out and couldn’t be changed, so I had to completely exit and restart the game.
The good news is that once everything’s at the bare minimum, the game runs well and is really snappy in the early turns. I didn’t play to late-game but if past history is any experience, you can except things to progressively slow down as the game progresses.
There isn’t an always-running FPS meter so I don’t have specific numbers. But overall, once video settings are dropped to the minimum: it’s very playable.
Gaming summary: Competitive with other Intel iGPU systems
The Pentium N4200 comes with the Intel HD 505 for graphics. Compared to the HD 520 and 530 found in the Skylake i3/i5/i7 models, it has 75% of the execution units and roughly the same percentage in clock speed.
When it comes to games, expect most of the common mass-market games and indie games to run at minimal settings. Basically if other people have been playing something on non-exotic integrated graphics, expect that you probably can too.
On the other hand… games that haven’t been optimized for mainstream use (looking at you Hitman 2016)… stuff that absolutely needs at least mid-range dedicated graphics to have a chance of running acceptably… I speak from experience here when I say “don’t get your hopes up”.
For being such a low-cost machine, the X541NA actually does quite well, all things considered. Performance vs price, this thing really has a nice ratio for casual games.
Disassembly… getting a look at the HD and RAM accessibility.
Unlike a number of other laptop models, the ASUS X541NA is not really meant to be disassembled. It’s not exactly the easiest thing to disassemble either. But here goes.
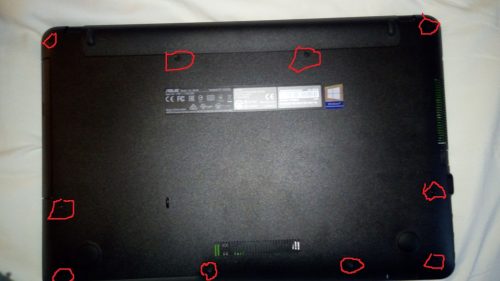
It starts with 10 screws on the bottom. The 4 on the front (thinner part of the bottom) are shorter than the others.
Next, the keyboard gets pried off. Forgetting a screw increases the chance that the keyboard will be snapped off rather than pried.
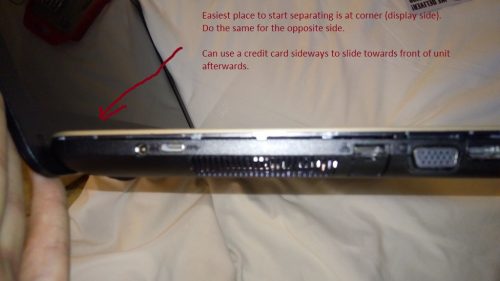
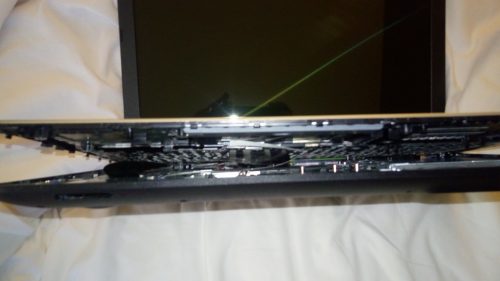
I tried various positions on the laptop – the rear corners (near the screen) were the easiest place to start. A fingernail or something else thin and non-metallic can get a bit of a space between the keyboard and bottom – once I had enough space to slide a credit card in, I got it in and slid towards the front, with the plastic clips popping free along the way.
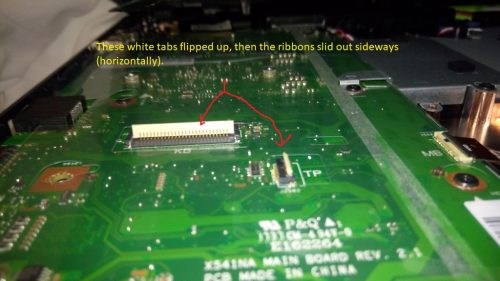
With the keyboard unclipped, there are 2 ribbon cables that have to be detached before the keyboard can be removed. They’re towards the left in the picture above – the picture didn’t take well, but you’ll see if them you’ve got the laptop opened to this point.
For the ribbons to come out, each has a white latch that has to be flipped up first. Here’s what it looks like with the ribbons removed:
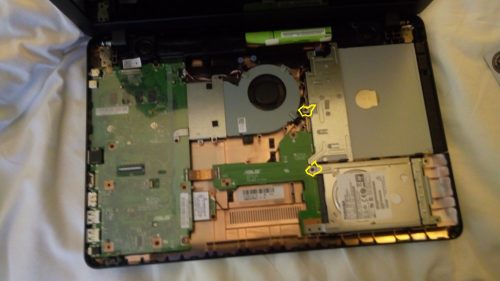
If you’re looking to remove the hard drive and/or optical drive, it’s just 2 screws from here:
With those 2 screws removed (positions circled in yellow above), the drives have to be slid out of their SATA connectors. They slide to the right side, with the hard drive caddy coming with the hard drive.
RAM – Not upgradable!
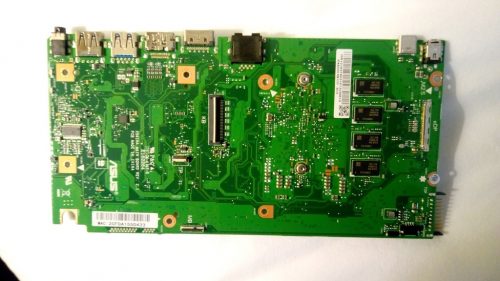
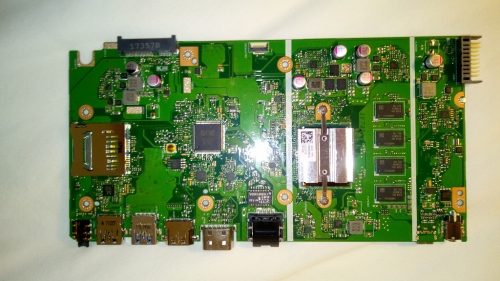
This was a bit of a disappointment. There’s no RAM socket – the 4GB are soldered into the motherboard.
So there’s no point in removing the motherboard unless you’re either:
- Looking to upgrade the CPU heatsink (may need something custom).
- Wanting to remove the battery (the connector tucks below the motherboard pins, thus the motherboard may have to come out if replacing battery).
I won’t go into the screws and extra cables that have to be removed, except to say the screws are different sizes and the display cable is taped. You probably shouldn’t tackle motherboard removal unless you’ve done a few laptops like this before.
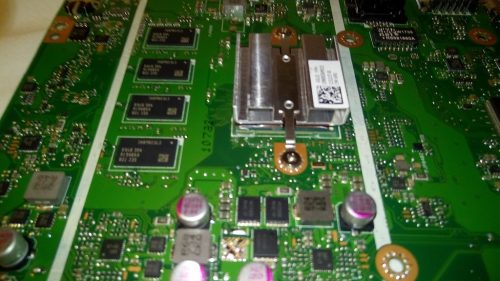
Here are some pics of the motherboard anyway in case you were curious:
CPU Heatsink
The heatsink is… well… somewhat cheap. The 2 center rails are extremely thin and flimsy and there isn’t much mass to the thing. That’s to be expected mind you: the N4200 is a 6W TDP chip and with the forced airflow, even thin and flimsy works fine.
That said, I like quiet fans. As you may have noticed further above, under high load the CPU temp maxed out at 85 degrees C which resulted in the fan being quite audible.
I decided to replace the heatsink with a custom one.
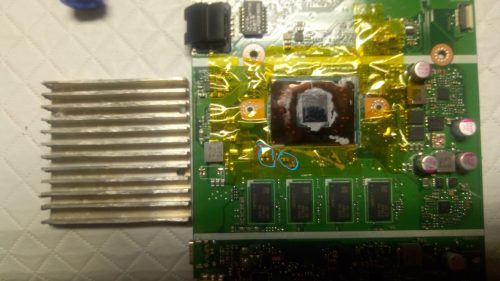
Eyeballing the size and pulling out the hacksaw, I cut a piece out of an old larger heatsink I had kicking around. Here it is beside the motherboard.
You’ll notice:
- 2 blue circles in the image. These are components that stick up high enough to hit the heatsink. You can’t see it, but I ground out the opposite side of the heatsink in those locations so that they didn’t touch.
- The heatsink fits between 2 white “lines” on the motherboard. This is important because there is framing/support where the lines are, so the heatsink must fit within those bounds.
- Tape all over the surface components, just to be sure they can’t touch the heatsink and short out.
- This heatsink is large enough to cover the RAM chips, which happened to the the same height (or close enough anyway) as the CPU die. I figured they may as well get some cooling too.
If you reproduce this (probably not worth the effort unless you enjoy tinkering), double check clearance on components, and maybe consider going with something smaller to avoid component clearance issues altogether, in addition to avoiding the uneven heatsink weight perhaps causing a tendency to pivot. Heatsink shouldn’t be much more than 7mm thick – perhaps even less to reduce the chance of damage if the bottom of the case sees a sharp impact.
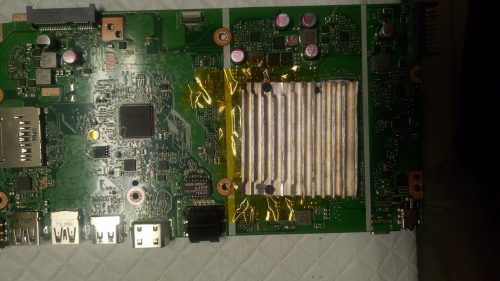
Here it is installed.
You’ll notice I had to grind down the fins around the screws – it’s a bit sloppy – I just used a dremel with the cutting wheel that happened to be in it. Since the default screws are too short, I swapped them with 2 of the long screws from the fan shroud (if you pick the right 2, you can manage it).
End result didn’t lead to a stellar improvement, though I used some cheap thermal paste and it’s also possible the RAM may not have been perfectly level and could be preventing the CPU from mating flush with the heatsink material. At idle the temps are quite a bit cooler, but at load there doesn’t seem to be a large difference (temp spikes just as high, and is only about 5 degrees cooler once the fan has spun up).
Battery
Getting the motherboard out is easier if you take it with the battery since the connectors can be quite tight. It’s only 1 extra screw to do so anyway:
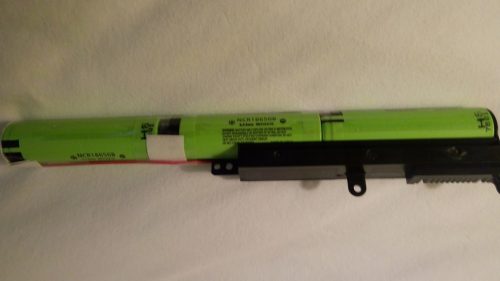
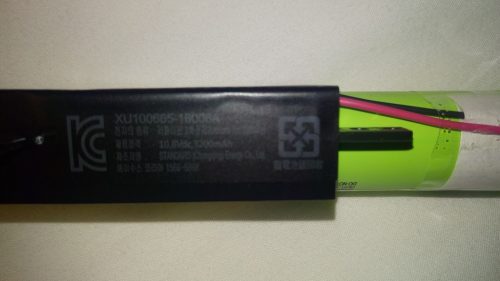
The battery was… interesting. It looks like 3 of the 3.6-3.7v Lithium Ion cells you can get on eBay all taped together and connected to a charge controller. Edit: just checked, they look to be the Panasonic NCR18650B you can find on eBay.
It you’re accustomed to tinkering with this sort of thing, that means if a cell dies, you might be able to replace it yourself with an 18650 eBay cell of appropriate capacity. That said, this entire “pack” (or similar ASUS ones at least) are only around $50 complete on eBay right now, so just getting the unit might be more sensible unless you’re itching to tinker..
Conclusion / Thoughts
If you’re willing to either clean wipe/install Windows or install Linux, the X541 is really a promising little machine. It can handle casual gaming, and I’d have no issue using it for typical workloads and typical web browsing.
The biggest downsides from my point of view are the lack of upgradability (hard drive only – no RAM), huge difficulty in swapping the battery, and high difficulty in swapping the hard drive. The RAM in particular really hurts long term potential – if 8GB is the standard a decade from now, there’s no way you’re brining this laptop along for the ride. Compare this to a decade-old Core2Duo which can often still be usable today if upgraded from it’s original 1/2GB to 4GB.
Ignoring the long term, for the price ($200-250USD range on sale), it’s got really solid value. I doubt anyone would find it to be a “perfect” laptop, but perhaps a “perfect laptop within a certain budget”.
–
That said, if you’re not willing to wipe/reinstall Windows (or move to Linux), you’ll probably have a horrible experience (and should probably avoid any <8GB RAM laptops to be honest). Otherwise, if the slowness doesn’t bother you, the random restarts probably will.


Since my fresh Ubuntu install (and fresh Windows 10 install - I'm dual booting at the moment), I haven't been hit with the random shutdowns. I've thrown hours of CPU intensive tasks and even tested a number of games on this thing both on Ubuntu and Windows. I'll update if anything hardware-specific rears its teeth, but for now if you're in a position to try a backup and complete wipe/install, it just might get you going again.
I have an old ASUS EEE 1005ha that I was looking to upgrade from to a newer system for Linux Mint. I'll probably take out my old 120GB SSD and replace the HD. You should note the provided HD is a 5400 RPM, so that explains a lot of the slowness with performance as well.
Thanks for the detailed review. It really helped a lot in my decision.
There's also the "start fresh" option from Microsoft which could be worth looking into: https://www.microsoft.com/en-ca/software-download/windows10startfresh . I haven't used it myself though.
I seem to recall there being a couple items in the control panel as well that do a "reset" (I believe something like Settings, Update/Security, Recovery), but whether that removes the extra stuff or not I'm not sure.
The after service offer of support from Asus was laughable and the whole experience with this pc has been terrible.
Do not buy. Cheap is cheap and nasty in this case. 22 April 2019.
Also, I am using a usb wifi dongle (using the rtl88x2bu driver) that is 802.11n capable, and got downloads (using 'speedtest-cli') that are about 10x what I get with the internal Qualcomm Atheros