If you find yourself driving down the road and hear a “crunch crunch crunch” coming from one of the back wheels of your car, there’s a good chance you’ve got bad wheel bearings. Actually, your bearings probably went bad long before you heard the crunching, but as with many other parts, they were nice enough to make a really awful sound to let you know they were preparing to leave you stranded.
Replacing the bearings isn’t a particularly difficult job. If you’ve ever replaced the brakes in your car, you’ve probably got the ability to do the bearings. It’s a job I recently tackled, and I thought I’d share the steps I took in doing so. This was done on a 1991 Chevrolet Sprint, but the process is very likely to be extremely similar (if not exactly the same) for a 1989 or 1990 Pontiac Firefly, Suzuki Swift, or Geo Metro as well.
First of all, there is both an inner and an outer bearing, and they’re both located in the brake drum. If you’re going to the trouble to replace one, I’d recommend doing them both. At the time of this writing, each bearing was between $10-15 CDN at Canadian tire, so you should be looking at $25-30 to replace both. If you’ve just bought a brake drum, I’d also recommend using new bearings rather than trying to reuse the ones in your old drum, partly because they’re probably going to need replacing at some point anyway, and partly because it’s extremely easy to damage the old ones when you take them out.
So on to the process…
I’ll assume you’ve already removed the wheel and are staring at the brake drum. Before you take off the drum, there’s a cap, a nut, and a washer that have to be removed.
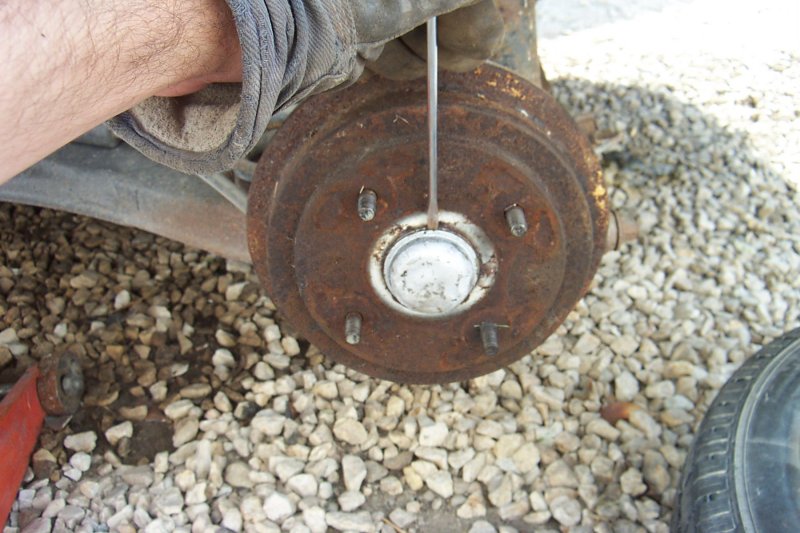
The cap comes off pretty easily with a sharp screwdriver and a hammer. Once it begins to come off, you can use a screwdriver to pry it off the rest of the way with ease.
Now that the cap is off, you should be facing a nut and a washer. One of two things will have been done to keep the nut from accidently coming off on it’s own. Either there will be a cotter pin through the nut & axel shaft that has to be removed, or as in my case, the nut will be staked, and you’ll have to “un-bend” the outer lip of the nut so that it comes off. Once that’s done, the nut should come off with a 22mm socket. Be sure to set both the nut and washer aside somewhere where they won’t pick up dirt.
Next, the drum has to come off. The drum is usually on pretty tight and may need some encouragement from a combination of screwdrivers, prybars, and hammers. Often, putting a screwdriver and prybar between the drum and the backplate, and prying while striking the side of the drum with a hammer to jar it loose works (just be sure not to pry hard enough to bend or damage the backplate). If all else fails, you may need to use a slide hammer or another tool to remove the drum. However, with a little time and persistence, the drum can usually be removed with the basic tools.

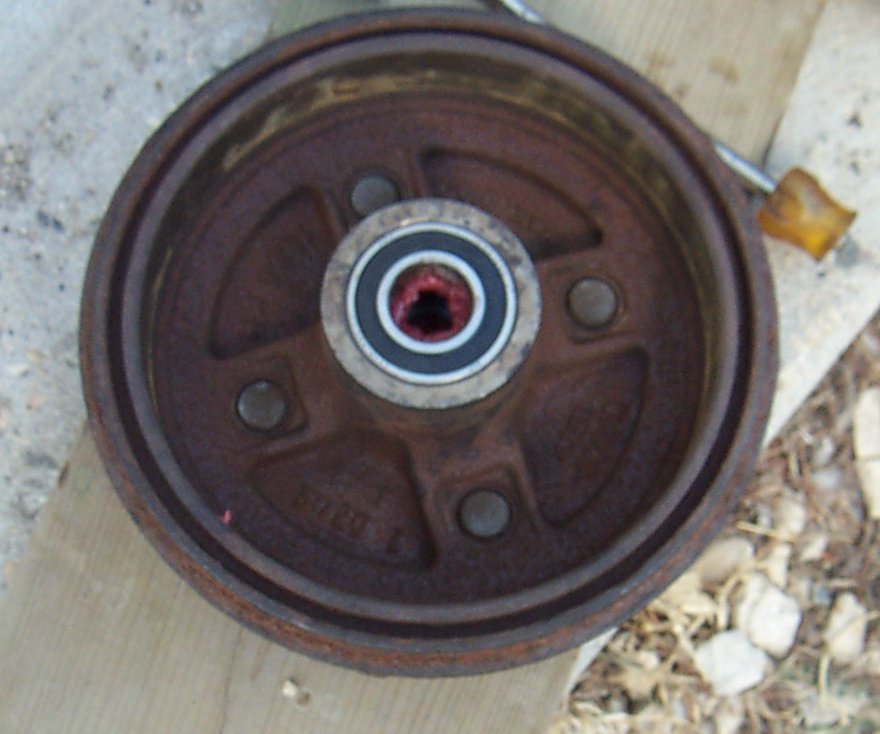
With the drum off, take a look and try to identify exactly where the following pieces are:
- Inner Bearing
- Outer Bearing
- Spacer (located between the inner and outer bearings)
A little clarification here before we continue. There is an Inner and an Outer bearing. Each has an Inner and Outer “race” to it (the metal rings that the bearings are in). So when I talk about a bearing, note that it’s the entire bearing itself, and when I talk about a race, it’s a specific part of either the inner or outer bearings.
Now, it’s time to remove the old bearings. The bearings will be in very tight, and you will need to use a drift, punch, or screwdriver and hammer them out. If worse comes to worse, your local mechanic can probably remove them for you for a small fee. To remove the outer bearing, put the drum down on a flat piece of wood (or another surface that won’t damage the threads) with the studs facing down. The spacer should slide enough out of the way that you can get to part of the bearing and start hammering it out with your punch/drift/screwdriver/etc. The easiest way is to put the drift on the inner race of the bearing and hammer away (note that hammering on the inner race will probably destroy the bearing in the process, so make sure you don’t plan on re-using it). While you’re hammering away, hit the bearing at different locations so that it comes out as straight as possible. If you’re not having much luck, try to remove the inner bearing first instead.

With the first bearing out, the spacer should fall out. One end has a “lip” to it. Take note of which way that lip faces (it should face the studs).
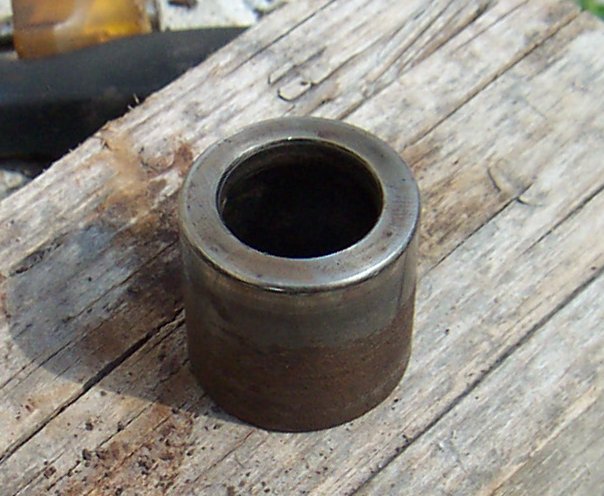
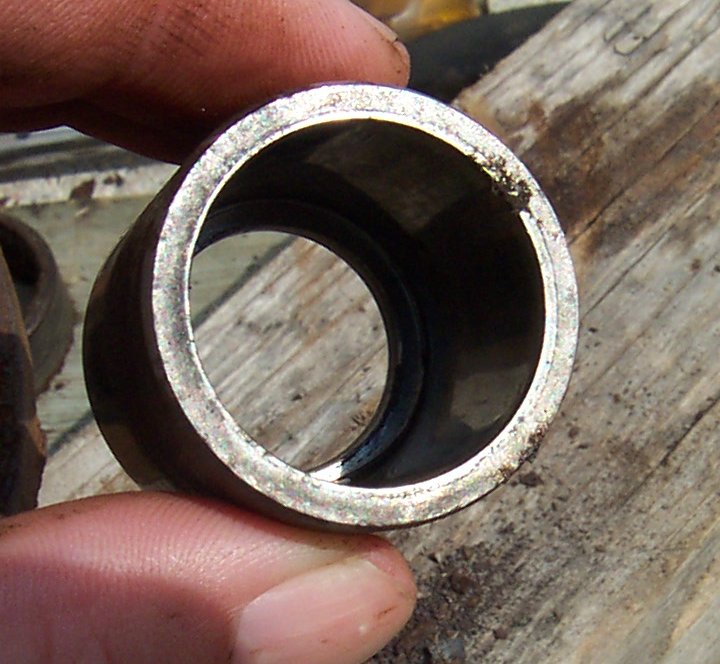
A couple pictures of the spacer. Note that one side has a “lip” to it.
To remove the inner bearing, take two blocks of wood (2×4’s are usually fine), and put one on either side of the drum to elevate it (otherwise the bearing won’t have anywhere to go). Again, find a part of the bearing to get your punch/etc on, and start pounding away, making sure to “rotate” the area you’re hitting so that the bearing comes out as straight as possible.
Remember, if you’re not having luck with one of the bearings, try the other first. Once you get one of the bearings out, the spacer comes out and it makes it very easy to access the outer race of either of the bearings.
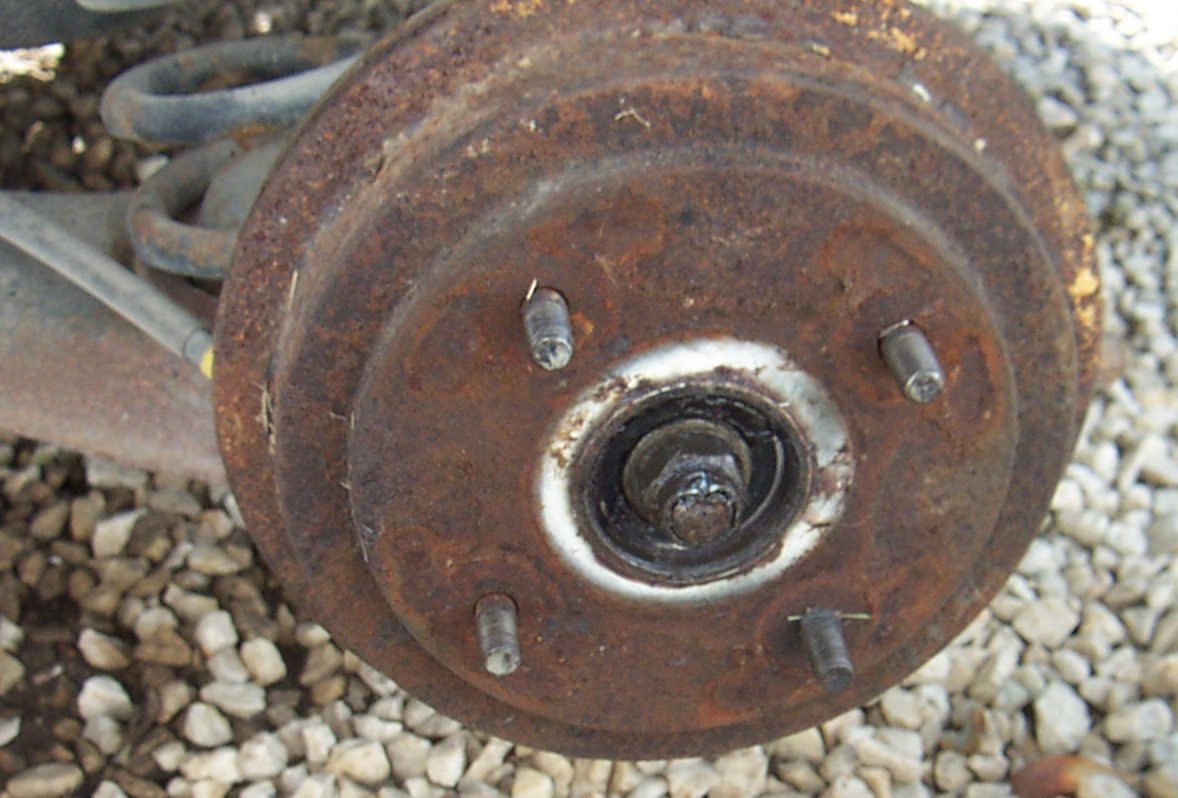
With both bearings and the spacer out, the drum should look something like this:
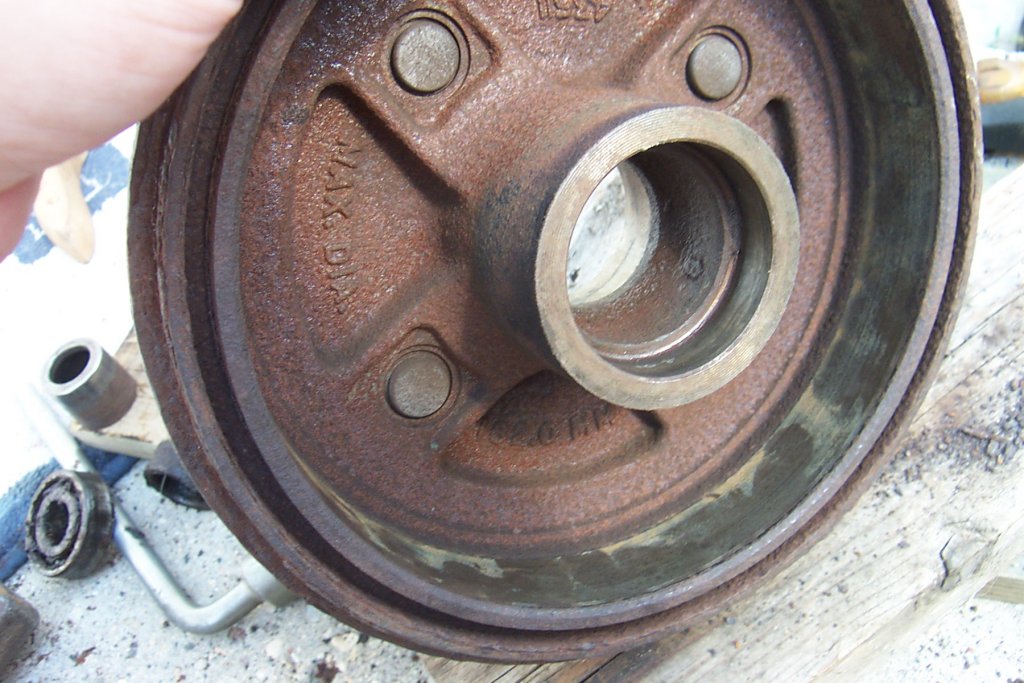

Notice the open space where there bearings used to be. When the new ones are installed, they’ll press up against the center “lip”.
At this point, it’s probably a good idea to clean up the drum a bit, removing the old grit and grease.
Now it’s time to put your new bearings in. First, pack them with fresh wheel bearing grease. Now it’s time to put them in the drum. This is the part where you want to be careful and keep the following in mind:
- The inner and outer bearings must go IN THE RIGHT PLACE. They’re different sizes and not interchangeable.
- The inner and outer bearings are directional. They only go in ONE WAY. Actually, they just might pound in either way, but if you put them on the wrong way, you won’t be able to get the drum back on the spindle. If they have dust caps, the dust cap will probably be facing you while you put it in. If they don’t have dust caps, and/or you’re not sure, try putting the bearings on the spindle before you put them on the drum to determine which way they go (it will be the way where they slide farthest on the spindle). Check, double check, and then triple check.
- ONLY strike the OUTER race on each bearing when inserting it. Do not strike the bearings themselves or the inner race, or you will probably damage the bearing.
- Don’t forget to put the spacer in!
With that said, the first bearing to put in is the outer bearing. This will be the smaller of the two (the one on the same side as the studs). Simply put it in place, and start to tap it in with a hammer, working around the entire race so that it goes in straight. The easiest way is to hammer around the edge of the outer race until it’s about flat with the drum. From there on in, use your drift/punch/screwdriver and hammer to put it the rest of the way in. Be careful that the drift/punch/screwdriver doesn’t slip off of the race and damage the bearings. Once it seems to be in all the way, take a look from the other side of the drum and make sure it’s pressed up all the way to the inner lip.
Next in is the spacer. Simply put it in place. I put a little grease around it just to have the extra grease in there.
Finally, the inner bearing goes in. Again, make sure it’s being put in the right direction. Unlike the other bearing, once this one is flush with the drum, it’s usually in all the way. You probably won’t need a drift/punch/etc until the very end. Just tap the outer race with a hammer until it’s almost flush and then finish off with your drift/punch/etc.
Note that it may be possible to use a small block of wood to insert the bearings (just hammer on the block of wood instead of on the outer race). I simply chose not to because that method forces the inner bearing to share some of the stress (although not a heck of a lot since the inner and outer races are usually even).
Once that’s done, the drum should be ready to go back on. Hopefully you quadruple-checked the bearing directions and the drum goes back on all the way. Once it’s on, give the drum a quick spin to make sure the bearings are nice and quiet.
With the drum on, put the washer and nut back on. If you had a cotter pin, put that back in place. If you didn’t have a cotter pin, you’ll have to re-stake the nut. The easiest way it to use a dull chisel and a hammer and give the outer lip a whack over the indented part of the spindle. Make sure the lip ends up “bent” enough to do it’s job. It’s basically the failsafe in case the nut comes loose. If the nut doesn’t have a cotter pin holding it in place, or it isn’t staked, you could potentially have a brake drum falling off with the wheel if the nut comes loose for some reason. So try to do it right.
At this point, you should be done. Put the wheel back on and you should be good to go.
Disclaimer: This procedure is based solely on my own experiences. I am not a certified mechanic. Following any of my procedures is done completely at your own risk and expense, and I shall not be held responsible for death/injury, or any damages as a result of this article.
1 Comment | Leave a Comment