After spending days tilling “new ground” with our old heavy front tine tiller, my arms and hands just couldn’t take it anymore. By “tilling” I mean pulling back as 200 pounds + some horsepower violently bounces and jumps around. If you’ve used a large front-tine on hard ground you know what I mean. Once something started intermittently popping out of my rear neck/shoulder, I knew it was time to start looking for a rear tine.
While rear-tines are a little more on the expensive end, I wanted something low cost. Didn’t have to be fancy, just had to till a couple acres without destroying my muscles and ligaments in the process.
Locally, the cheapest rear-tine tiller was the Southland. I looked around for some reviews and info, but unfortunately there wasn’t much information available about it.
I looked around for similar tillers and found the following which appeared to be nearly identical:
- Powermate 18 inch 196cc Rear Tine Tiller (sold by Home Depot)
- Earthquake 6015V Rear Tine Tiller (sold on Amazon)
- Troy Bilt Super Bronco CRT
…the engines were a bit different, and the Troy Bilt had a few more differences (levers and frame), but they generally appeared to be extremely similar – some even had the exact same manual (with different branding). I have a feeling that the Southland, Powermate, and Earthquake are all made by the same manufacturer, using a custom frame, various clones of the Honda GX200 engines, and a clone of the Troy Bilt Super Bronco’s transmission & gear drive. Not 100% sure on this, so don’t go spending an arm and a leg on Troy Bilt transmission parts only to find they don’t fit… but they might.
Anyway, enough background. Let’s get to the tiller.
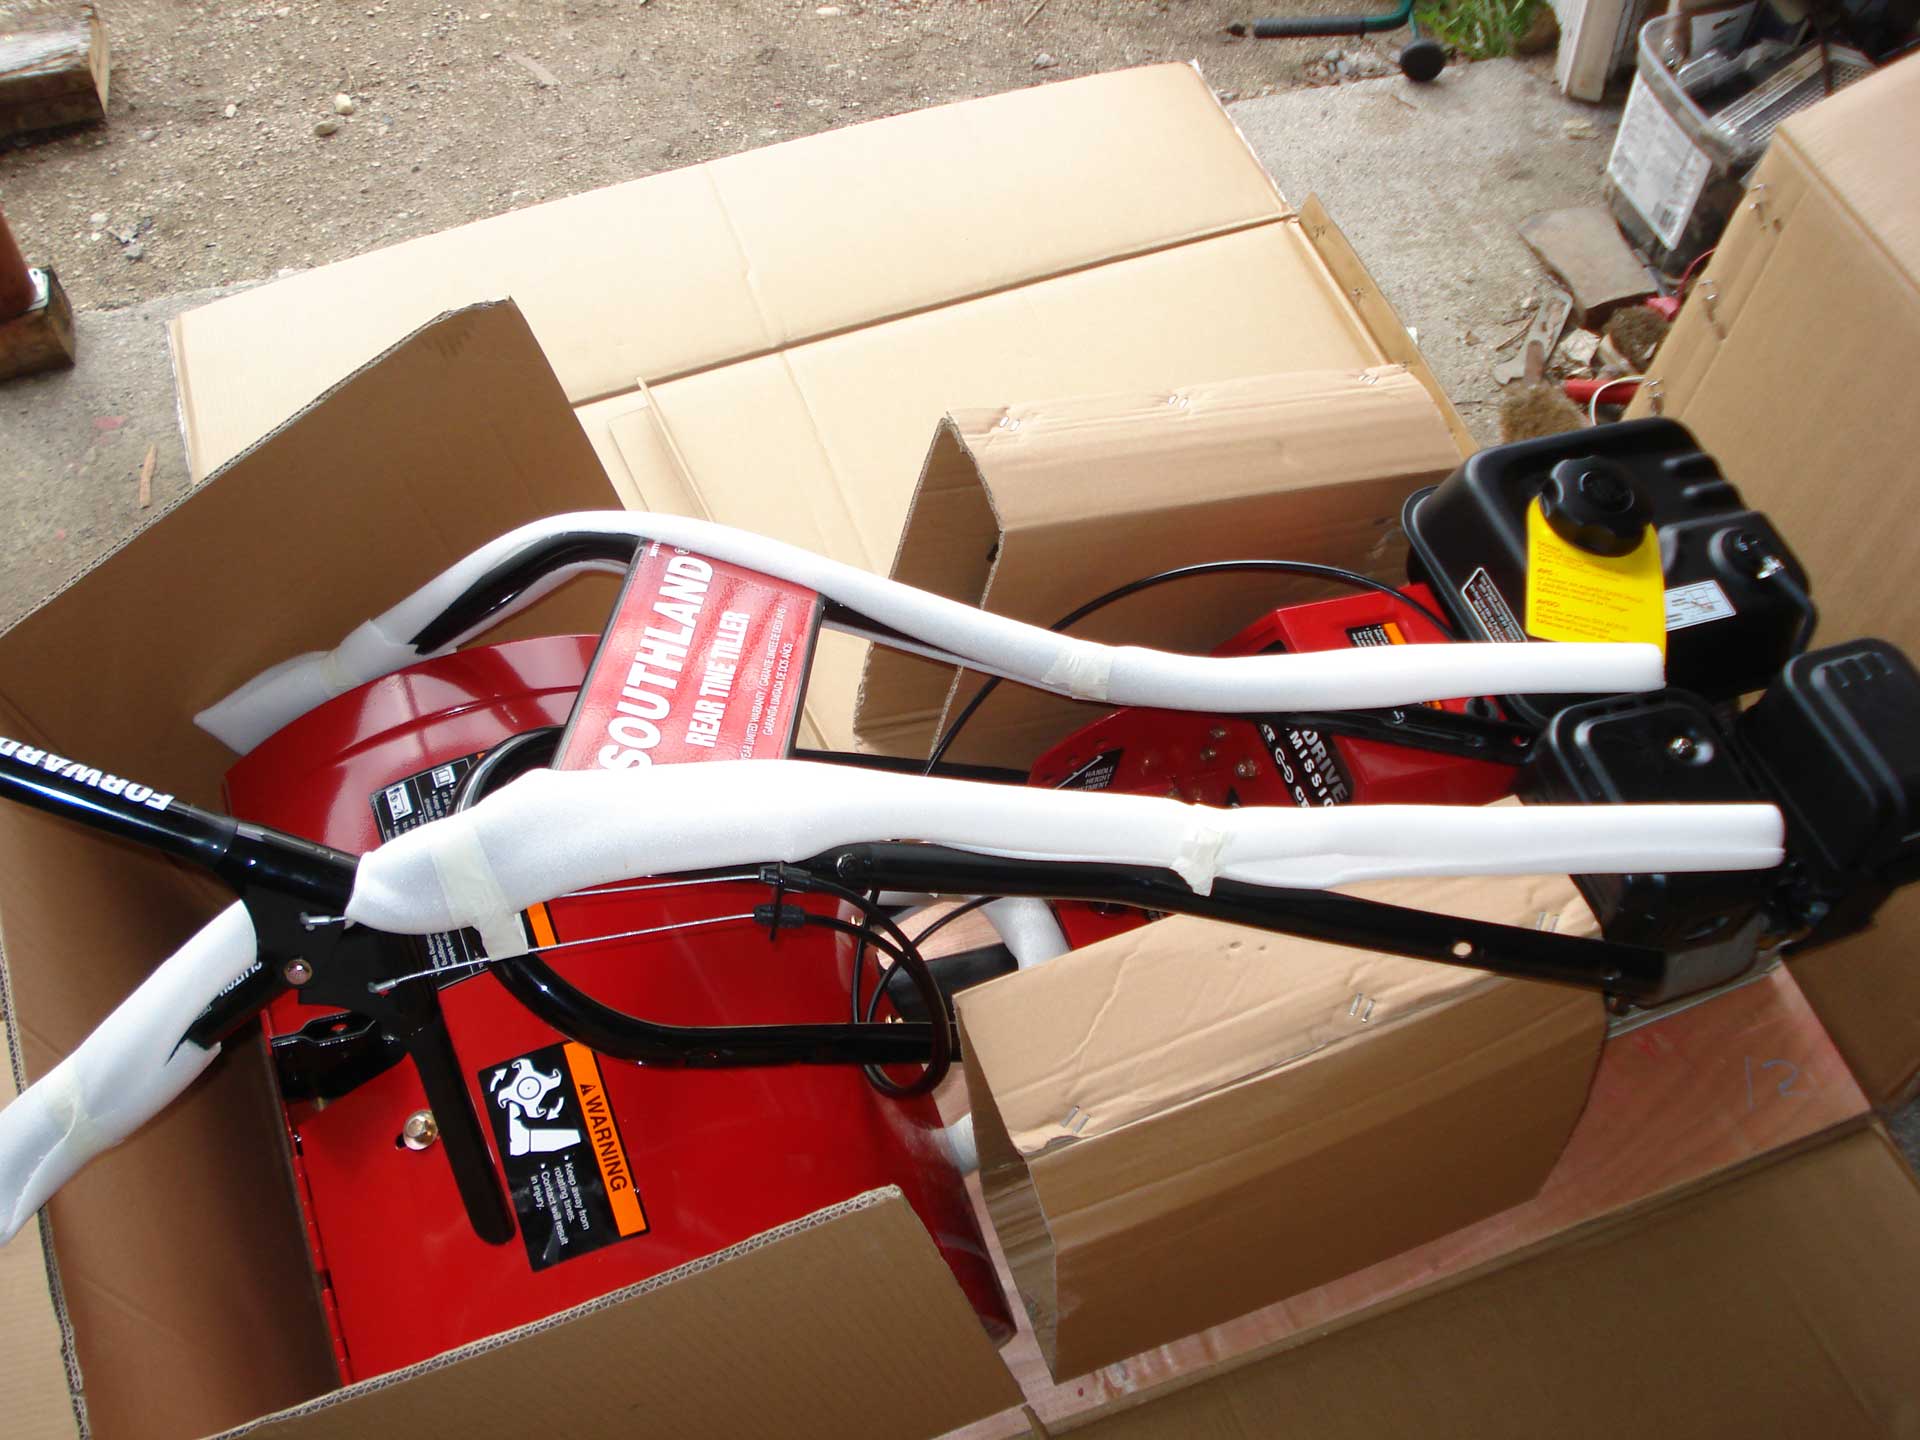
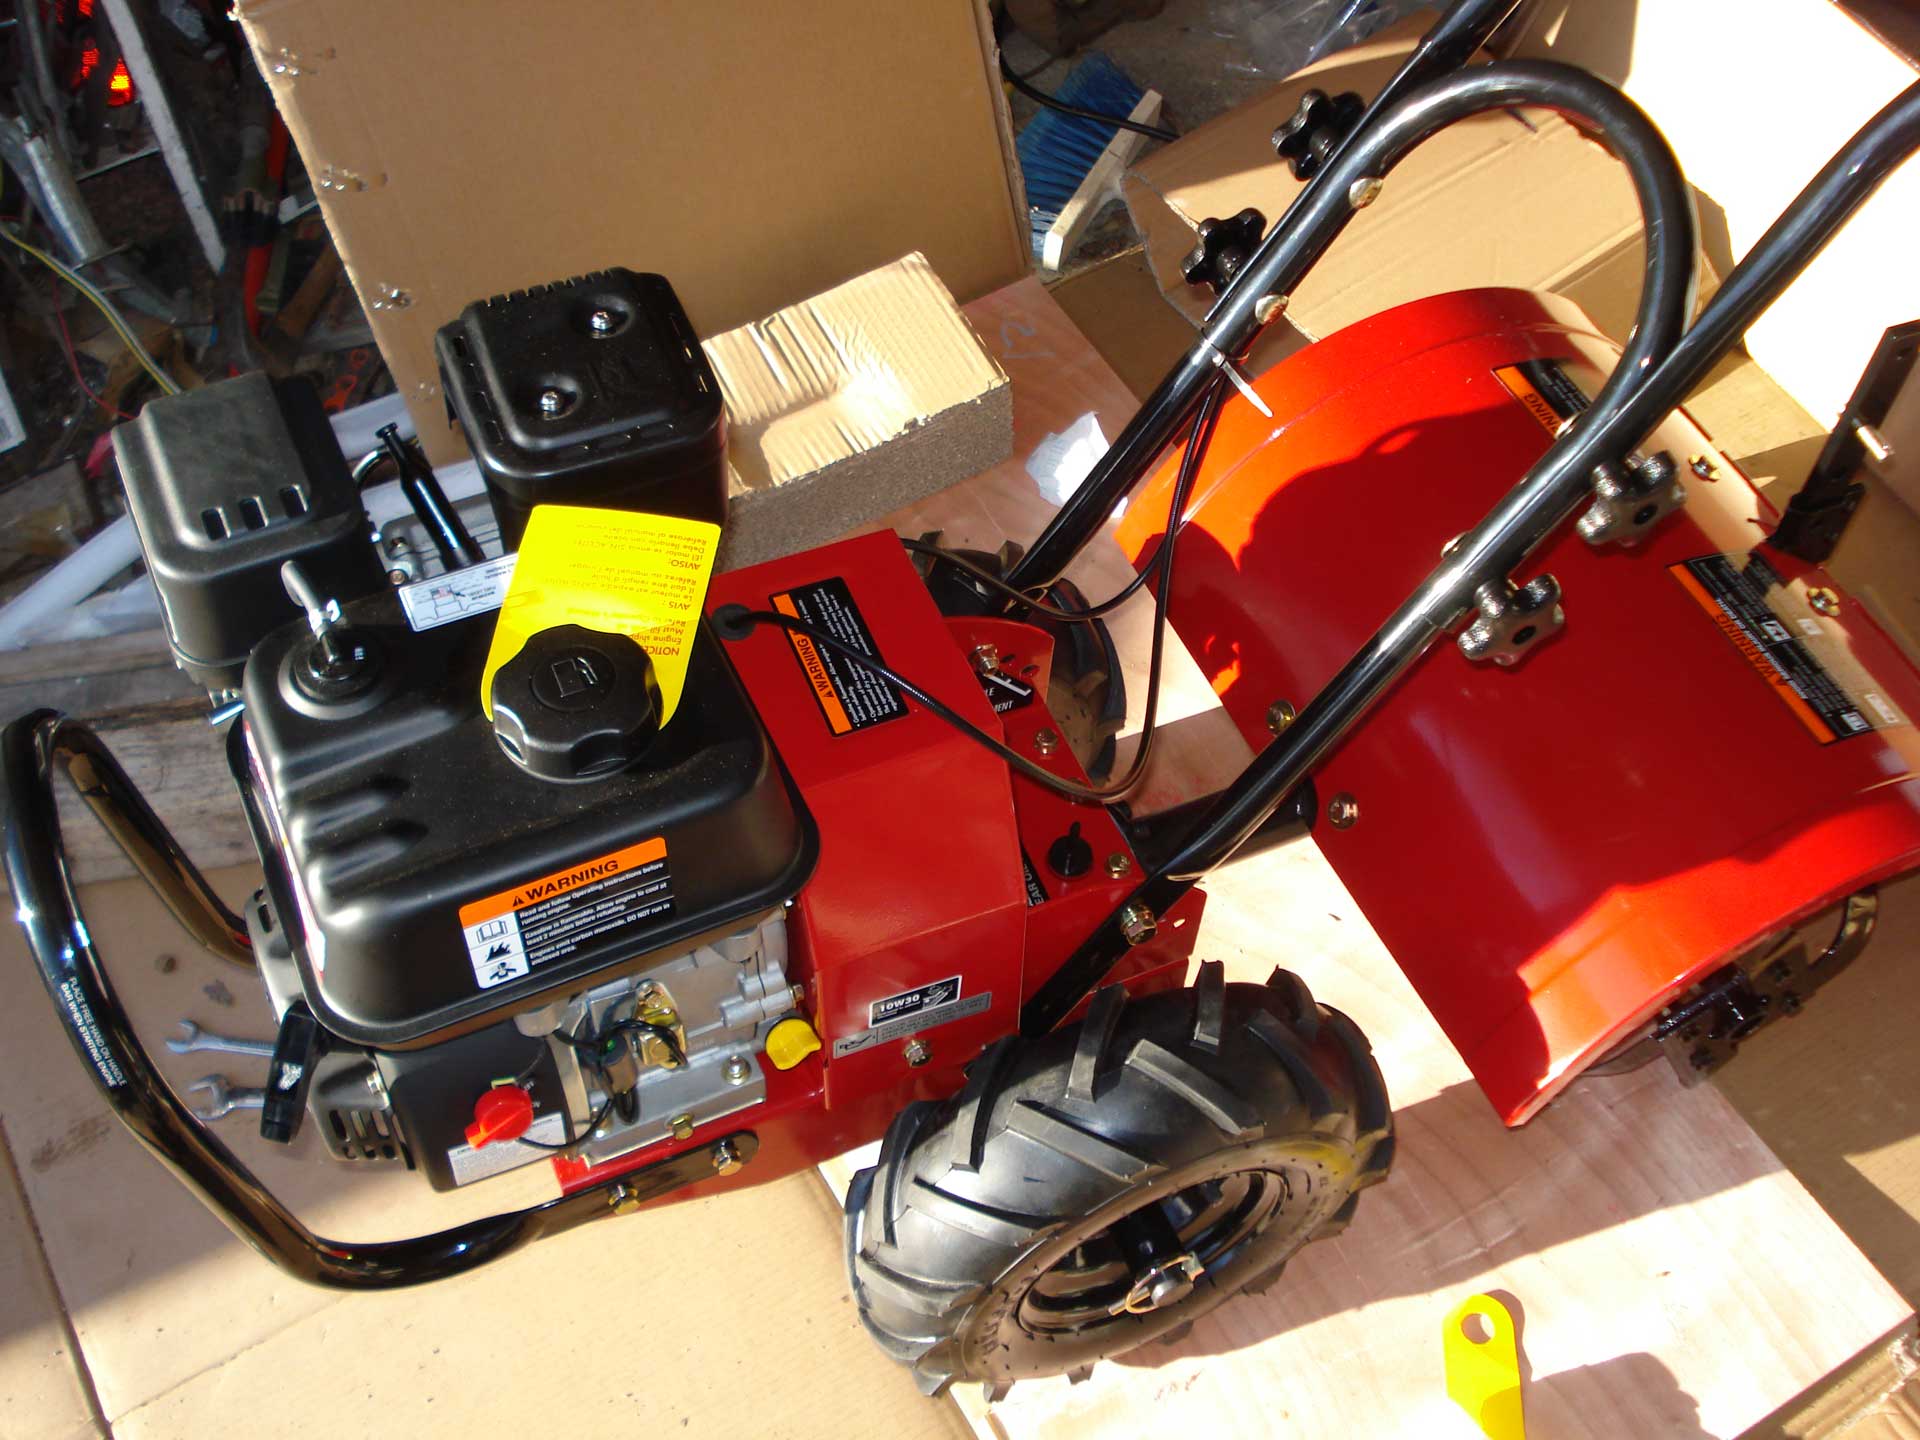
First some “unboxing” and during-assembly pics (just using thumbnails here, so click for larger images).


A few preliminary notes that might be helpful if you’re considering this tiller:
- TRANSPORT – The dimensions of the box it comes in is 44x20x22 (inches). I picked it up in the truck, but *might* have been able to manage it in the hatchback with the rear seats down.
- TRANSPORT – The box is fairly heavy. Somewhere between 150-200 pounds. You’ll want 2 people to put it into your vehicle (I managed to work it out alone but it wasn’t easy). Don’t lift by the straps – they’ll break and the box will fall.
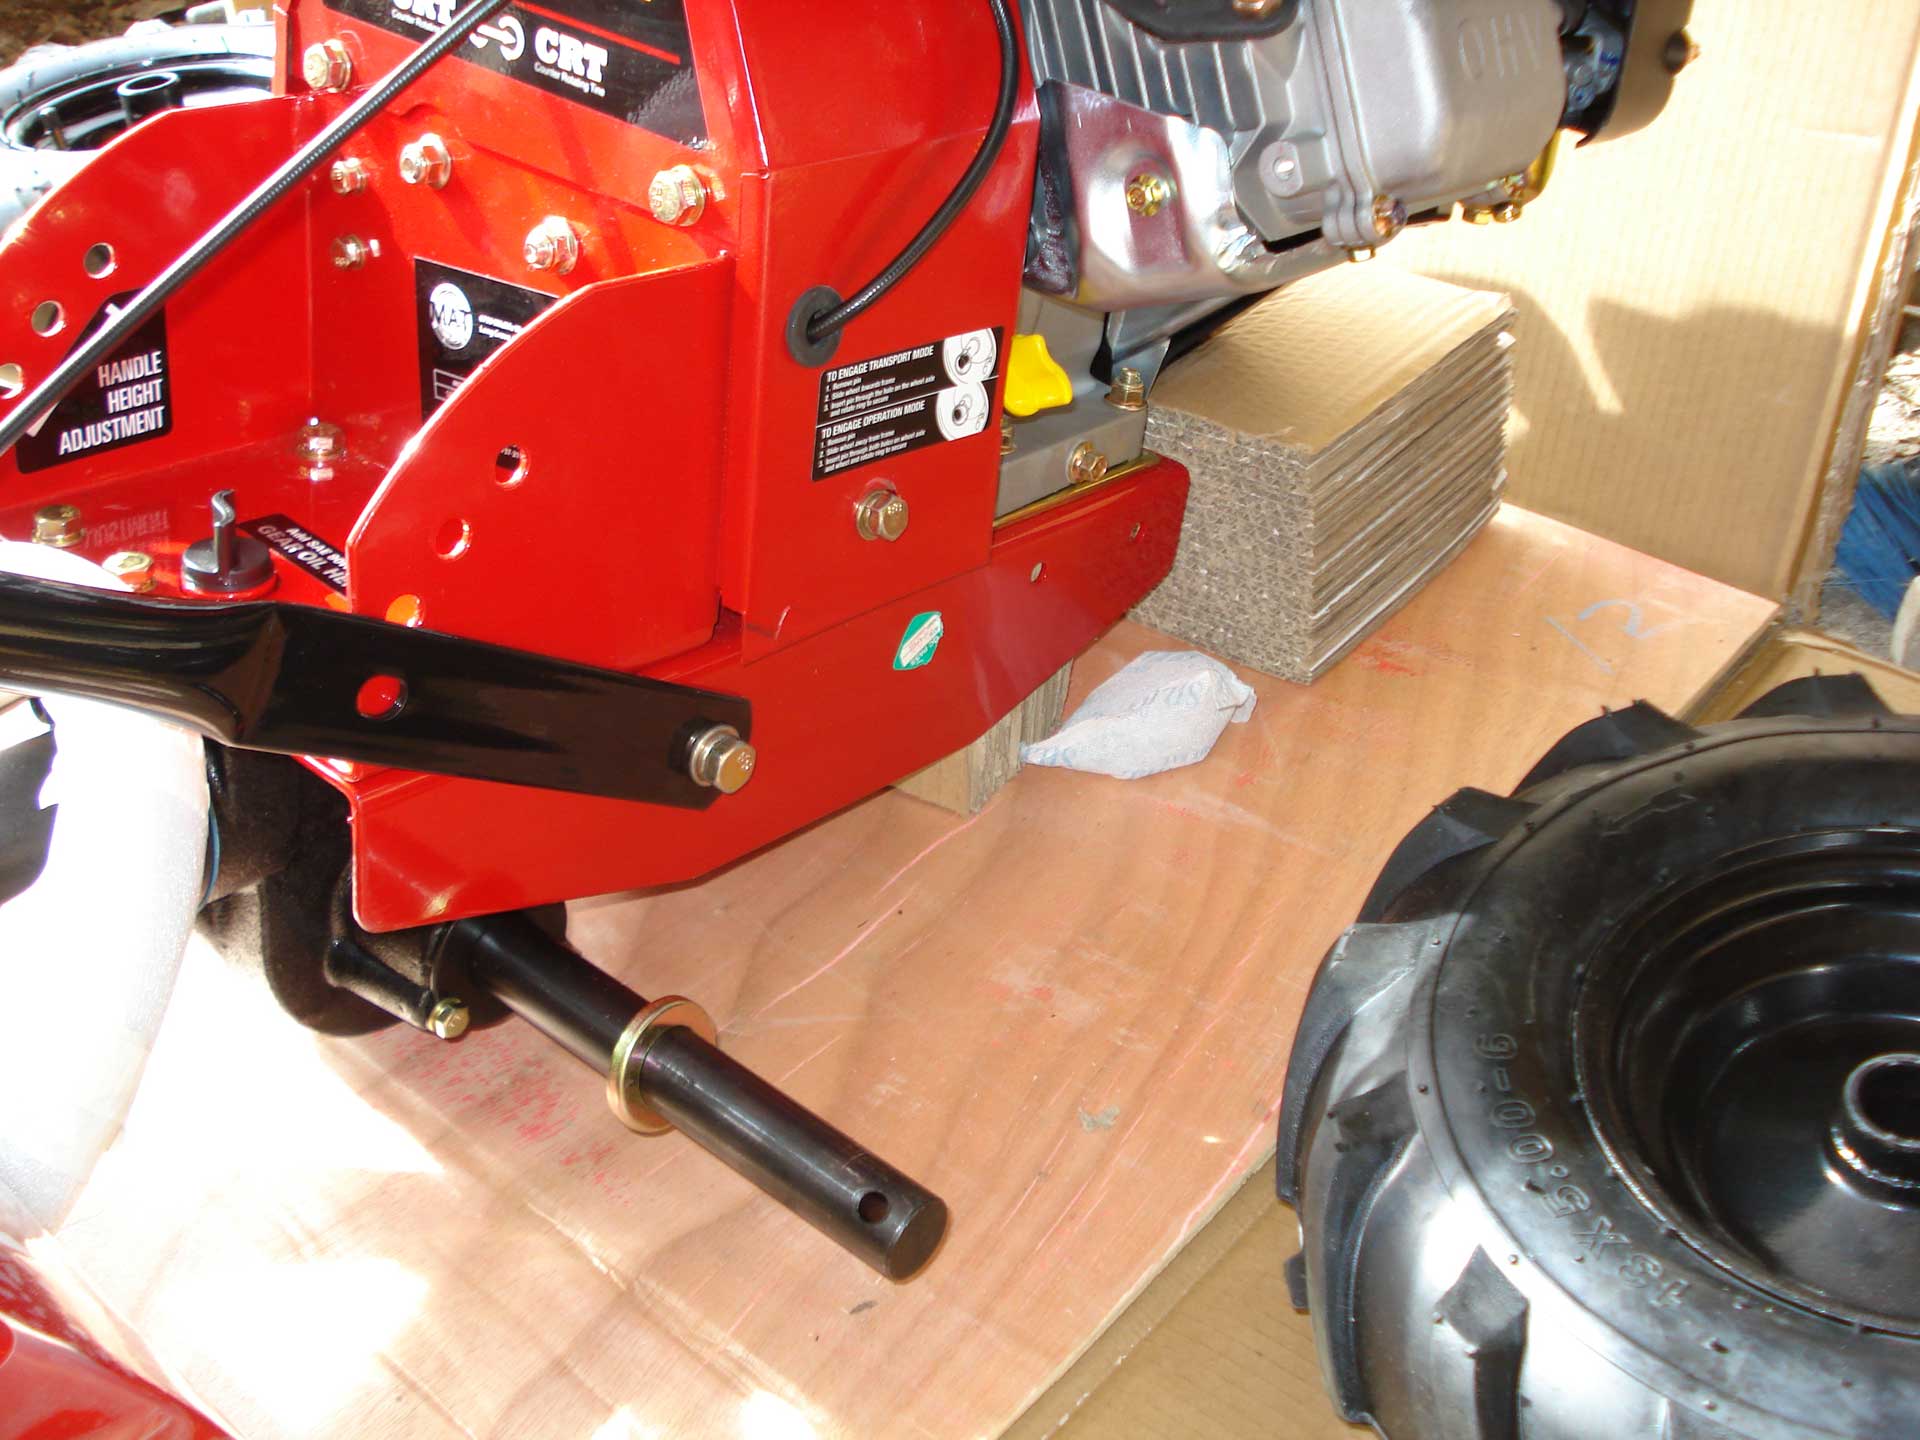
- ASSEMBLY – I was 1-manning this, so I cut the sides of the box open instead of trying to lift the thing out. Attached the handlebars, front engine guard, tine height adjustment, etc, and added the included oil. To attach the wheels (most difficult part), you’ll want a helper to LIFT the front of the unit to get the axle high enough to slide the wheels on. Alternately, you can lift the front yourself and slide a stack of boards underneath with your foot if you’re really careful – it’s what I did.
- ASSEMBLY (TIRE NOTE) – I’d seen some others who ran into valve stems that weren’t aligned and other tire-related issues. If the tube is damaged, you’ll probably have trouble finding a replacement. One of my valve stems (and thus tubes) weren’t quite aligned, so I emptied the air, realigned it, and made sure both tired were filled to max pressure (31psi if I’m remembering right).
- ASSEMBLY (TINE HEIGHT NOTE) – The tine height adjuster didn’t have all the holes aligned with the bracket (3 were, others weren’t). If you can’t get the pin in to lock the tine height in place, look closely because you might be in the same situation. Either find another hole that’s aligned, or you’ll have to drill the offending holes in the tine adjust (not the bracket) slightly larger.
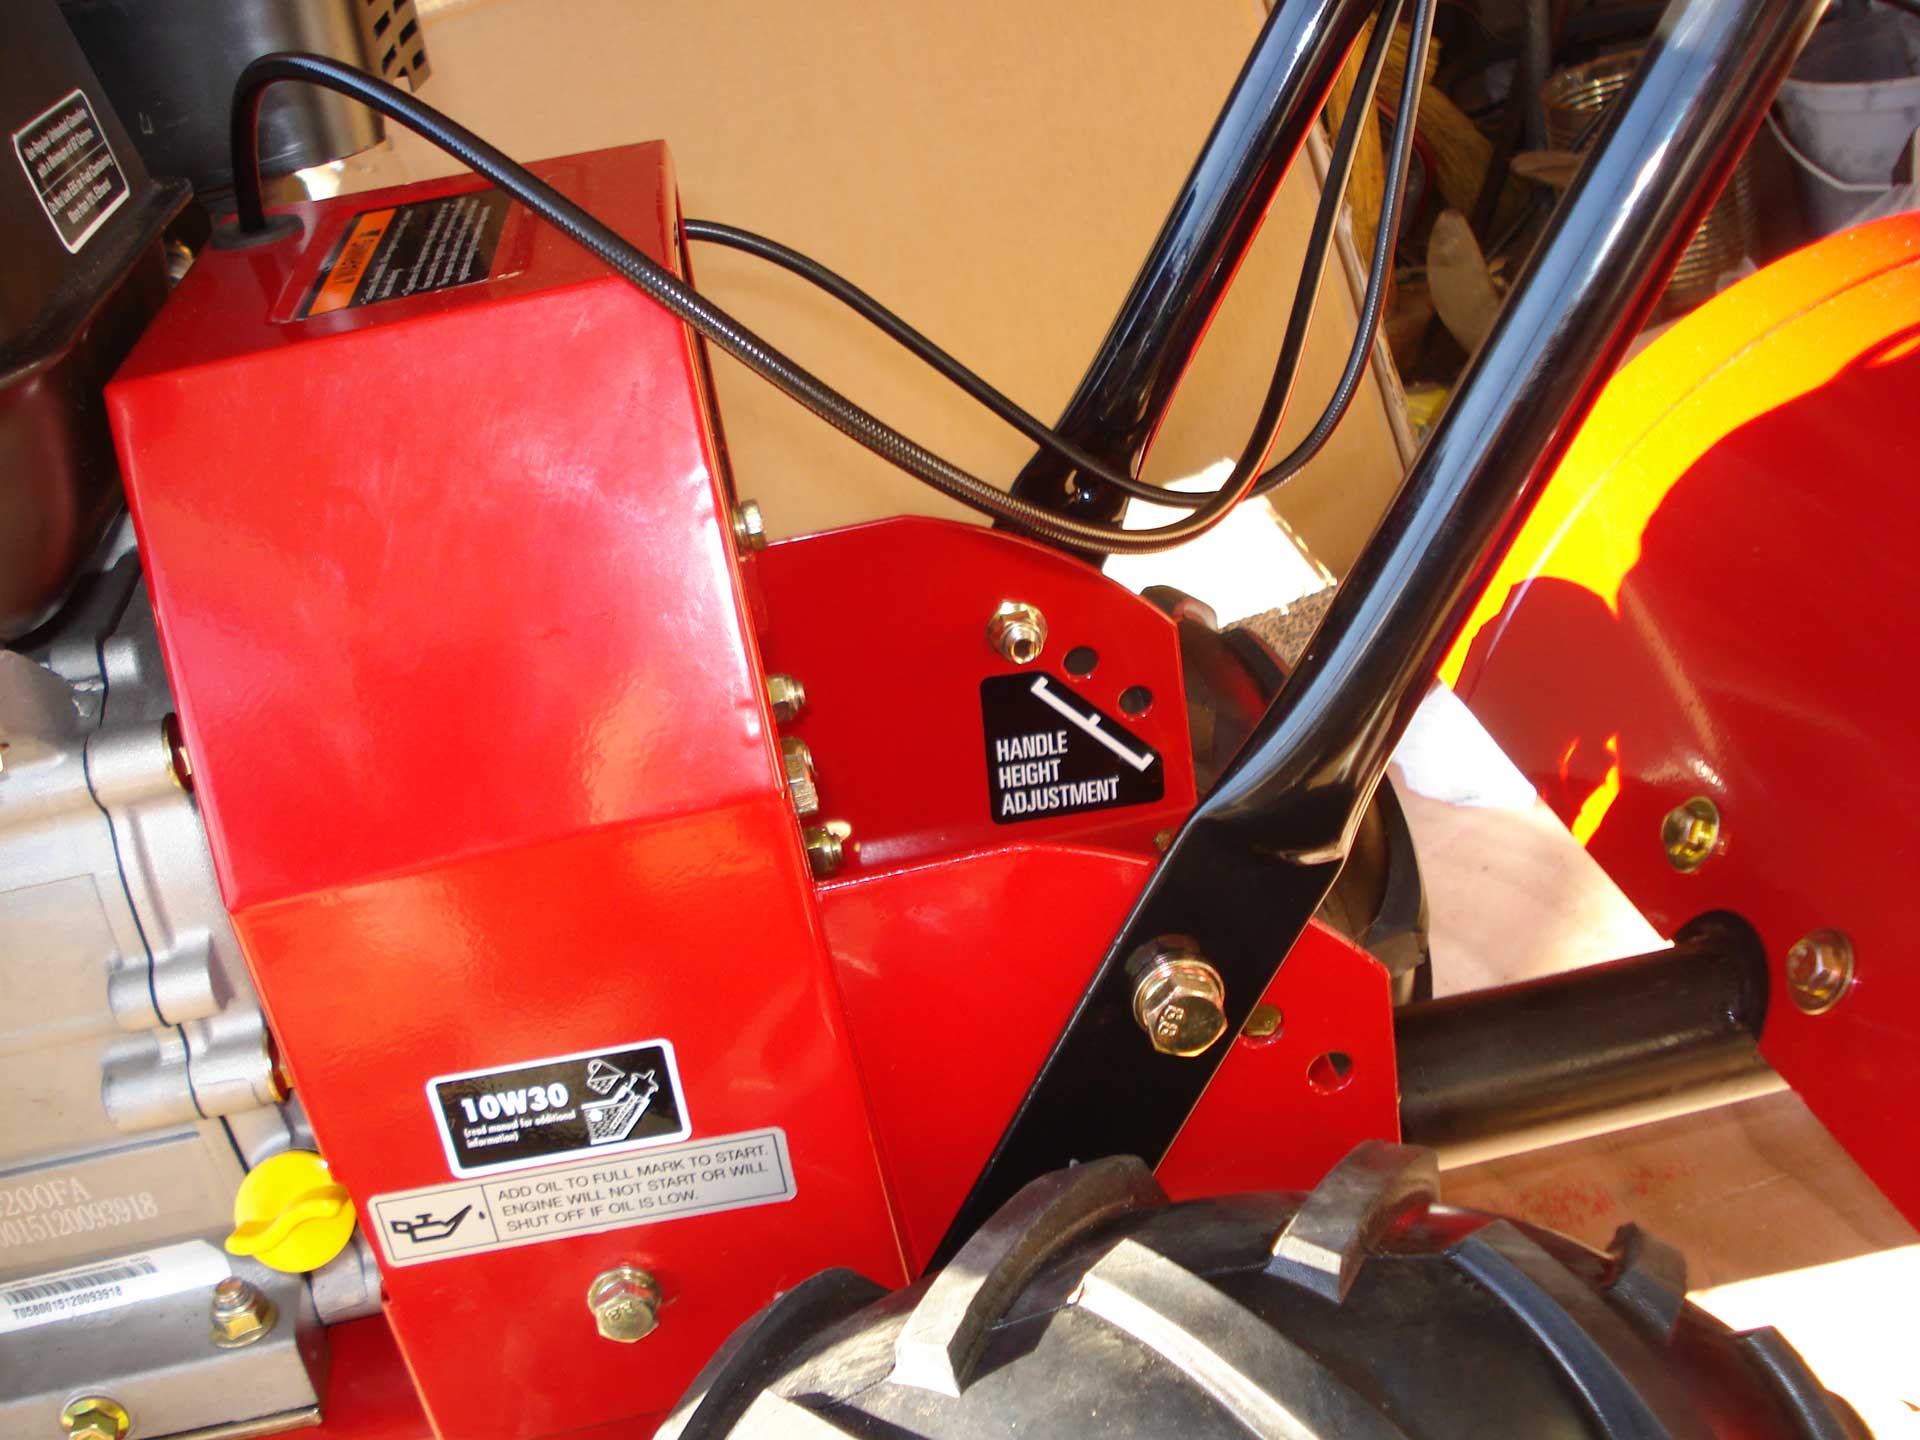
- ASSEMBLY (HANDLE HEIGHT NOTE) – When assembling, the “highest” height looks like it would be too high, and is indeed a bit awkward when trying to move the machine around at first. However, when the rear has dug into the soil, it’s quite a bit lower. I’d wager that anyone 5’9″ or taller will probably want to use the highest setting. For me, even the highest height isn’t high enough, and I’m under 6 feet.
- ASSEMBLY (FORWARD/REVERSE LEVER NOTE) – With some of the other variants of this tiller, I noticed that a number of people had misadjusted levers: either the belt wouldn’t engage well enough, or would engage too soon. I didn’t come across this issue, but it’s something to be aware of and adjust if necessary.
And a few operational notes:
- GEARBOX – I had read a few horror stories about the worm-gear drive on these types of units (across brands) getting destroyed pretty quickly during use. Sometimes due to the gear oil having leaked out, but other times it just sounded like fast wear. The warranty doesn’t appear to cover it either (warranty just covers the engine). And good luck finding a replacement gear box at a reasonable price… So the first thing I did was I used a syringe to suck out the old gear oil and replaced it with some synthetic (Royal Purple if you’re wondering). Oddly enough, the old gear oil didn’t even smell like gear oil – gear oil usually has a pretty distinctive smell, so I’m wondering if they just used something cheap by default, which might help explain some of the deaths.
- GEARBOX – After some use, I did have some gear oil slowly seeping out of the seals near the tine shaft. CHECK THE GEAR OIL LEVEL FREQUENTLY! Note that the transmission is a 1-piece unit, but it can take awhile for the oil to seep to the rear (tine axle housing) or front (wheel axle housing) section. Overfilling slightly seemed to keep the gearbox a little cooler: the wheel-axle section of housing tended to get fairly hot at the normal level and was cooler when slightly overfilled. Of course overfilling will just increase pressure when the thing heats up so you might have more seepage out the rear tine axle seals. Do whatever you feel is best here, but check the gear oil level frequently regardless.
- TINES – Like many tillers, weeds and roots have a tendency to get wrapped up between the tines and the transmission housing. It’s a pain to pick them out manually… removing the tines and sliding the weeds off is much quicker (1 nut/bolt for each tine).
- TINES – If you release the “forward” handle while in-the-soil, you’ll tend to get a sharp squeal when you re-engage it. Thus, each time I release “forward”, I use the “reverse” lever for a second to back it out of the soil. That way when “forward” is used again, the tines get a second to spin up in free-air before hitting the dirt again. Note that you want to be CAREFUL any time you’re using reverse. Those tines move right towards you spinning at high speed… the guard has bumped into my shoes on a number of occasions, often when I’m a bit tired from a long run in forward.
- MOVING WITH ENGINE OFF – There’s no “neutral” (because it’s a worm gear and a 1-piece transmission, it’s easy for the engine to turn the shaft, but hard for the wheels to turn the shaft). If you want to roll the thing around without it running, you’ve got to pull the pins out of the front-wheel axle so that the wheels can just free-wheel – you can then slide in the wheels, and slip the pins back in the shaft so that the wheels don’t work their way off without the pin through them. What I usually do, rather than messing with the wheels, is set the tine height to the highest setting, start the engine, lift the rear by the handles slightly, and “walk” it where I need it to go (watching my toes the whole way). It’s a slow journey, and riskier for your toes, but I find it easier.
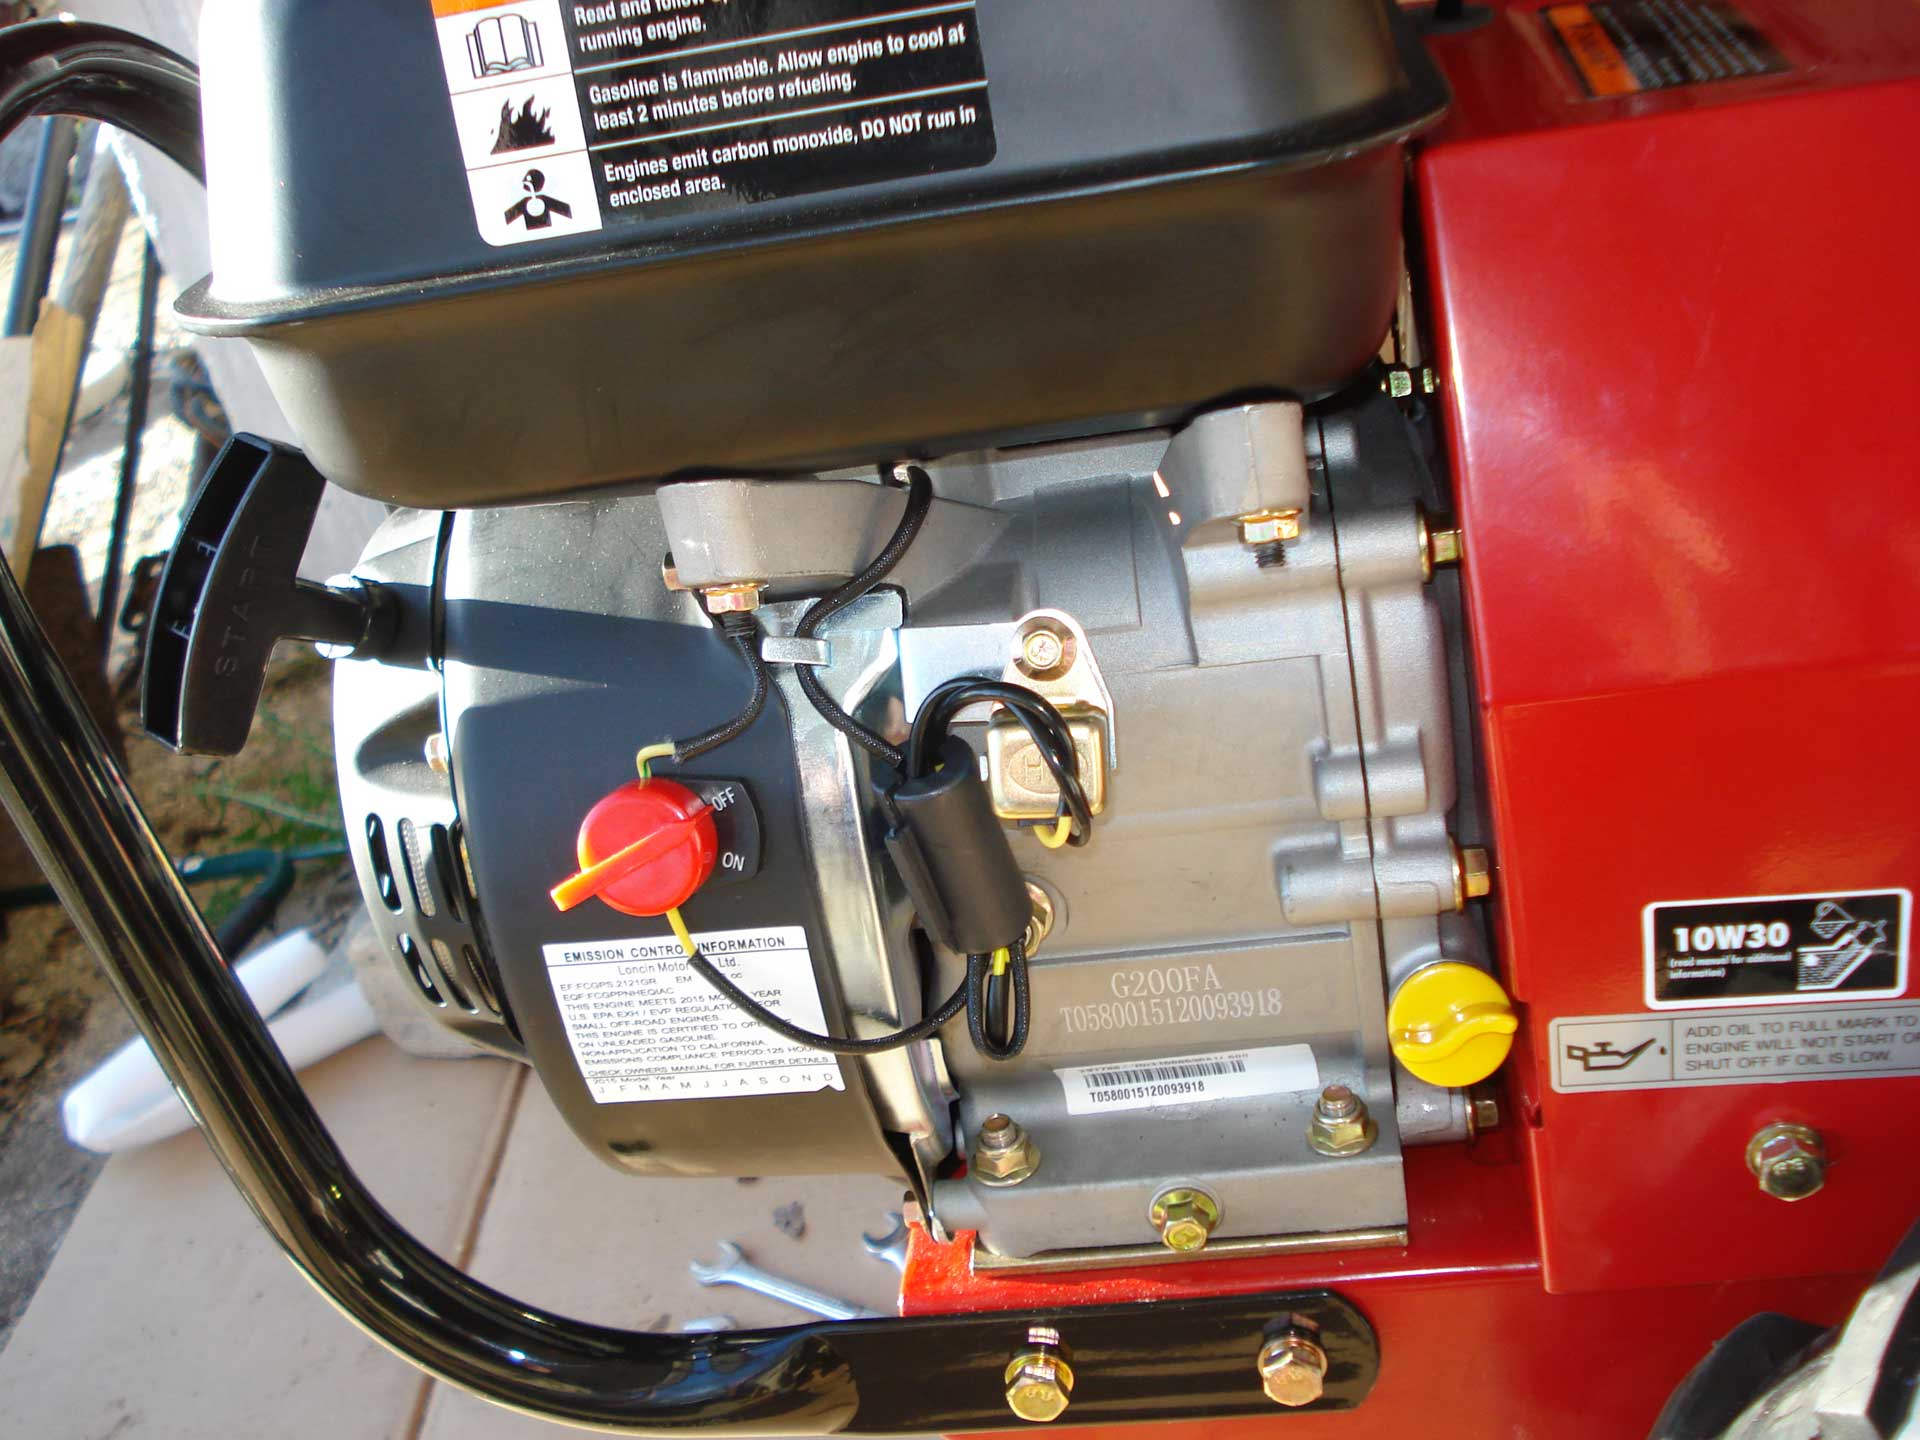
- ENGINE PARTS – The tiller uses the “Loncin” engine (G200FA or G200FDA). It includes a pretty reasonable manual. However, if you end up needing any parts, most of the parts from the Honda GX200 will likely work, and they can be found readily on eBay or Amazon. The Southland/Loncin came with a Bosch plug: note that these “Chonda” engines tend to use the dreaded “Torch” spark plug (F7RTC) which isn’t known for being a high quality plug… I’ve seen some go-kart forums suggest replacing it immediately so it doesn’t leave people stranded when it heats up. In any case, if you want to replace the plug, the NGK BPR6ES seems to be the common one used, although the NGK BPR7ES (7 is a slightly cooler plug) seems to be the equivalent one based on a few spark plug charts.
A Quick Tilling Review
So how does the Southland Rear Tine actually do? I’ll leave a few random notes as separate observations and you can take what you want from it.
Compared to the front-tine, it’s night-and-day. I’m not constantly fighting the thing. Let go, and it’ll dig in and usually move it’s way forward slowly (the wheels spin much faster than it moves when you’re dug in, but it still does manage to get enough traction to move). If it digs in a bit deep and doesn’t move forward, just lift on the handles slightly to pivot the weight forward and the front wheels get enough traction to get it moving again.
Turns are a bit tough. I can push the handles sideways to force the thing to make a sharp rotation, bit it takes a bit of energy to do so and makes a bit of a mess of the soil.
The engine usually starts 2nd pull. I choke it for the first pull, then open the choke and it starts right up. If warm and un-choked, it can take 3 pulls.
I changed the original oil (after a 5-8 hour break-in period). It didn’t burn any of the break-in oil, and hasn’t been burning any of the new oil.
While the counter-rotating-tine design (tines spin opposite of the wheels) makes the tiller dig really well, it’s pretty terrible when it comes to digging in mulch you might have spread over top – newspapers, leaves, thick grass clippings, twigs, branches, etc all have a tendency to just get spit out the rear or sides (unless you’re in reverse which is wonky and possibly a bit dangerous). If mixing in large amounts of mulch is really important to you, you might either have to look into a front-tine tiller or a rear-tine that lets you change tine direction independently of the wheel direction.
I’ve done a mix of softer soil and some harder stuff. Most areas it effortlessly tears up (even with a high clay content). At this point I just use the deepest till setting and “lift” the handles if it’s a bit low or if I’m on really hard stuff (your arms will shake if you’re holding the handles in hard stuff). I did originally try the “highest” tine setting which is recommended for breaking new ground, and while much more effortless, doing multiple passes on 2 acres would have been too time consuming. If you’ve just got a small area, using the shallow setting first and then doing multiple passes on deeper settings might be more reasonable.
The depth setting isn’t consistent when it comes to tilled vs non-tilled ground. On “new” ground, it’s fairly accurate and useful. On soft ground that’s already been deeply tilled, the depth bar will sink to the bottom even at the highest setting, and the tines will be fairly deep in the soil.
Tree roots (approx 1 inch or less) have been less of an issue than with the front tine. The front-tine would often grab under the root and jam. The rear tine spins pretty fast and has a tendency to just slice up the same roots. I’ll usually hear it struggle a bit when it first catches a root though, and there’s no sheer pin to avoid something breaking in the driveline, so I usually pull up on the handles and slowly lower it to ease it into the root when this happens.
Small stones and rocks haven’t been an issue – just a loud noise as it tosses against the inside of the shield.
The videos you may have seen with people walking beside the tiller using 1 hand…. I only had a few moments where that actually worked. Once I’m in fairly deep on either side, the tiller will tend to veer towards the softer side. It’s somewhat straight for the most part, but will catch any soft high-points or tire tracks it created on the previous pass and has to be “helped” straight more often than not in my experience – something which is easier done with 2 hands.
After enough hours, my arms and hands do get a little bit sore from using it, though I’m also pretty aggressive in forcing it to go exactly where I want it to go (including sharp turns).
The couple acres I did (new unbroken ground) took about 15 hours. I gave the tiller a break after every 30-45 minutes, mainly so that the transmission could cool down a little.
The gear oil I’m using (for those curious) is Royal Purple Max Gear 75W140. You’re supposed to use 90W140, but it wasn’t available to me locally in a synthetic. Whatever you use (if you choose to replace the stock stuff), make sure it’s not corrosive to brass (most new stuff is non-corrosive), and it’s probably worth going for a decent brand since if the transmission dies, you’ll probably pay as much as a new machine for a new one. While adding originally, I got it to around the full mark on the dipstick, and then each time I checked it afterwards I added if I could still see the top of the worm gear through the fill point (you can see it at an angle). If the transmission does die at some point, there don’t seem to be many Southland parts available online, so I’ll probably roll the dice on transmission parts for a Troy Bilt Super Bronco CRT since they’re more readily available and the transmission design looks to be similar.
—
All-in-all, I’ve been pretty pleased. It’s not the fanciest machine with all the bells and whistles, and I do remain concerned about the transmission (mainly since it’s the one thing that can’t be replaced or repaired cheaply if it breaks). That said, it was about half the price of some of the bigger-name, fancier tillers, and it’s done it’s job well so far. If you’ve been fighting with a front-tine tiller and want something a lot easier on the arms, the Southland (or one of the other similar models listed above) might be worth a look if you find it at the right price. Just make sure to get all your ground-breaking tiling done within the return window of your chosen retailer… just so you have some recourse if you’re one of the unlucky ones who experience an unfortunate transmission mishap.
The "forward" sticker on the handle has peeled off but aside from that you'd never know it has a few hundred hours on it.
We do have an old front-tine tiller in operation too - if we want to till really deep we use it first and then use this one to break up all the massive chunks the front-tine leaves behind.
One thing I'd suggest with these rear tines is being really aware of your footing when reversing, particularly if you've been outside for awhile. Quite a few times when I'd be a little worn out and my mind wandered, I'd back up without realizing how close the tines were to my toes.
The gate opening to my back yard is only 34" wide. From your "Transport" description it appears before assembly the machine should go through the gate; does that sound accurate?
Thanks, Michael
Did u ever have an issue with the tiller dieing while tilling? It seems whenever i am tilling deeper than say 4 inches and the engine is at a fairly steep angle the motor dies. It seems like it isnt getting fuel. Any ideas? I installed a new carb and no difference. Im thinking that the float isnt allowing any fuel into the float bowl when the motor is at such an angle like that. If thats the case this would be an issue for all of them from new.
Thanks,
Tyler
To test your theory, you could probably prop up the tiller at an angle, remove the float bowl, and lift the float up and down slowly to see if you can feel the needle binding. I've always lubricated the needle any time I've had one of these carbs apart because they sometimes like to stick at first assembly, but normally they behave perfectly fine after that.